
Contents
|
Step 1 – Creating a Cost Basis File Step 3 – Uploading and Converting a Cost Basis File |
SUMMARY
This article provides step-by-step instructions on how to update open-lot cost basis for accounts that are not supported in Tamarac’s cost basis offering.
MORE INFORMATION
What you need:
- Access to PortfolioCenter via Citrix
- Access to your Tamarac FTP site
- Cost basis file template
- Custodian-provided open-lot cost basis details as of last market close
Step 1 – Creating a Cost Basis File
Use the attached cost basis file template to create a cost basis file. The template file has three tabs:
- Cost Basis Data: On this sheet, enter the cost basis details. Each row is a unique open lot. The required columns are highlighted in the file template.
- Column Reference: Refer to this sheet for an explanation of each column and its requirements. The required columns are highlighted.
- Security Type Codes: Refer to this sheet for a list of codes to use for each security type.
How to Complete the Template
We recommend copying the column headers (row one) from the Cost Basis Data tab into a new spreadsheet so that you can re-use the blank template as needed.
This table gives instructions for how to fill out each required column in the cost basis file template. Each row in the spreadsheet represents a separate lot.
|
Business Date/As of Date/Trade Date: |
Business date or as of date for the file record. Use the as of date you are referencing for cost basis details. If the cost basis details from the custodian are as of May 1, 2020, then type 05/01/2020. The date must be in Excel custom date format as follows: MM/DD/YYYY. |
| Account Number: |
A unique identifier given to the portfolio. Format the account number exactly as it appears in PortfolioCenter, including dashes. For example, if the account number is 1234-5678 in PortfolioCenter, then type 1234-5678 in the spreadsheet. We strongly recommend formatting this column as text to preserve any leading zeroes in account numbers. Dropped leading zeroes will result in an account number mismatch and the cost basis reset will not be processed for those accounts. |
| Security Type: |
Used to identify the type of security. Refer to the Security Type Codes sheet as needed. For example, Apple (AAPL) is an equity, so you would type EQ. |
| Symbol: |
The identifier for the security, usually the ticker symbol. Format the symbol exactly as it appears in PortfolioCenter. A special character may occasionally be required, such as a dash (-), dot (.), slash (/), underscore (_), etc. |
| Current Quantity: |
The number of units in the lot. Do not use any punctuation other than a decimal. For example, if a lot is one thousand units, type 1000 rather than 1,000. Including commas will cause the row to be offset by one column per comma, resulting in unusable data in the cost basis reset. |
| Unamortized Cost Basis: |
The original purchase amount. Do not use any punctuation other than a decimal. For example, if the original purchase amount is one thousand dollars, type 1000 rather than 1,000, $1000, or $1,000. Including commas will cause the row to be offset by one column per comma, resulting in unusable data in the cost basis reset. |
| Cost Basis Fully Known: |
Used to indicate whether there is a full set of cost basis data for the security lot. Type T (True) if all lots for a security have cost basis details. Type F (False) if at least one lot for a security has missing cost basis details. |
| Certified Flag: |
Used to identify whether the custodian has certified the accuracy of the values in the record. Type Y (Yes) if the custodian has certified the accuracy of the cost basis details. Type N (No) if the custodian has not certified the accuracy of the cost basis details. |
| Original Purchase Date: |
Use the date the lot was originally purchased. The date must be in Excel custom date format as follows: MM/DD/YYYY. |
In the example below, there are two lots for AAPL, and cost basis details are known for both:


Next you'll need to save the template following a specific format.
Step 2 - Saving the Template
Once you have completed the template, you are now ready to save the file.
To save the template, follow the steps below:
- In Excel, click Save As.
- Type a file name using the following format: ADYYMMDD.CBL.
- AD: Always start with AD.
- YYMMDD: Use the last two digits of the year, two digit month, and two digit day. For example, if the file date is May 1, 2020, the file name will be AD200501.CBL. This is the date of the file, not the date of the transactions.
- .CBL: This is the file type that will be read by PortfolioCenter.
- The file date must match the date given in the business date column.
- In Save as type, select CSV (Comma delimited). When you select this file type, Excel may add .csv to the end of the file name you typed. If this happens, delete the .csv so that the file name ends .CBL.

- Click Save. You may see a warning about changing file types. If you see this warning, click OK to continue.
- Save the file to a designated manual file folder on your FTP site. If this is your first time doing any push file template, please contact your Tamarac service team to set up the file folder on your FTP site and link the file path to PortfolioCenter. Standard 1 is a common file folder name, but this may vary.
Once the file is saved, you'll need to upload and convert it in PortfolioCenter.
Step 3 – Uploading and Converting a Cost Basis File
Once you have saved the cost basis file to your FTP site, the file is automatically available to be converted in PortfolioCenter. You will need to sign into PortfolioCenter via Citrix in order to proceed. If you do not know your credentials for Citrix and/or PortfolioCenter, please contact your Tamarac support team. Once you have signed in to PortfolioCenter, follow these steps:
- Click Interfaces.

- Click the
 sign to expand the interface that corresponds to your manual interface. The name of the FTP site folder where you saved the file should be an indicator for the interface number. For example, if the folder name is Standard 1, the interface would be S1 - Manual.
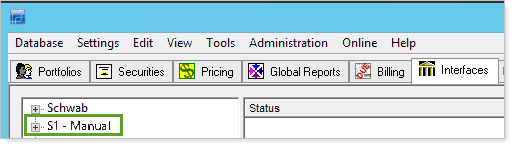
- In the manual interface, click Cost Basis Reconciliation.

- Click the blue diamond next to the file date from the cost basis file you created.

- Double-click the New file, which opens a prompt to generate a reconciliation report.
- Click Next. The as of date should be the same as the trade date in the file.
- Click Finish. All portfolios should be selected. A reconciliation report will generate and the file will now show a red diamond.

Next, use the Transaction Writer to create and post a cost basis reset.
Step 4 - Transaction Writer – Cost Basis Reset
Once the cost basis file has been converted in PortfolioCenter, you can create cost basis resets to update one or more accounts by using Transaction Writer within PortfolioCenter. To create and post cost basis resets using Transaction Writer, follow these steps:
- Click Transaction Writer.

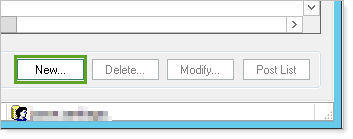
- Click New.
- In the List Name box, enter a descriptive name, for example: CB Reset AAPL. In the Description box, type a description. We recommend your initials.
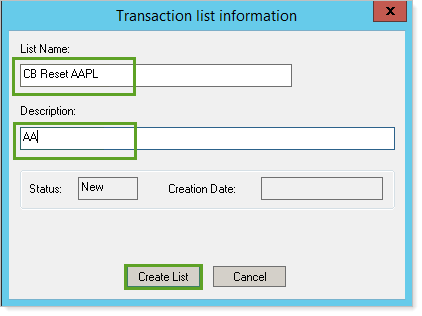
- Click Create List. The new blank Transaction Writer will open automatically.
- Click
 .
.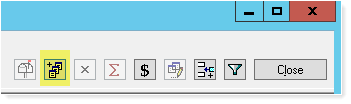
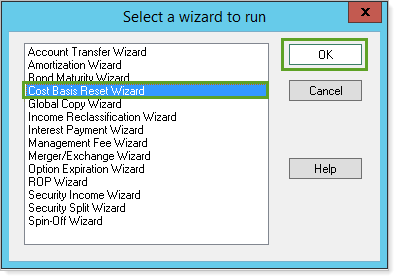
- Select Cost Basis Reset Wizard, then click OK.
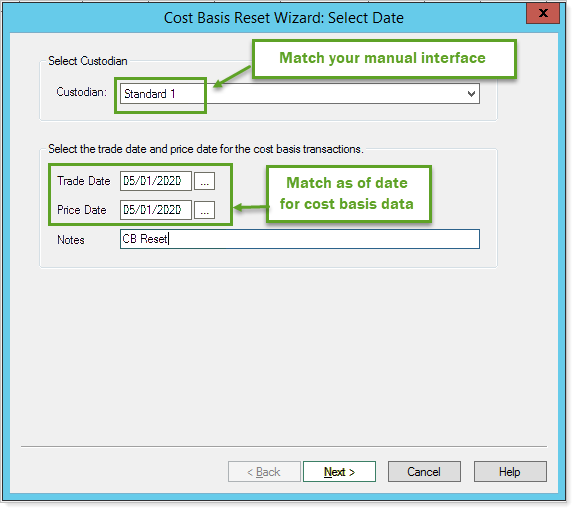
- In the Custodian box, select your manual interface.
- Type a Trade Date and Price Date that match the as of date from your cost basis data. Add Notes as needed, and click Next.
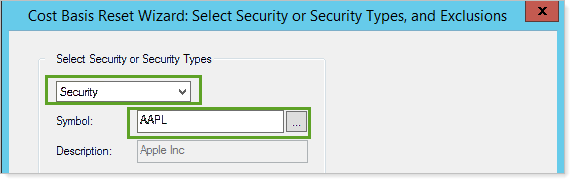
- Do one of the following:
- If you are updating a single security for an account or accounts, select Security, then type the individual security symbol.
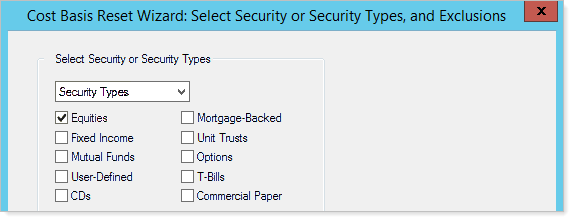
- If you are updating one or more security types for an account or accounts, select Security Types, then select the applicable check boxes for each security type.
- If you are updating a single security for an account or accounts, select Security, then type the individual security symbol.
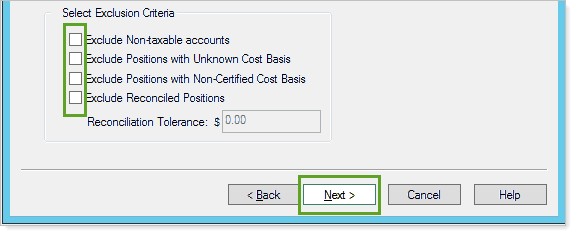
- Select the check box next to any applicable exclusion criteria. We recommend clearing all check boxes, which will force a cost basis reset for all positions from your created spreadsheet. Click Next.
- Select All Portfolios, and click Next, then Finish. This will generate the debits and credits for your cost basis reset.
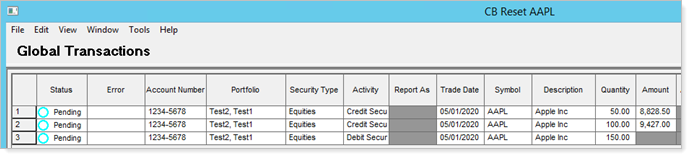
Finally, post the transactions for the cost basis reset.
Step 5 - Posting the Transactions
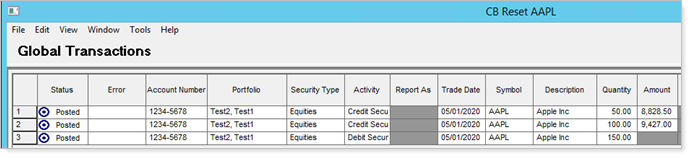
Follow these steps to post the transactions for your cost basis reset.
- Select all credits, right-click, and select Block transaction.
- Select all debits, right-click, and select Post.
- Select all credits, right-click, and select Unblock transaction. Then click Post.
APPLIES TO
- Tamarac Reporting