
Contents
|
Creating Cash Reserve Categories Important Changes to Upload Data Sets Approve Trades on the Rebalance Summary Report Quickly Modify Security Level Models When You Create Allocation Models |
Unlimited Cash Reserves
With this release, we're pleased to announce that you can create an unlimited number of cash reserves - all with different starting and ending dates.
Example
Let's say you have a client that is 75 years of age. This client is required to withdraw required minimum distributions (RMD) from his or her account each year. Some clients prefer to distribute these amounts monthly. With the unlimited cash reserves functionality in Advisor Rebalancing, you can schedule cash reserves for each month.

Creating Cash Reserves
To add cash reserves, follow these steps:
-
On the Accounts menu, click Account Settings, and then click Cash Management Settings tab.
-
In the Type account name or number box, start typing the name or number of the account where you want to set cash reserves. When you see it in the list, click it and then click Select.
-
In the Cash Reserves area, click Add.
-
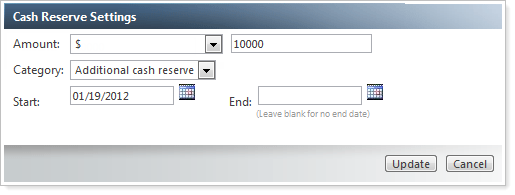
In the Cash Reserves Settings dialog, complete the following information:
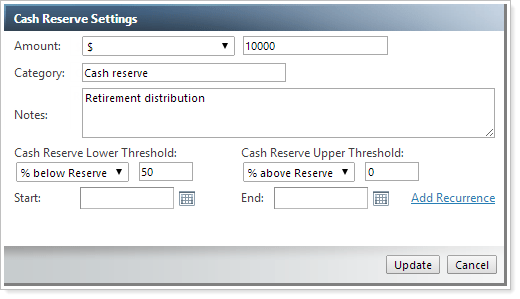
This setting... Does this... Amount In the Amount box, type the amount you want to designate for cash reserves. You can specify the amount as a fixed dollar amount, a percentage of a rebalancing group, percentage of account value, or as a percentage of available cash. Category In the Category list, choose a category for the cash reserve. You can create one cash reserve for each category. For more information on creating cash reserve categories, visit Creating cash reserve categories. Start Click the calendar symbol next to the Start box. In the calendar that appears, click the start date for the cash reserves. If you do not specify a start date, the start date will take effect immediately.
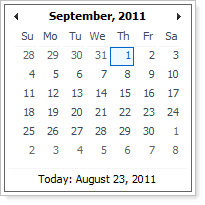
End Click the calendar symbol next to the End box. In the calendar that appears, click the "effective to" date for the cash reserves. If you do not specify a date in this box, the cash reserve will always be applied.
-
When finished, click Save. Repeat these steps to add additional cash reserves.
NOTES
-
If you update cash reserves on the Accounts page, the existing cash reserves assigned to the selected category will be updated. If the account does not have a cash reserve for selected cash reserve category, the cash reserve will be added.
-
If you delete cash reserves on the Accounts page, the cash reserves assigned to the selected category will be deleted from the selected accounts, but the category will still be available for use.
Creating Cash Reserve Categories
A category is a classification of cash reserves. You can specify any category you want. The categories you create will be available in the Category list when you set up your cash reserves and will be recognized when uploading cash reserves.
To create a category for cash reserves, follow these steps:
-
On Setup menu, a click Cash Reserve Categories.
-
Click Add Category.
-
In the Category Name box, type a name for the category.
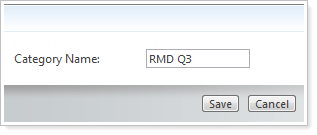
-
Click Save.
Important Changes to Upload Data Sets
As a result of this enhancement, we've made some important changes to our upload data sets that you need to know about. The new unlimited cash reserve functionality will impact uploads for the following data sets:
Account Information Upload Data Set
The following fields have been removed:
| Field... | More information... |
|---|---|
| CashReserveType | This column is no longer valid in the Account Information upload data set. Please use the Cash Reserves upload data set instead. |
| CashReserve | This column is no longer valid in the Account Information upload data set. Please use the Cash Reserves upload data set instead. |
| CashReserveKeepThroughDate | This column is no longer valid in the Account Information upload data set. Please use the Cash Reserves upload data set instead. |
| AdditionalCashReserveType | This column is no longer valid in the Account Information upload data set. Please use the Cash Reserves upload data set instead. |
| AdditionalCashReserve | This column is no longer valid in the Account Information upload data set. Please use the Cash Reserves upload data set instead. |
| AdditionalCashReserveKeepThroughDate | This column is no longer valid in the Account Information upload data set. |
Cash Reserves Upload Data Set - New
We've added a new Cash Reserves upload data set to support the new unlimited cash reserves functionality.
| Field Name, Valid Characters, Description | Field Condition | DataType | Size | Digits |
|---|---|---|---|---|
|
UniqueAccountId This is the unique accountid designated by the custodian of the account |
Required | String | 20 | 0 |
|
CashReserve Value that will adjust the amount of Total Beginning Cash that is available in the account. |
Required | Numeric | 19 | 6 |
|
CashReserveValueType Dollar, PercentOfAccount, PercentOfCash, or PercentOfRebalancingGroup. Required when uploading CashReserve. |
Required | String | 16 | 0 |
|
CashReserveCategory Cash reserve categories are user defined account descriptions used to help cash reserves within an account. |
Required | String | 50 | 0 |
|
CashReserveStartDate The first date the cash reserve should be reserved. If blank, the cash reserve will take effect immediately. |
Not Required | Date | 0 | 0 |
|
CashReserveEndDate The last date the cash reserve should be reserved. If blank, the cash will be reserved indefinitely or until changed. |
Not Required | Date | 0 | 0 |
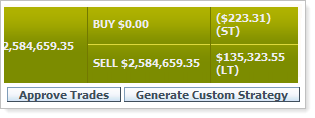
Approve Trades on the Rebalance Summary Report
Ever wanted to approve a trade from the Rebalance Summary report? Now you can. With this release of Advisor Rebalancing, simply click Approve Trades on the Rebalance Summary report to approve a trade.
To check out this feature, follow these steps:
-
On the Reports menu, click Rebalance Summary.
-
In the Type account name or number box, start tying the name or number of the account where you want to approve trades. When you see it in the list, click it and then click View Rebalance Summary.
-
On the Rebalance Summary, click Approve Trades.
NOTE
Approval levels will be recognized in the same way that they are honored on the Rebalance Review page.
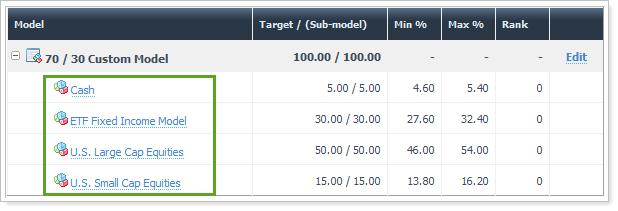
Quickly Modify Security Level Models When You Create Allocation Models
We've made it easier to make changes to the Security Level models and Alternate Security Sets that are assigned to an Allocation model. Once you're on the Allocation Models page, you can add and edit securities and Alternate Security Sets.
To view this feature, follow these steps:
-
On the Models menu, click Allocation Models.
-
In the Select an Allocation Model list, choose the Allocation model you want to edit.
-
To modify the Security Level model, click the model you want to edit.
-
In the window that appears, do any of the following:
Update a security.To make changes to an existing security, click Edit/Remove next to the security. In the dialog that appears, you can modify the target percentage, minimum and maximum percentage and rank. When finished modifying the security, click Update Security to save your changes.
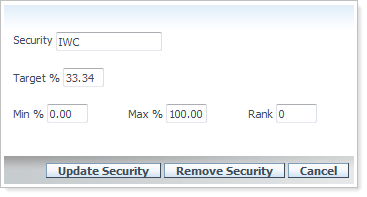
Remove a security.To remove a security, click Edit next to the security you want to remove. In the dialog that appears, click Remove Security to remove the security from the model.
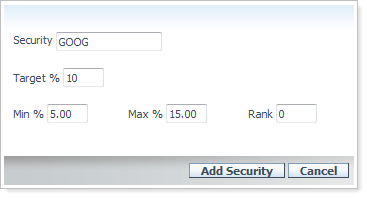
Add a new security.To add a new security, click Add Security. In the dialog that appears, complete the Target %, Min %, Max %, and Rank fields. When finished adding the security, click Add Security.
Add an Alternate Security Set.To add an Alternate Security Set, choose the security set in the Select an Alternate Security Set list, and then click Add Alternate Security Set.

-
Click Save.
New Archived Account Status
Some of you asked for a way to differentiate between truly closed accounts and inactive accounts where you want to prevent any trading activity. To address this request, we're introducing a new Archived account status. If you want to designate an account as truly closed, you can simply assign the account the new account status.
To change the status of an account, follow these steps:
-
On the Accounts menu, click Account Settings.
-
In the Type account name or number box, start typing the name or number of the account you want to set as archived. When you see it in the list, click it and then click Select.
-
Click the Account Configuration tab.
-
In the Account Status list, click Archived.
Notes
-
By default, accounts with the status of Archived will appear in your saved searches. However, you can modify your saved searches to hide accounts with this status by adding additional criteria to your saved search.
-
Accounts with a status of Archived are only visible on the Account Settings, Accounts, Rebalancing Group Settings, Reconcile Trades, and Reconciliation Reports, Bulk Reports, Rebalance Summary, Rebalance Analysis, Detailed Reports (all), and Client Reporting pages.
-
You cannot rebalance an account with an Archived account status.
Date and Time Stamp Added to the OMS Trade Report
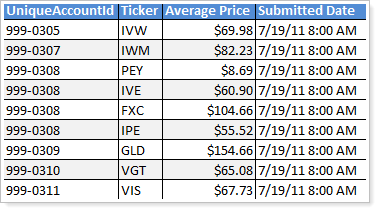
Many of you that use Advisor OMS liked having the Submitted Date column on the OMS Trade Report. However, some of you also wanted see the time the trade was submitted. With this release, we've added a date and time stamp to the OMS Trade Report so that you can quickly find out the date and time that trades were submitted.
To check out this feature, follow these steps:
-
On the Reports menu, click Bulk Reports.
-
Click OMS Trade Report and then click Next (Identify Accounts).
-
Select the accounts for which you want to run the report and then click Generate Report.
-
When the File Download dialog appears, click Open. The bulk report will open in Microsoft Excel® or similar program that is capable of opening comma-delimited files. When the report appears, the date and time the trade was submitted will appear in the Submitted Date column.
End of Support for Internet Explorer® 7
Tamarac has greatly enhanced its products over the past six years. Unfortunately, Internet Explorer 7 has trouble running our new features effectively. As the complexity of our suite of products grows, we want to be sure that you can run the newest features that we release and that you have the best possible experience using our products.
With this release, we have discontinued support for Internet Explorer 7. If you're using Internet Explorer 7, you may find that major areas of Advisor Rebalancing will no longer work properly.
We are committed to continually improving the products and services we offer, and we want our valued clients to get the most out of the new functionality we are developing. Please take the time to upgrade your business to Internet Explorer 8 or Internet Explorer 9.
Microsoft Internet Explorer 8 (recommended for Windows XP)
Microsoft Internet Explorer 9 (recommended for Windows Vista or higher)
If you have any questions, please do not hesitate to contact Client Services at 866.525.8811.