
This billing group button allows you to add all the billing groups you've selected to the new billing group. This is Step 3 in the process for adding accounts to billing groups.
To add an account to the billing group:
-
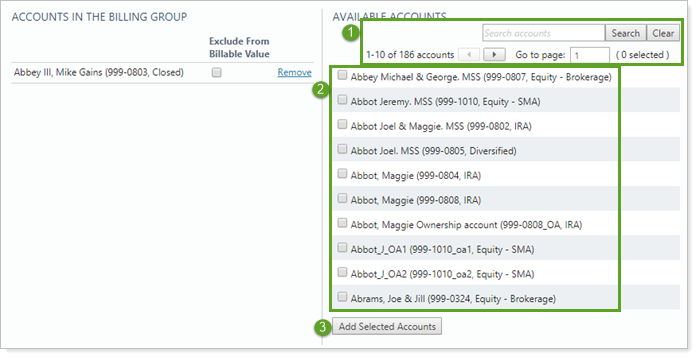
Find the account in the Available Accounts list. The list includes both regular accounts and partial ownership accounts. Use any of the following methods:
- Search for an account by name. Type the name in Search accounts and click Search. To do a new search, click Clear.
- Page through the list. Click
 to go to the next page in the Available Accounts list.
 - Jump to a page. Type the page number you want to go to in Go to page and press Enter.
-
Click the check box next to the account name to select the account. You can select more than one account at a time. Selections are retained if you go to another page in the accounts list.
-
Click Add Selected Accounts. This adds all the accounts you selected to the Accounts in the Billing Group list.
To delete an account from the billing group, in Accounts in the Billing Group, click Remove next to the account you want to delete.
For more information on billing groups, see Understanding Billing Groups.
For more information on billing definitions, see Understanding Billing Definitions.