
Contents
Introduction
Each Reports template you create can include one or more advisor-created dashboards that clients see when they sign in. This allows you to create several dashboards, each of which focuses on a different aspect of the client’s financial picture.
For example, you might provide three dashboards to clients initially:
-
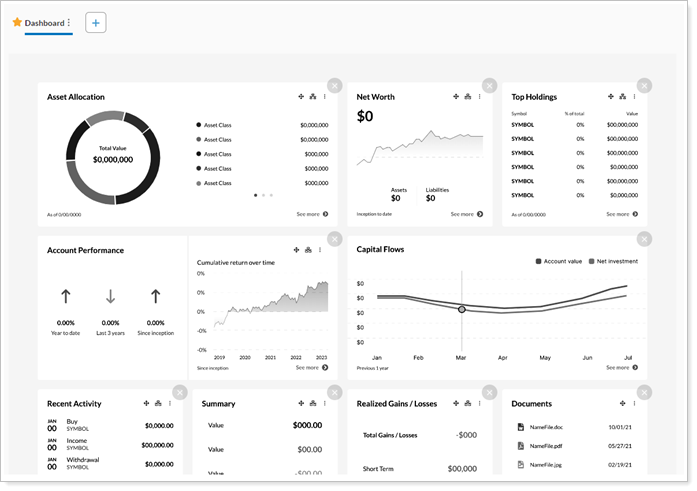
A summary dashboard that includes widgets like Account Performance and Recent Activity, but also Net Worth, Documents, and MoneyGuide Probability of Success.
-
A performance dashboard that includes widgets for Account Performance, Asset Allocation, Holdings, Activity, and Realized Gains/Losses.
-
A spending dashboard that includes Income vs. Spending and Budget widgets along with the Net Worth and Activity widgets.
This topic provides steps for how to:
-
Create a new dashboard or edit an existing dashboard.
-
Add widgets to a dashboard.
-
Link widgets to a full page.
-
Set a dashboard as the default dashboard.
-
Rename a dashboard.
Before You Start
Create the inventory of widgets that you'll draw from when creating the dashboard. For more information, see Customize the New Client Portal Widgets.
Create a New Client Portal Dashboard
To build a dashboard in a new client portal Reports template:
-
On the Client Reporting menu, select Configuration Tool (New).
-
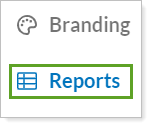
Select Reports.
-
Select the Reports template where you want to create the dashboard.
-
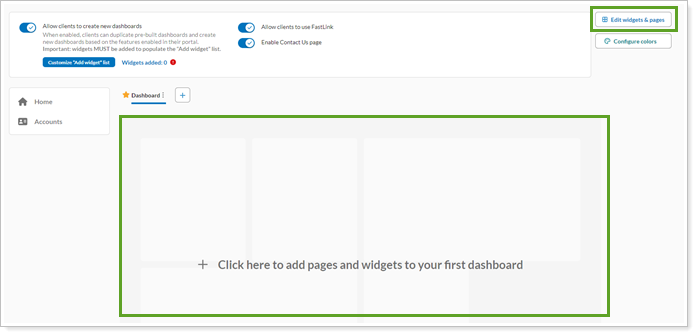
To set up the first dashboard, click in the Click here to add pages and widgets to your first dashboard area or select Edit widgets & pages.
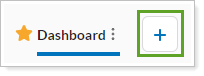
To add another dashboard, next to the current dashboard(s), select +. You can then add widgets the same way as for the first dashboard.
-
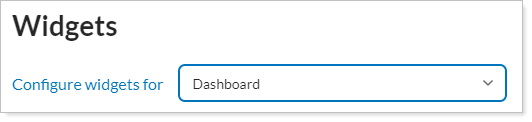
In Widgets, set the Configure widgets for list to the dashboard where you want to add widgets. If you have multiple dashboards, the dashboard you're viewing when you click Edit widgets & pages will be selected by default.
-
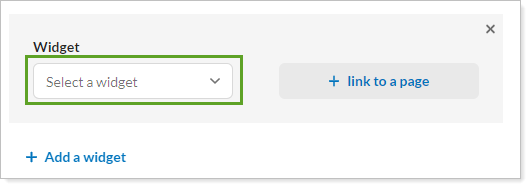
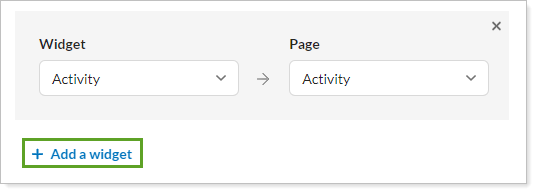
In Select a widget, choose the widget you want to add. You can add one instance of each widget to a given dashboard. If you have multiple types of the same widget—for example, two Account Performance widgets with different dates—you can add each unique widget once.
-
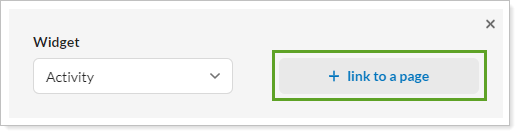
If desired, link the widget to a full page. To link a widget to a page:
-
Select + link to a page for the widget you want to add a link for.
-
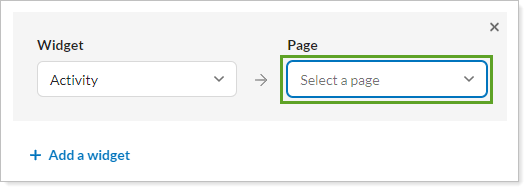
In the Select a page list, choose the page you want to link to. You’ll only see pages that have been added to this Reports template.
-
-
To add more widgets, click + Add a widget and repeat the process.
-
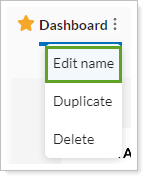
Optionally, rename the dashboard. To rename a dashboard:
-
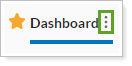
Next to the dashboard you want to rename, select
 .
.
-
Select Edit name.
-
In the text box, type the new dashboard name and select
 or press Enter.
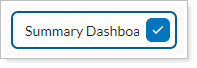
-
-
Optionally, set the dashboard as the default. To set a default dashboard, next to the dashboard you want to set as the default, select
 . The star changes to a solid fill, indicating that dashboard is now the default.
Next time clients sign in to the portal, they'll see the new default, if they haven't already designated their own default.
-
To keep working on the template later, select Save as draft. Firm users can see and edit draft templates, but can't assign them to clients. To make the template available to assign to clients, select Publish.