 Back
Back Home > Tamarac Reporting > Clients and Client Portals > Client Portals > Setting Up Client Portals > Customize Your Company Logo
|
Back |
Home > Tamarac Reporting > Clients and Client Portals > Client Portals > Setting Up Client Portals > Customize Your Company Logo
|
Customize Your Company Logo
You can rebrand Tamarac Reporting and make it your own. Your logo will replace the Tamarac logo on the sign in screen and at the top-left corner of every page—each touchpoint can be rebranded to keep your brand firmly in the spotlight.
![]()
You can specify a unique logo for each Household in your firm, or even for each advisor in your firm.
The logo that appears when signing into the client portal is set at the Household level so your logos can vary for each Household. This allows you to support multiple business units.
To set custom logos for Households, follow these steps:
On the Accounts menu, click Households.
Click the name of the Household where you want to assign a logo.
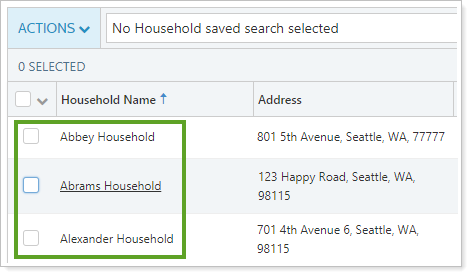
On the Settings panel, choose the logo that you want to display.
![]()
If you want to add a new logo that's not in the list, contact your dedicated Service Team for assistance in adding a new logo. Once they upload the logo for you, it will appear in this list for you to assign to a portal.
Click Save.
To assign a unique logo for an advisor in your firm, follow these steps:
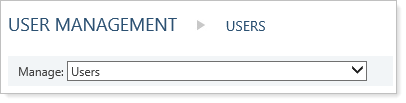
On the Setup menu, click User Management.
In the Manage list, choose Users.
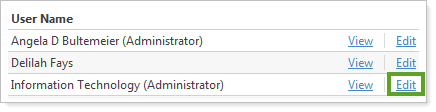
Click Edit next to the advisor where you want to assign a logo.
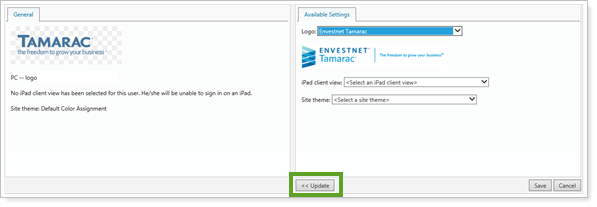
In the Logo list on the Available Settings tab, choose the logo you want to assign to the advisor and then click Update.
Click Save.
If you want to update or add a logo to a client portal, contact your dedicated Tamarac Service Team. Your Service Team will upload the logo for you.
For more information on formatting your logo, see Customizing the Menu Bar.
To add the logo, you must send it to your Service Team to upload into Tamarac Reporting. When preparing your logo for use in Tamarac Reporting, keep the following in mind:
The following file types can be uploaded: .BMP, .GIF, .JPG, .JPEG, and .PNG. The recommended file type is .PNG.
The ideal logo size: 270 pixels by 60 pixels (4.5:1).
However, if you provide a logo image at twice the actual display size (i.e. 540 x 120), the logo will look better on high definition monitors. Although the logo on your menu will stay the same size, it will look larger on your clients' login screens and automatic client portal emails.
If at least one of the logo's sides (either width or length) meets or exceeds the minimum width requirements, the logo will be automatically resized. In some cases, this may not look as expected, so it's best to format your logo to the ideal logo size specifications.
A 10-pixel margin is added on the left and right sides of the logo. There is no additional margin for the top and bottom of the logo image.
The logo should have a transparent background color instead of a solid background color (white, black, etc.). Otherwise the logo will display on a solid-colored field that may not match your menu bar.
![]()
If you have a logo with white text, you may not want a transparent background. A white logo with a transparent background would be invisible on any page with a white background. In this case, we recommend setting the logo background color to match the color of your menu bar.
This logo may be the same image that is assigned to the Household, which appears on the Sign In page of Tamarac Reporting and the automated email messages Tamarac Reporting sends. These pages have white backgrounds. If you use a logo with a white font, it will not appear on these pages because the background and the logo are the same color.
![]()
For more information on formatting your logo, see Customizing the Menu Bar.