Contents
iPad App for the Advisor View Client Portal
Every day we hear from you that it is important for you and your clients to access the Advisor View client portal on all devices. We take your feedback very seriously, and we share your belief that your clients should have access to their portfolio data and reports at any time – even when on the go.
Today, we are pleased to announce that the Advisor View iPad® app is coming soon to the Apple Store. We put a lot of thought into what you and your clients want from a tablet application. The app has the same clean look and intuitive user experience of Advisor View with some additional features we've added based on feedback for the client portal.

We will release two versions of the iPad app: a standard version and a premium version. With both versions of the app, you and your clients gain access to portfolio data, PDF documents, and the Asset Allocation, Holdings, and Account Performance reports. You can even upload Apple-compatible videos that your clients can watch directly in the app. Although both versions of the app will allow you to define a color scheme that meets your firm's brand, when you choose the premium version you have the opportunity to brand the app with your firm logo – and we'll even add the application to the Apple Store for you.
We expect the new app to hit the Apple Store in the coming weeks. Keep an eye on your inbox for more information about the availability of this new app that makes your value even more accessible to your clients.
New Amortization and Accretion Report
Over the past few months, we've been working hard to bring you the Amortization and Accretion report – and we're incredibly excited to finally share it with you. This new report displays the amount that each fixed income or mortgage-backed security has amortized or accreted over a specified period of time, and provides the necessary year-end fixed income tax reporting.
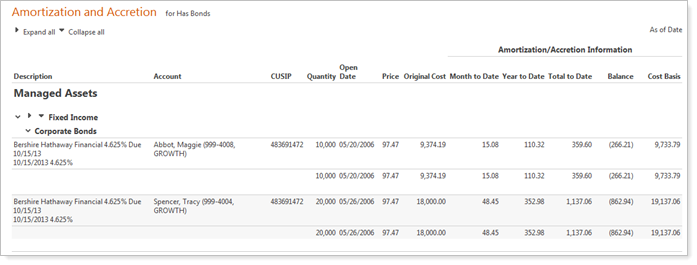
Advisor View offers the following amortization methods for the report: Scientific and Straight Line. The Scientific method produces adjustments that gradually increase each period while the Straight Line method produces adjustments that are evenly distributed across all periods.
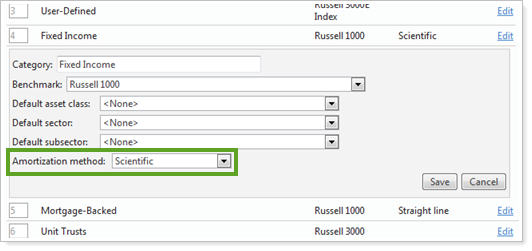
T-Bills and Mortgage-Backed securities always use the Straight Line method, but Fixed Income securities can use either method. Although the Scientific method is generally recommended for amortizing fixed income securities, there are exceptions.
The Scientific method requires an interest rate, yield at purchase, and beginning cost basis for each trade lot being amortized. For yield at purchase, Advisor View will calculate the Yield to Maturity (cost) value based upon the Amortize or Accrete To setting for the security.
The Straight-Line method requires only a beginning cost basis for each trade lot being amortized.
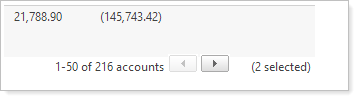
Warning When Selecting Accounts or Clients Across Multiple Pages
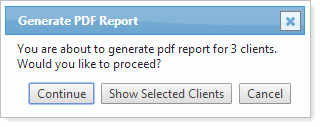
When selecting accounts or clients across multiple pages, sometimes it's difficult to determine which accounts or clients you have selected. In some cases, this may cause you to inadvertently take action on an account or client – for example, post a document to an unintended recipient. With this release, we've provided two ways to make it easier for you to only take action on the accounts or clients that you want. First, we've added a warning that lets you know that you have multiple accounts or clients selected will appear when you make a selection in the More Actions list. On this dialog, you can click Show Selected Clients to see the accounts you have selected.
This dialog will appear when you click one of the following options in the More Actions list:
Accounts Page
-
Generate PDF Report
-
Search for Files to Post
Client Management & Client Views
-
Post Document
-
Post Announcement
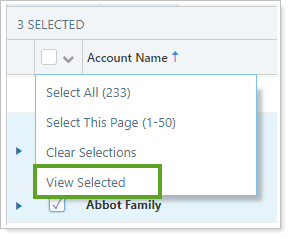
The second feature we've added is the ability for you to filter your current account or clients view to only those that you've selected:
Custom Fields Updates
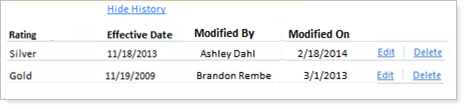
In some cases, you may want to add a custom field to a security. For example, let's say you want to use a custom bond rating classification system and then generate reports or view audit history information on your screen for when a rating is either upgraded or downgraded. With this release of Advisor View, you can add custom fields to any security and then run PDF reports using custom security information.
The new changes include:
|
Adding Custom Fields to Securities Complete a Custom Field Value for a Security Maintain History and Effective Dates for Your Custom Field Values |
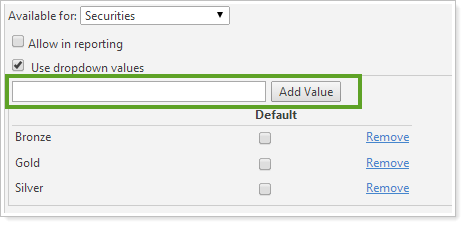
Adding Custom Fields to Securities
You can now assign custom fields to any security via upload or on the Securities page. You can then build saved searches and run bulk reports using these custom fields.
Before you can assign custom fields to a security, you must first create the field in Advisor View. Creating the field at the global level will ensure the field is used consistently across securities.
To create a custom field for a security, follow these steps:
-
On the Setup menu, click Custom Fields.
-
Click Create.
-
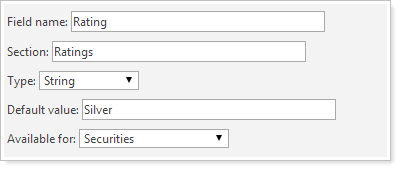
Complete the following fields:
-
Click Save.
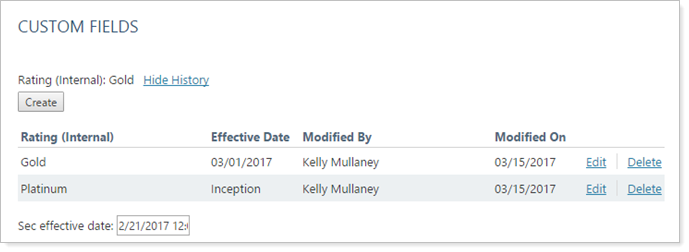
Complete a Custom Field Value for a Security
To fill in custom field for a security on the Securities page, follow these steps:
-
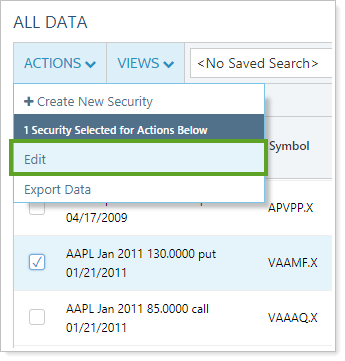
On the Setup menu, click Securities.
-
Select the check box next to the security where you want to complete the custom field and then click Edit in the More Actions list. You can use the Search securities box to search for any security.
-
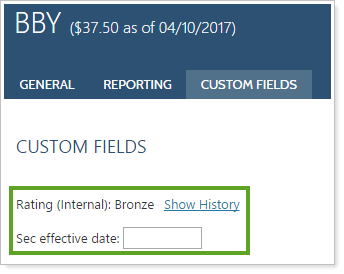
On the Custom Fields tab, complete the custom field.
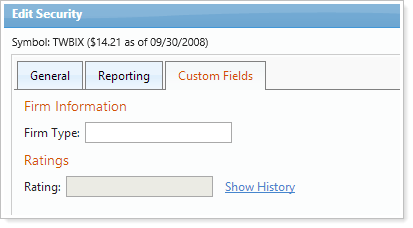
-
Click Save.
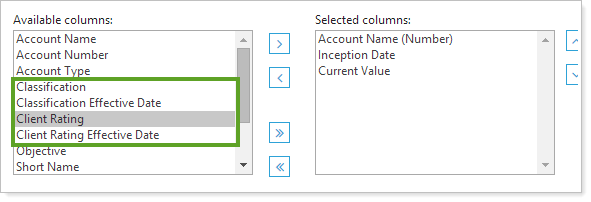
View Custom Fields on PDF Reports
Once you've created the custom security and completed the values, the column will appear in the Available columns list for the PDF report.
Bulk Reporting & Uploading Updates
With each release, we've made a commitment to refining the bulk reporting and uploading functionality of Advisor View. In this release, we've added the following enhancements:
|
Bulk Uploading of Target Allocations View Managed and Unmanaged Values on the Account Information Bulk Report |
Bulk Uploading of Target Allocations
You can now bulk upload target allocations, which compare account holdings to account targets. Uploading target allocations requires using the following upload data sets:
-
Target Allocation.Using this data set, you can create the target allocations.
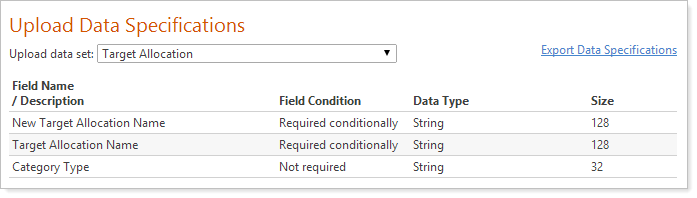
-
Target Allocation Components.Using this data set, you can create categories and targets and assign them to a target allocation that you created.
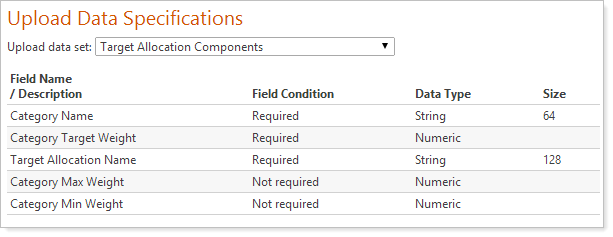
Once you create the target allocation, you can assign it using the Target Allocation field on the Account Information upload data set.

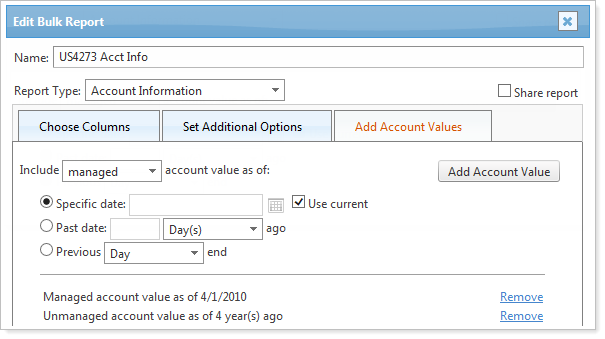
View Managed and Unmanaged Values on the Account Information Bulk Report
Advisors prefer to report on managed and unmanaged assets in a number of different ways. Some advisors prefer to concentrate only on managed assets, while others prefer to see both or the total amount. When you create the Account Information bulk report, you now determine the inclusion of managed and unmanaged asset values.
Learn More About Bulk Reports >>
Billing Updates
We've added the following new features to Advisor View that many of you will be excited about:
Add Custom Text for All Payment Types
Now you can add custom text for both direct and non-direct payment types. Before this release, you could only include custom text for a direct payment. To do this, we've added a Payment Custom Text option to the Detail Statement Display Options.

When you select this option in the list, you can enter your custom text in the following boxes:
-
Direct Custom Text.This text will appear on the billing statement for direct accounts only.
-
Non-Direct Custom Text.This text will appear on the billing statement for non-direct payment accounts only.
-
Any Direct Custom Text.This text will appear when you have a mix or direct and non-direct accounts.
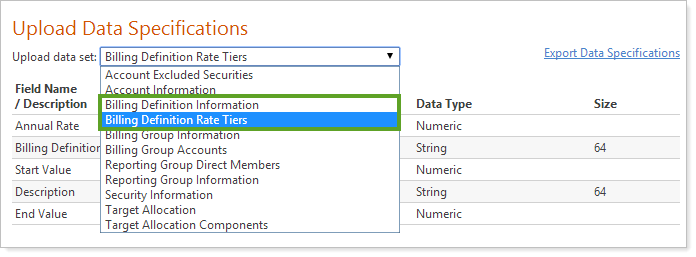
Upload Billing Definitions & Rate Tiers
To speed up the time it takes to make large-scale billing updates, you can now bulk upload your billing definitions and rate tiers. To do this, you'll need to upload the following upload data sets:
-
Billing Definition Information.Use this upload data set to create new definitions or update existing definitions.
-
Billing Rate Tiers.Use this upload data set to create the rate tiers for your billing definitions.
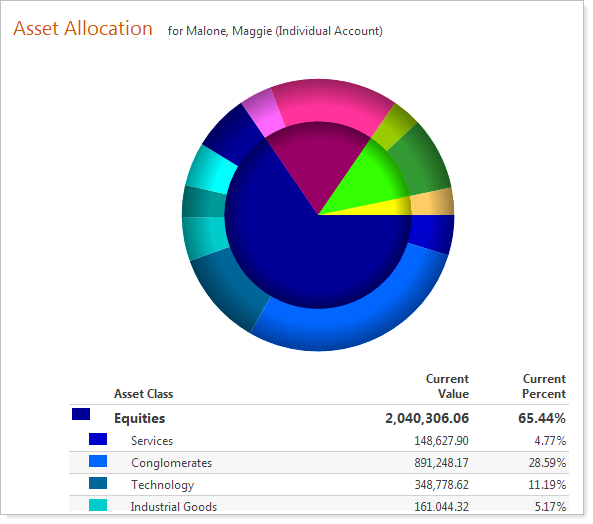
Group Categories on the Asset Allocation Report
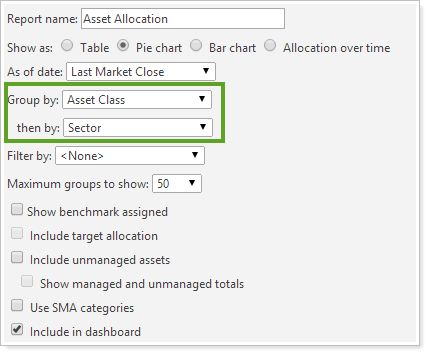
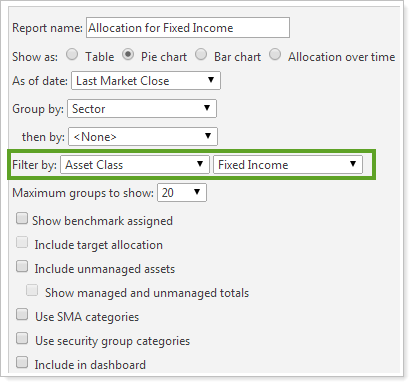
Sometimes when you're running the Asset Allocation report, you want to drill-down between categories. For example, let's say you want to group by asset class and then show the sector. Now, you can choose up to two groupings for the report.
To set the groupings, use the new Group by and then by lists in the report settings.
Other times you may want to focus only on one category. With this release, we've added the ability for you to limit your asset allocation report to a specific category such as Fixed Income.
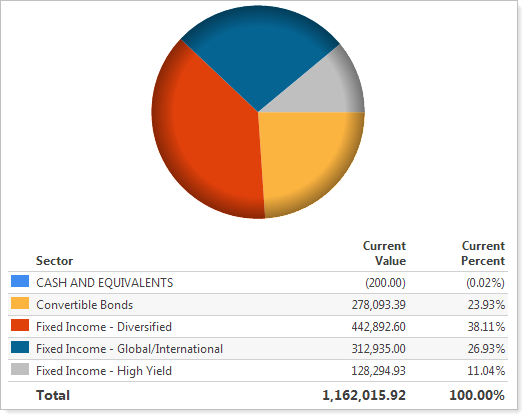
You can do this with the new filtering option in the Asset Allocation report settings:
Additional Usability Enhancements
We've made some additional changes to make Advisor View as easy to use as possible:
-
It's now easier to move between pages in Advisor View. We've added back and forward buttons to the top and bottom of the following pages: Accounts, Auto-Reconciliation History, Billing, Capital Flows, Client Management, Composites, Realized Gains/Losses, Securities, Setup, Security Cross-Reference, Transactions, and Unrealized Gains/Losses.
-
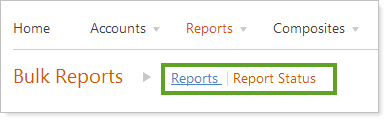
We've added a "breadcrumb" link to the top of the Report Status and Upload Status pages.
-
Currently, the dynamic Summary dynamic report shows an asterisk next to a return if the return is for a partial period. However, every value in the date period column is a partial period return. With this release, we have removed the asterisk that appears next to the return and moved it to the column heading if the values in the column are partial period values.
-
The Transactions report now includes a column for Net Amount. This update affects the dynamic, PDF, and bulk reports.
-
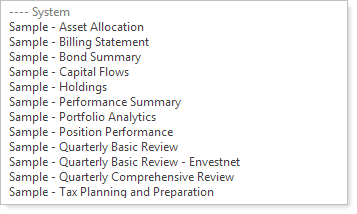
We've added new system templates and updated the existing ones to include the latest features we've added to Advisor View. These new templates have updated graphics, cover pages, and show off some potential best practices for the most commonly used PDF sections. You can find the new and updated system templates in the Select a Template list under ---- System.