 Back
Back Home > Tamarac Reporting > Integrations > CRM Integrations > Salesforce Integration > Install and Configure Tamarac App > Configure Contact/Client Mapping
|
Back |
Home > Tamarac Reporting > Integrations > CRM Integrations > Salesforce Integration > Install and Configure Tamarac App > Configure Contact/Client Mapping
|
Configure Contact/Client Mapping
Mapping links a field in Tamarac Reporting with the same field in Salesforce. It allows you to use your existing customized Salesforce objects to view Tamarac data by telling the two systems where each piece of data belongs.
For more information about mapping, see Understanding Mapping in the Salesforce App.

This page provides steps to map Salesforce Contact records with Tamarac client records.
This is Step 1 in Workflow: Configure Mapping. That workflow is the third step in the overall onboarding process.
To map Salesforce Contacts with Tamarac client records:
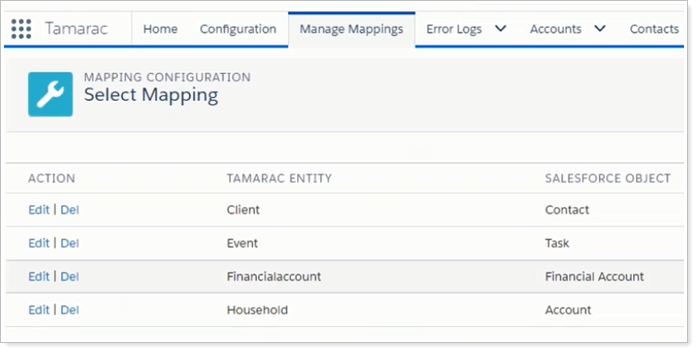
Open the Tamarac app in Salesforce.
Under Manage Mappings, click Edit in the Client/Contact row.
Shared fields between Tamarac Reporting and your version of Salesforce will be mapped by default in the Tamarac app.
For a list of all the Contact fields automatically mapped, see Default Contact/Client Mapping.
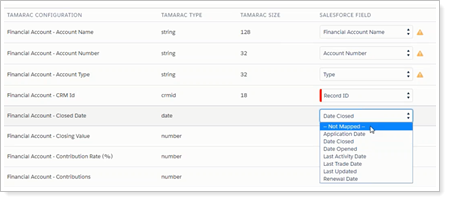
For each Tamarac Reporting configuration field where Not Mapped is selected in the Salesforce field list, click the Salesforce field list and select the Salesforce field that corresponds to the Tamarac Reporting field.
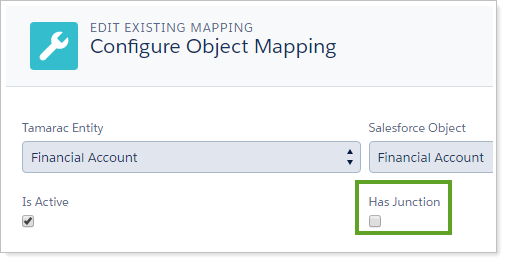
Select Has Junction if the object contains records that are associated with multiple other records. For example, if the same financial account is assigned to multiple Accounts, select Has Junction.
When you are done, click Save.
When you have reviewed the mapping for all the objects, click Send Mappings to send mappings to Tamarac. Click Send Mappings even if you don't make any changes to the default mappings. This creates the mapping link between Tamarac and Salesforce.
