 Back
Back Home > Tamarac Reporting > PDF Reports > Work With PDF Reports > Document Assembly: Distribute a Unique File to Each Client
|
Back |
Home > Tamarac Reporting > PDF Reports > Work With PDF Reports > Document Assembly: Distribute a Unique File to Each Client
|
Document Assembly: Distribute a Unique File to Each Client
|
Use the Correct File Name Format Create the Zipped (Compressed) File Upload Your Files to the Tamarac FTP Site |
With document assembly, you can bundle one or more client-specific documents with your PDF reports.
For example, let's say that you want to send a personalized quarterly newsletter to each of your clients in addition to a quarterly report and invoice. Instead of creating a complex mail procedure, you can simply upload a single zipped file of all your newsletters and each letter will be added to the correct client's PDF report.
The following are the steps in the document assembly workflow.

By using an intelligent file naming convention that integrates with your internal file creation systems, Tamarac Reporting can identify where a file belongs and add it to the a PDF report for the correct client.
To ensure Tamarac Reporting routes the file to the appropriate client, you need to specify the account number in the file name. Tamarac Reporting uses to file name to determine where to add the file. By adding the client account number in the file name, Tamarac Reporting identifies the correct account and adds the files to the correct PDF report.
When you create your files, specify the following format: [prefix_][accountnumber][_suffix][file name extension].
Example: quarterly_newsletter_1234-5678_08162011.pdf
Tamarac recommends that you avoid using spaces in the file names. Instead, it's best to use underscores between words.
Specify a unique file name each time you upload a file because the contents of the oldest file will be overwritten.
The maximum length for a file name is 64 characters.
After you've created your files and specified the correct file name format, right-click the folder where you saved your files, point to Send to, and then click Compressed (zipped) folder.
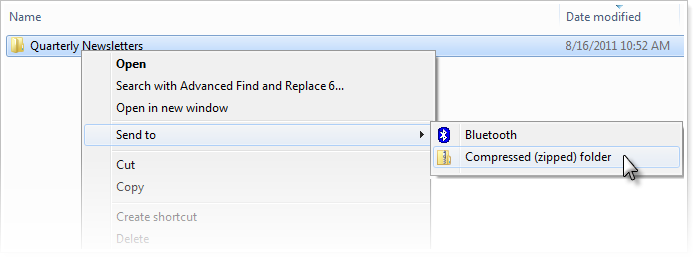
A new compressed folder is created in the same location. To rename it, right-click the folder, click Rename, and then type the new name.
Once you've prepared your files for upload, you upload them to Tamarac Reporting via the Tamarac FTP site. After you upload the files to the FTP site, they'll be available for use in Tamarac Reporting.
To upload your files, follow these steps:
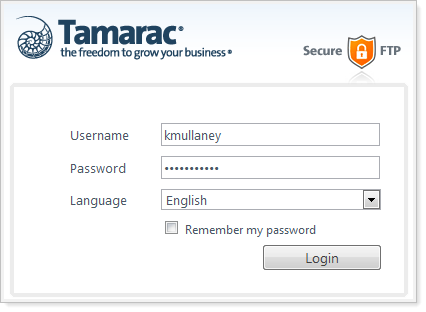
In the Address bar on your web browser, type sftp.tamaracinc.com and then press ENTER.
Type your user name and password for the Tamarac FTP site and then click Login. If you do not have a password, contact Customer Support.
Select the destination folder on the FTP server where you want to upload the file. The name of the folder will vary by client. For more information, contact Customer Support.
Click Upload Files.
In the Open dialog, browse to the ZIP file you want to upload and then click Open.
Click OK to upload the file to the Tamarac FTP server. It may take up to an hour for this file to appear in Tamarac Reporting.
After you upload the file to the Tamarac FTP site, follow these steps to verify the file upload was successful. Please note that it may take up to an hour for recently uploaded files to appear in Tamarac Reporting.
On the Client Reporting menu, click Upload Custom Files. Your file should appear in the list. If it does not, the upload was not successful.
Click Edit next to the file you uploaded.
In the File name format box, specify the naming convention you used for the file name.

Click Save.
Once you've uploaded your files, you can include them in the Custom section of your PDF template. For more information, see Add a Letter or Article as a Custom Section and PDF Custom Section.
To add custom files to the PDF report template, follow these steps:
On the Client Reporting menu, click Templates.
In the Select a template list, choose the PDF template you want to modify. If you haven't created a PDF template, choose Create new template.
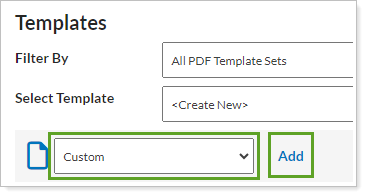
In the Add a section list, click Custom and then click Add.
In the Custom section, choose the compressed (zipped) file in the Choose a custom file as background list.
Click Save.