 Back
Back Home > Tamarac Reporting > Report & Site Appearance > Report Appearance > Customize the Name of Column Headings for Reports
|
Back |
Home > Tamarac Reporting > Report & Site Appearance > Report Appearance > Customize the Name of Column Headings for Reports
|
Customize the Name of Column Headings for Reports and Pages
|
Customize PDF Column Heading or Row Names |
You can easily customize your reports and page views by renaming column and row headings to match your firm's terminology and your clients' needs—for example, you could rename the Price column if you need to call the column Price in Dollars. This customization is possible for both PDF reports and dynamic reports.
The column labels are specific to each PDF template, dynamic report, or page view.
To customize a column or row name, follow these steps:
On the Client Reporting menu, under PDF Settings, click Templates.
In the Select a template list, click the template you want to edit.
Double-click the column/row in the Selected columns or Selected rows box, and then type the name you want shown on your reports (if a column or row displays in gray, it can't be edited).
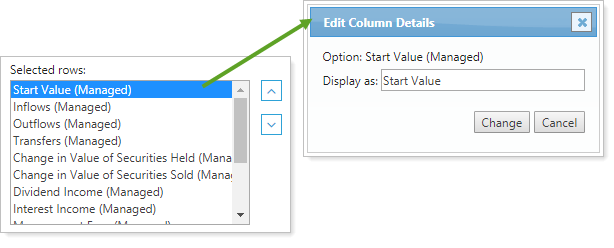
Click Change.
To customize a column or row name, follow these steps:
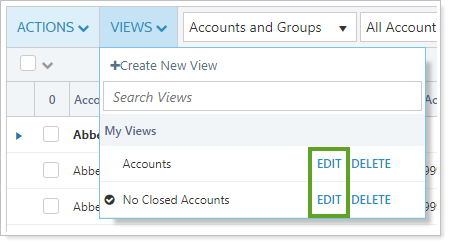
On the Reports menu, click the report type that you want to change column/row heading names for.
Click Edit.

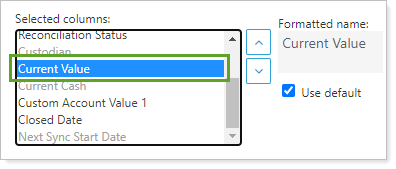
Click the column/row in the Selected columns or Selected rows box, and the Formatted name field will display on the right.
Clear the Use default check box, and type the name you want shown on your reports (if a column or row displays in gray, it can't be edited).

Click Apply.
To customize the column name on a page view, follow these steps:
Open the grid page you want to view.
On the Views menu, click Edit next to the view containing columns you want to rename.
In the view, under Selected Columns, click the column you want to rename. If a column name displays in gray, it can't be edited.
Clear Use Default and type in the new column name in Formatted name.
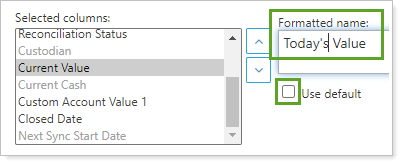
Click Save.