Contents
Introduction
This integration allows the flow of data between Tamarac CRM and the Mailchimp web application for marketing lists targeted at contact records. It is available via Power Automate flows that use pre-built Power Automate connectors. It supports the following actions:
-
Initial Segments and Contact Synchronization from Mailchimp to Dynamics
-
Synchronization of Dynamics CRM Marketing List to Mailchimp
-
Synchronization of Dynamics CRM Marketing List Members to Mailchimp Segments
The integration does not apply to marketing lists targeted at accounts or leads in CRM. Other solutions like PowerMailchimp Power Objects are not required for this integration.
Before you can use this integration, you have to configure Power Automate flows and Tamarac CRM. This topic provides steps to set up the integration.
For information about using the Mailchimp integration, see Use the MailChimp Integration.
For information about using Power Automate flows, see Use Power Automate Flows in Tamarac CRM.
Before You Start
To authorize Mailchimp in Power Automate, you must be:
-
An admin user in Mailchimp.
-
A System Customizer in Tamarac CRM.
Authorize the Mailchimp Connector in Power Automate
Power Automate flows require the connection reference established to set up an integration with Mailchimp. Your organization’s Admin will need to log in to the existing Mailchimp account from the flows builder to have the connection reference created.
For each flow and Mailchimp connector action, the login should be done manually.
-
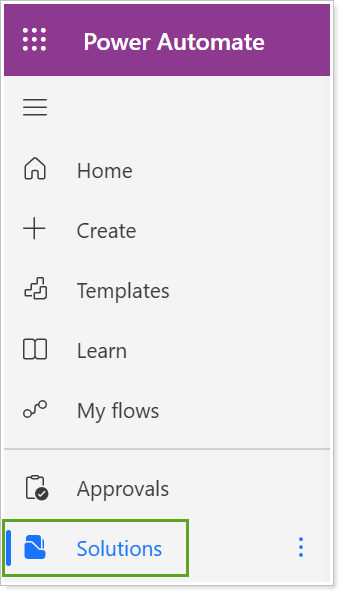
Open Power Automate (external link opens in a new tab).
-
Select Solutions.
-
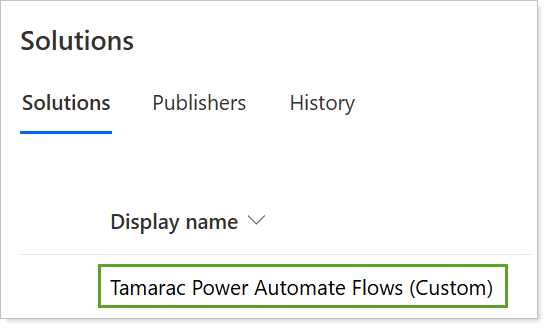
In Solutions, select Tamarac Power Automate Flows (Custom).
-
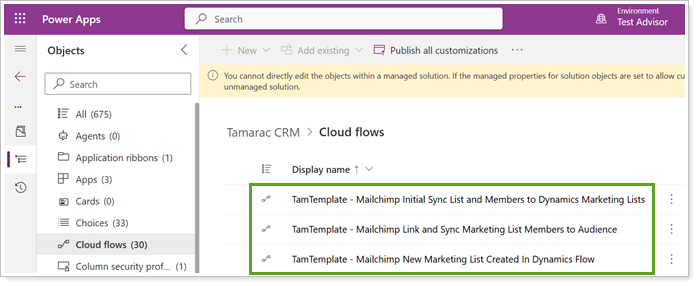
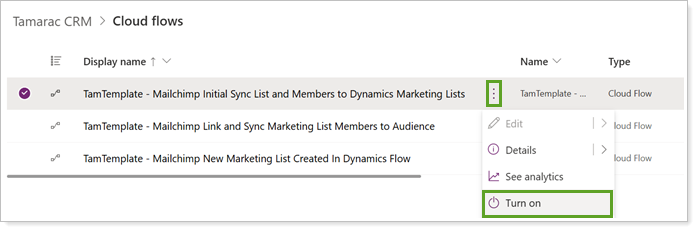
In Cloud flows, locate the Mailchimp flows:
-
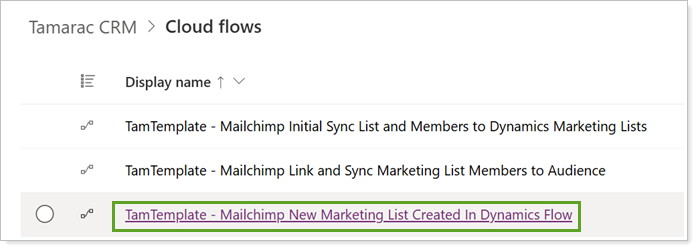
TamTemplate - Mailchimp New Marketing List Created In Dynamics Flow
-
TamTemplate - Mailchimp Link and Sync Marketing List Members to Audience
-
TamTemplate - Mailchimp Initial Sync List and Members to Dynamics Marketing Lists
-
-
Select the menu next to each flow and Turn on.
Note
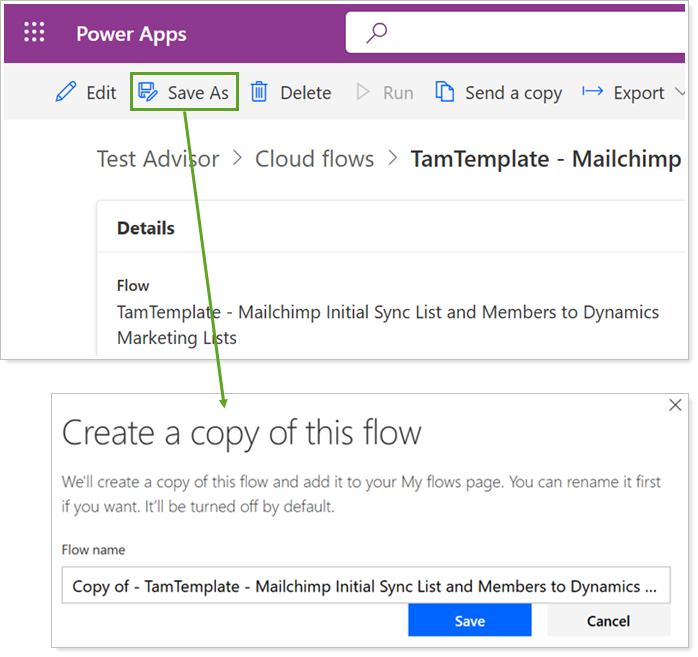
If you turn on the template in the custom solution without copying it, any customizations you make may be overwritten in future releases since it is part of the managed solution.
Optionally, you can create a copy of each flow to have full customization access. If you create a copy, turn on the copy flow instead.
For steps, see Enable Power Automate Flows.
Authorize Connectors
To use the Mailchimp integration, you must authorize each connector individually.
Note
If the user Mailchimp credentials linked to this integration change in the future, you must re-establish the connection references in Cloud flows.
Authorize the New Marketing List Created In Dynamics Connector
To authorize the New Marketing List Created In Dynamics connector:
-
In PowerAutomate, open TamTemplate - Mailchimp New Marketing List Created In Dynamics Flow.
-
Select Edit.

-
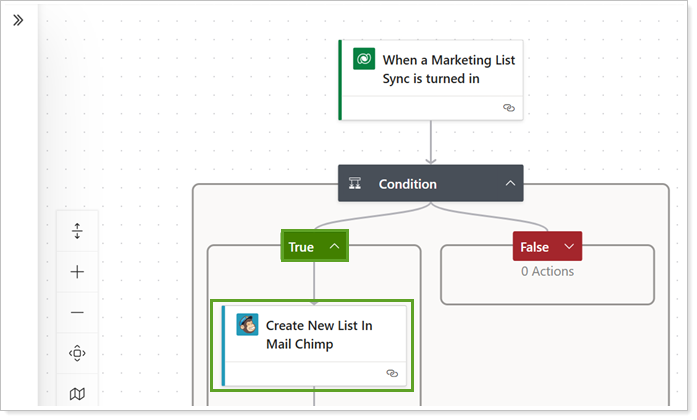
Select to expand Condition.
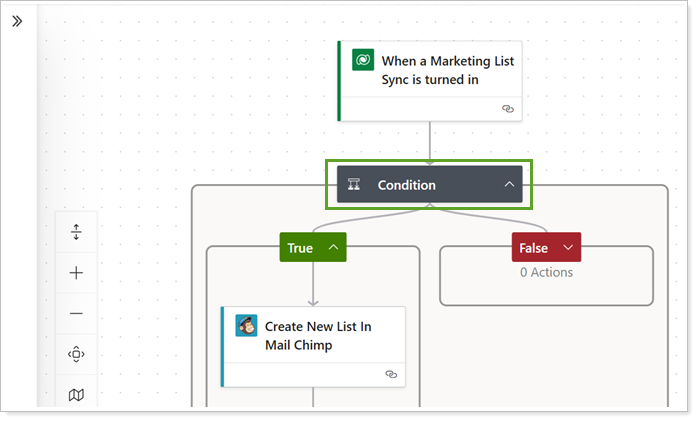
-
Under the True condition, select Create New List In Mail Chimp.
-
Select +New connection reference.

-
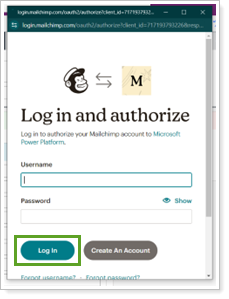
Add the Username and Password and select Log In.
-
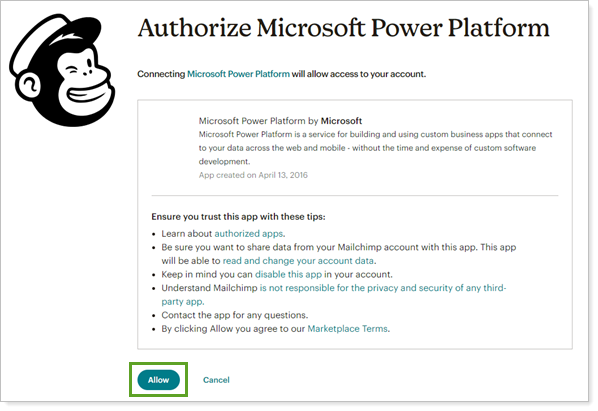
In Authorize Microsoft Power Platform, select Allow.
-
Save the flow once the connection reference is created.
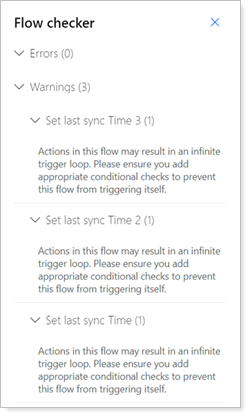
Note
The following warning is normal. If you see these, your changes should still be saved:
-
To return to the solution, select the back arrow.

-
Publish all customizations. This can be done after all the changes in the solution.
Authorize the Link and Sync Marketing List Members to Audience Connector
To authorize the Link and Sync Marketing List Members to Audience connector:
-
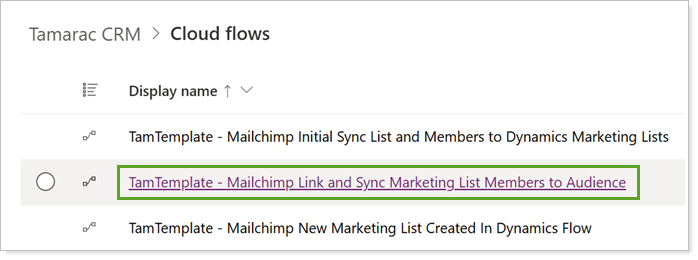
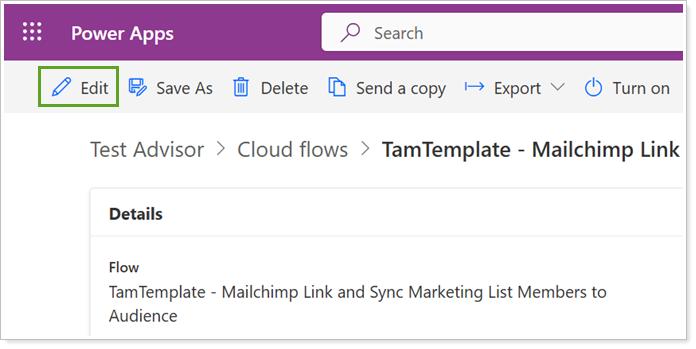
In Power Automate, open TamTemplate - Mailchimp Link and Sync Marketing List Members to Audience.
-
Select Edit.
-
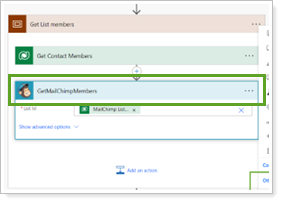
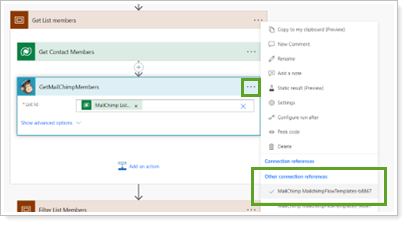
Expand each of the following blocks: Get List members → GetMailChimpMembers → GetMailChimpMembers.
-
In GetMailChimpMembers, select the menu and choose the Mailchimp connection reference created previously.
-
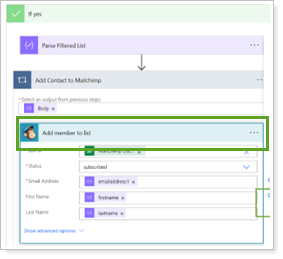
Expand each of the following blocks: Update Members and Marketing List → Check If List not equal → If yes → Check List Is not Empty → If yes → Add Contact to Mailchimp → Add member to list → Add member to list.
-
In Add member to list, select the menu and choose the Mailchimp connection reference created previously.

-
Save the flow once the connection reference is added.
-
To return to the solution, select the back arrow.
-
Publish all customizations. This can be done after all the changes in the solution.
Authorize the Initial Sync List and Members to Dynamics Marketing Lists Connector
To authorize the Initial Sync List and Members to Dynamics Marketing Lists connector:
-
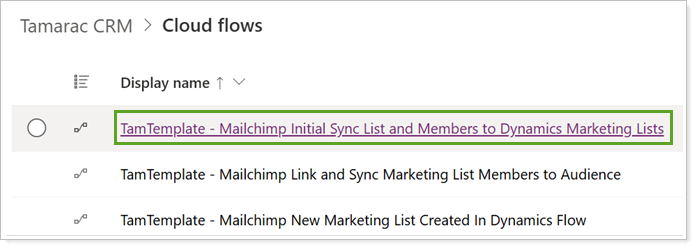
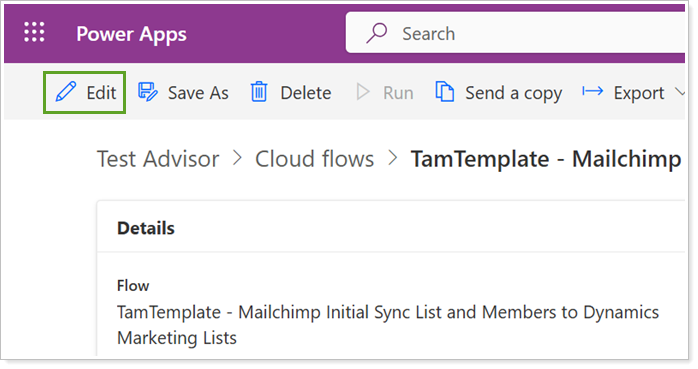
In PowerAutomate, open TamTemplate - Mailchimp Initial Sync List and Members to Dynamics Marketing Lists.
-
Select Edit.
-
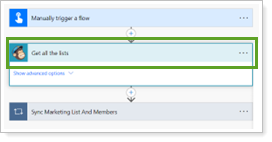
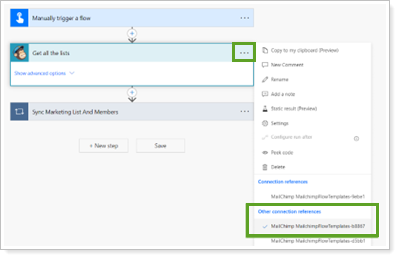
Expand the following block: Get all the lists .
-
In Get all the lists, select the menu and choose the Mailchimp connection reference created previously.
-
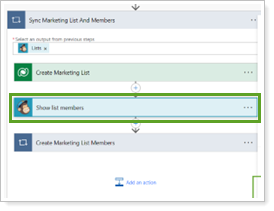
Expand each of the following blocks: Sync Marketing List And Members → Show list members.
-
In Show list members, select the menu and choose the Mailchimp connection reference created previously.
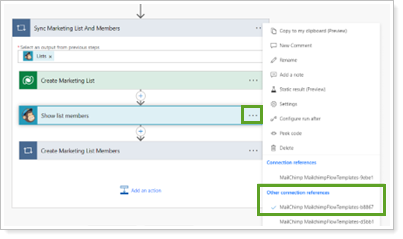
-
Save the flow once the connection reference is added.
-
To return to the solution, select the back arrow.
-
Publish all customizations. This can be done after all the changes in the solution.
Enable Mailchimp Integration in Tamarac CRM
An organization Administrator user must complete the following actions to activate the Mailchimp integration in Tamarac CRM.
Enable the Mailchimp integration:
-
In Tamarac CRM, under Home, select Tamarac Settings.

-
Select Configurations.
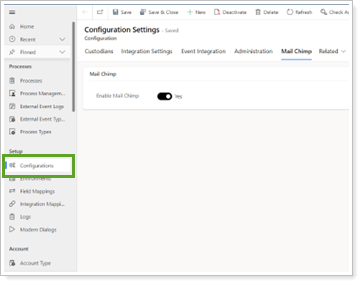
-
In Configuration Settings, select the Mail Chimp tab.
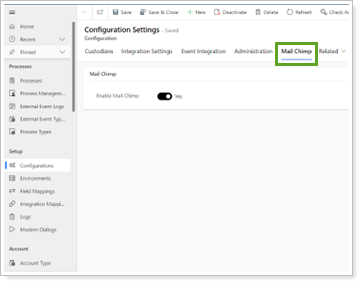
-
Turn on Enable Mail Chimp.
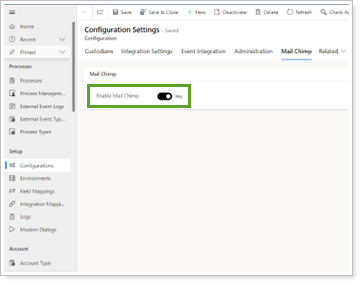
-
Select Save or navigate away from the page to save the changes.
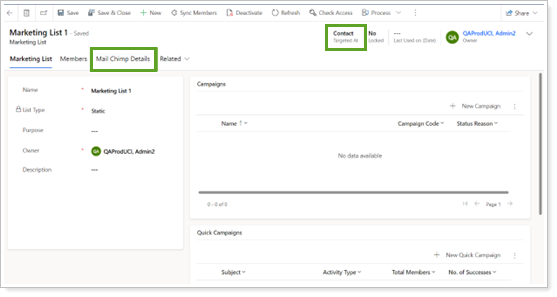
Once the integration is enabled, in the Main Marketing List form, the Mailchimp Details tab appears when you set Targeted At to Contact.