
Contents
|
Drag and Drop Files into a Folder Add Files to a Folder with the Menu Add Files to a Folder in the File Settings Add Files to a Folder When You Generate a PDF or Post from FTP |
Introduction
Folders represent the high-level document categories that your firm can use to help sort files posted to them. They can help you and your clients group similar content. You can still use labels to organize files, which means that you have multi-level organization—for example, you can have a Tax Documents folder containing files with labels for Abbot Family, Abbey Family, etc.
Folders are easy to create and remove. On the Manage Folders page, found under Documents, you can create, edit, organize, and delete folders.
For more information on using the document vault, see Use the Document Vault.
Folder and Label Assignment Limits
-
Files can only be assigned to one folder at a time. However, there is no limit to how many labels you apply.
-
Clients will see only folders and labels applied to files in their document vault.
MoneyGuide Integration Folder
Tamarac automatically creates a Financial Plans folder in your and your clients' document vault for all firms using the MoneyGuide integration. For more information about that folder and the MoneyGuide integration, see See MoneyGuide Financial Plan Reports in the Document Vault.
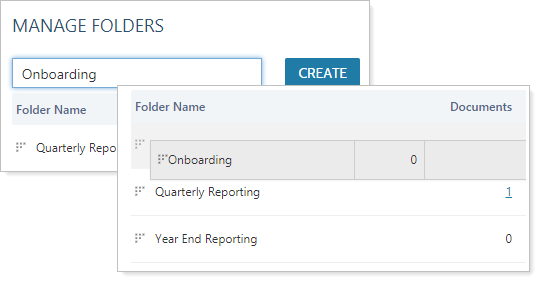
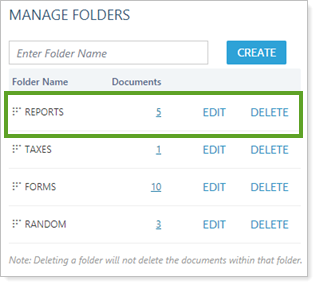
Create a Folder
To create a folder, follow these steps:
-
Under Documents, click Manage Folders.
-
In Enter Folder Name, type the name of the folder.
-
Click Create. The new folder will be added to the list in the document vault.
Edit a Folder
To edit a folder, follow these steps:
-
Under Documents, click Manage Folders.
-
Click Edit next to the folder you want to edit.
-
Type the new folder name.
-
Click Save.
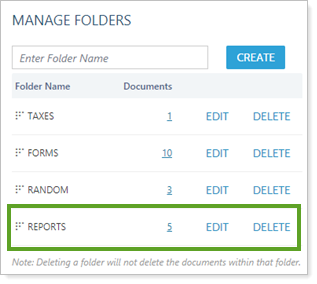
Delete a Folder
Deleting the folder will not delete the files within that folder.
To delete a folder, follow these steps:
-
Under Documents, click Manage Folders.
-
Click Delete next to the folder you want to delete.
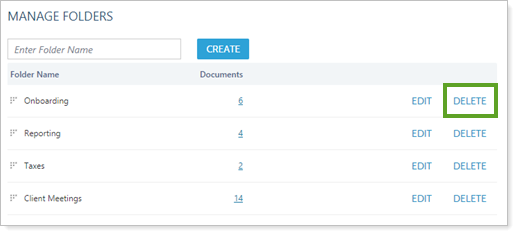
-
Confirm the deletion by clicking Delete.
Reorder the Folder List
You can determine the order the folders appear in on the Document Vault page. Reorganize the order the folders appear in by using the corner  to drag and drop the list into the desired order.
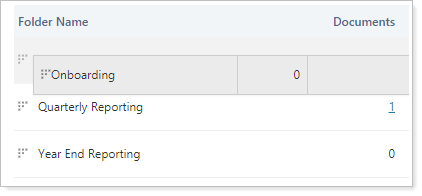
For example, before rearranging, the Reports folder was at the bottom of the folders list. After dragging and dropping to rearrange the order, the Reports folder appears at the top of the folders list.
| Manage Folders Order | Document Vault Order |
|---|---|
|
|
|
|
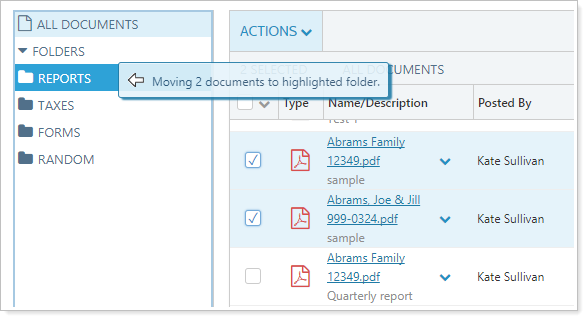
Add Files to a Folder
To assign multiple documents you've posted to a client portal to a folder, you have the following two options: Drag and drop or use the menu.
Drag and Drop Files into a Folder
To drag and drop files into the desired folder:
-
In the document vault, select the check boxes next to the files you want to add to the folder.
-
Hover your mouse over the Type icon until your cursor changes to the drag and drop arrow
 .
. -
Drag and drop the files into the desired folders.
Add Files to a Folder with the Menu
To use the menu to add files to the desired folder:
-
Select the check boxes next to the files to add to the folder.
-
In the Actions list, click Edit Folder.
-
Choose the desired folder from the list.

-
Click Save. All the selected documents will be added to that folder.
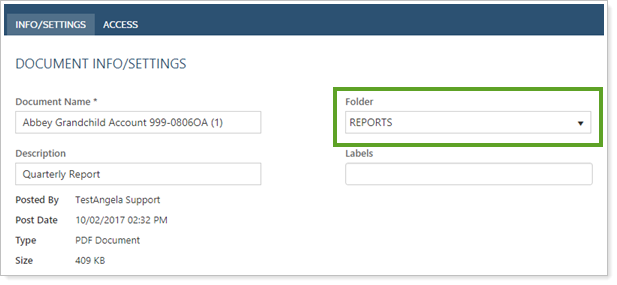
Add Files to a Folder in the File Settings
You can also choose to assign files to folders using individual file's actions list. Click ˅ next to the file name and then, in the Folder list, select the desired folder.
Add Files to a Folder When You Generate a PDF or Post from FTP
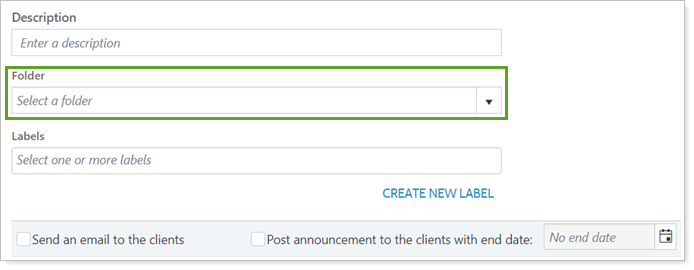
When you generate a PDF or post a file from FTP, you have the option to assign a folder at that time. To add the file to a folder, in the Folder list, click Select a folder and choose from among the folders.
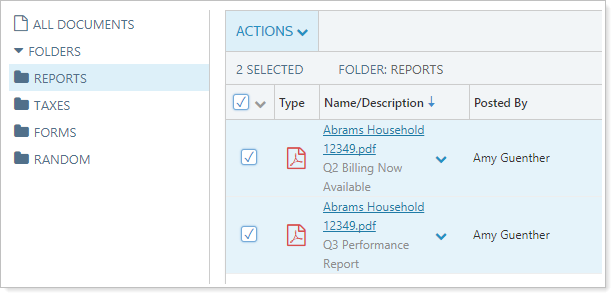
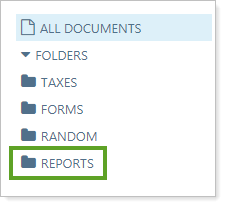
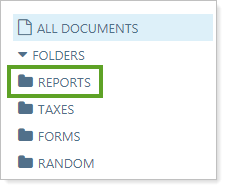
Filter the Document Vault by Folder
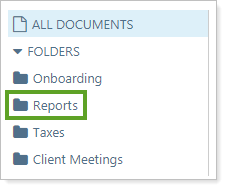
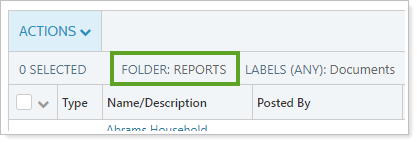
To see only files contained within a specific folder, click that folder in the Folders list.
When you filter by folders, the folder you're looking at is listed above the column headers. This updates dynamically as you change folders.
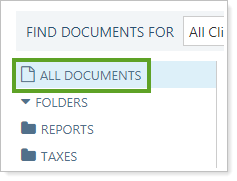
To switch back to seeing all files, click All Documents.
Assign a Client Access to All the Files Within a Folder
If you choose to create folders for every Household, you can grant clients within the Household access to the contents of the entire folder.
To assign a client access to a folder:
-
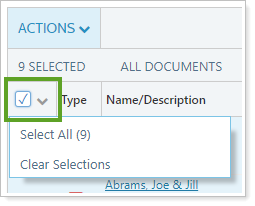
Within the folder, select the Select All check box at the top of the grid.
-
In the Actions list, click Edit Access.
-
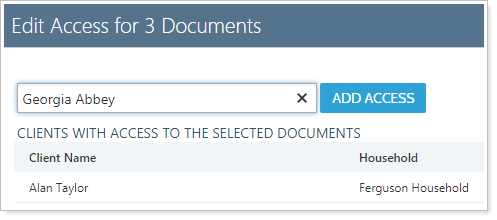
Type the name of the client in the Search clients with access field.
-
Click Add Access. You can also remove clients' access to files by clicking Remove on the Edit Access window.
-
Click Close. The client will be granted access to the selected files in the folder.