 Back
Back Home > Tamarac Reporting > Integrations > CRM Integrations > Salesforce Integration > Install and Configure Tamarac App > Add Tamarac Fields to Salesforce
|
Back |
Home > Tamarac Reporting > Integrations > CRM Integrations > Salesforce Integration > Install and Configure Tamarac App > Add Tamarac Fields to Salesforce
|
Add Tamarac Fields to Salesforce
You can see and edit Tamarac data and open Tamarac records through your existing Salesforce pages when you add Tamarac fields to Salesforce page layouts.

This page provides steps to add Tamarac Reporting data fields to Salesforce pages.
This is Step 3 in Workflow: Add Tamarac Fields and Buttons to Salesforce Pages. That workflow is the fourth step in the overall onboarding process for users who do not use Financial Services Cloud.
To add buttons or fields to the desired object in Sales Cloud:
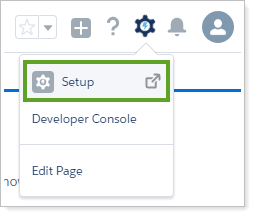
Click Setup.
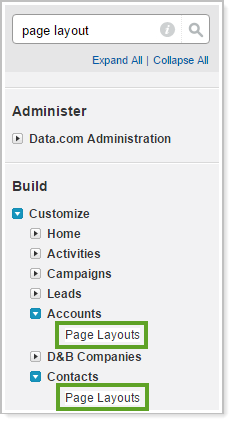
In the search bar, search for Page Layout.
Click the object where you want to add a field or button in the search results.
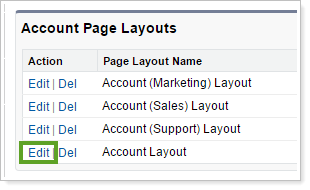
On the [Object Name] Page Layout, click Edit next to the page layout you want to edit.
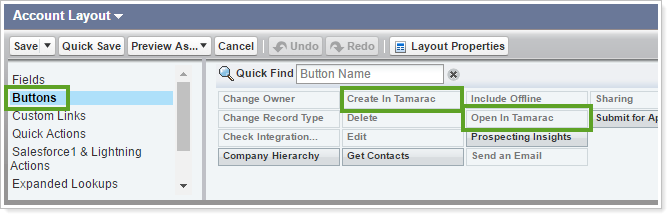
Click Buttons.
Drag and drop the buttons into the desired locations on the page. We suggest that you add the Open in Tamarac button near the top of the custom buttons list, since you're likely to use it frequently. Add the Create in Tamarac button lower down, since this will be used less frequently.
Drag and drop the mapped fields into the desired location on the page.
Click Setup.
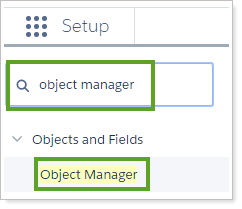
In the search bar, search for Object Manager. Click Object Manager.
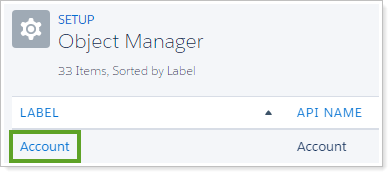
Click Account.
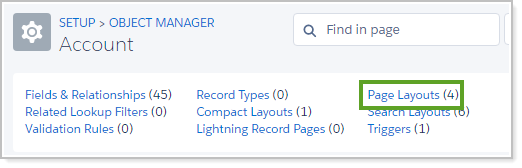
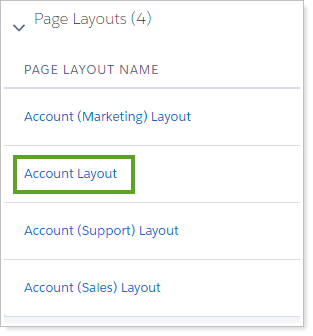
Click Page Layouts.
Click Account Layout.
In the Object Manager, click Salesforce1 & Lightning Actions.
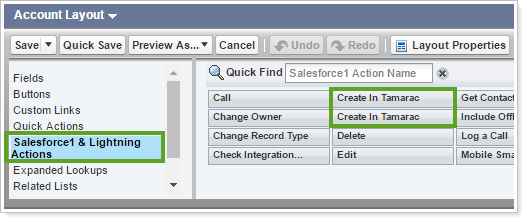
Drag and drop the buttons into the desired locations on the page.
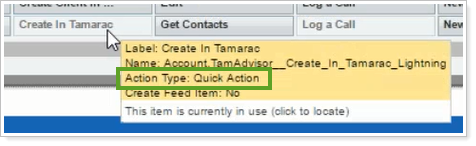
To find the correct Create in Tamarac button, hover over each Create in Tamarac button. Use the one with an Action Type of Quick Action. We suggest that you add the Open in Tamarac button near the top of the custom buttons list, since you're likely to use it frequently. Add the Create in Tamarac button lower down, since this will be used less frequently.
Drag and drop the mapped fields into the desired location on the page. To add fields, select the fields first in the panel (Step 6) and then drag and drop
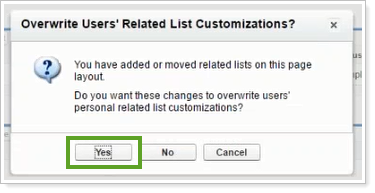
In the Overwrite Users' Related List Customizations? window, click Yes.
This process involves adding buttons to:
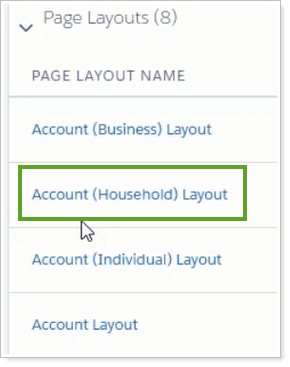
Account (Household) Layout. Use this to add Create in Tamarac and Open in Tamarac buttons for Financial Services Cloud or a custom Financial Account object. We suggest that you add the Household rollup fields to the Account (Household) layout.
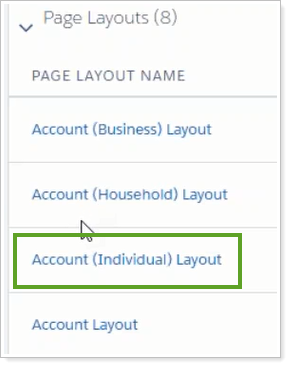
Account (Individual) Layout. For Financial Services Cloud only. Use this to add Create Client in Tamarac and Open in Tamarac buttons for Financial Services Cloud or a custom Financial Account object. You must manually create the Create in Tamarac button.
Financial Accounts Layout. Use this to add the Open in Tamarac button for Financial Services Cloud or a custom Financial Account object. You must manually create the Open in Tamarac button.
You must create and map the Financial Account fields when using the Financial Services Cloud before adding fields or buttons to the Financial Account object. For Contacts or Accounts, the default fields available through the Tamarac app will be available.
To add a button to the Financial Services Cloud Account (Household) page layout:
Click Setup.
In the search bar, search for Object Manager. Click Object Manager.
Click Account.
Click Page Layouts.
Click Account (Household) Layout.
Click Salesforce1 & Lightning Actions.
Drag and drop the Create in Tamarac and Open in Tamarac buttons to the desired locations on the page.
If you are using Lighting Experience, to find the correct Create in Tamarac button, hover over each Create in Tamarac button. Use the one with an Action Type of Quick Action. We suggest that you add the Open in Tamarac button near the top of the custom buttons list, since you're likely to use it frequently. Add the Create in Tamarac button lower down, since this will be used less frequently.
Drag and drop the mapped fields into the desired location on the page.
For the Account (Individual) object, you must create the Create Client in Tamarac button before adding it to the page.
Create the Create in Tamarac button.
Click Setup.
In the search bar, search for Object Manager. Click Object Manager.
Click Account.
Click Page Layouts.
Click Account (Individual) Layout.
Click Salesforce1 & Lightning Actions.
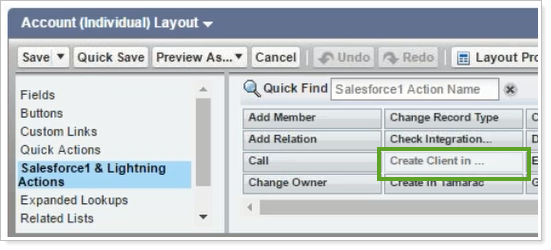
Drag and drop your new Create in Tamarac and Open in Tamarac buttons into the desired location on the page layout. We suggest that you add the Open in Tamarac button near the top of the custom buttons list, since you're likely to use it frequently. Add the Create in Tamarac button lower down, since this will be used less frequently.
Drag and drop the mapped fields into the desired location on the page.
For the Financial Account object in Financial Services Cloud or a custom Financial Account object, you must create the Open in Tamarac button before adding it to the page.
You will not add a Create in Tamarac button because financial account creation sync is one-way, from Tamarac Reporting to Salesforce.
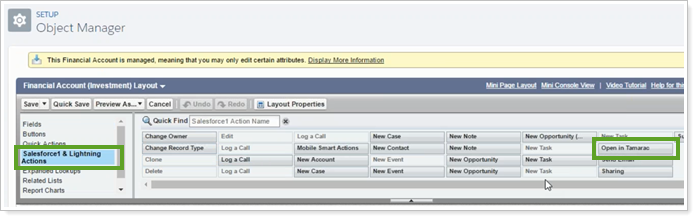
To add a button to the Financial Services Cloud Financial Account page layout:
Click Setup.
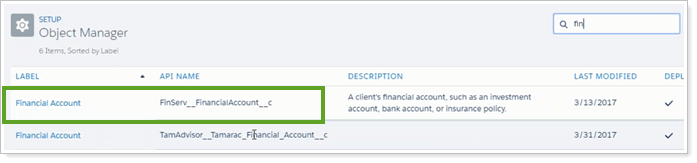
In the search bar, search for Object Manager. Click Object Manager.
Search for Financial Account. Select the one that starts FinServ...
Click Page Layouts.
Click Financial Account (Investment) Layout.

You can also choose to add this button to the other Financial Account layouts, such as Financial Account (General) Layout. Using the Open in Tamarac button from such a page will open Tamarac Reporting to your Dashboard according to the following guidelines:
If the financial account is linked between Salesforce and Tamarac Reporting, the Dashboard displays the specific financial account's data.
If the financial account is not linked, Tamarac Reporting searches for the corresponding account number and displays that data.
If there no corresponding account number is available, your Tamarac Reporting Dashboard displays the financial account most recently viewed.
Click Salesforce1 & Lightning Actions.
Drag and drop the Open in Tamarac button to the desired location on the page.
Drag and drop the mapped fields into the desired location on the page.