 Back
Back|
Back |
|
Create, Edit, and Delete Bulk Reports
Bulk reports are custom comma-delimited reports that you can build using data found in Tamarac Trading. You can customize which columns of data appear within bulk reports, as well as share your customized bulk reports with colleagues.
For more information on the available report types, see Bulk Report Descriptions.
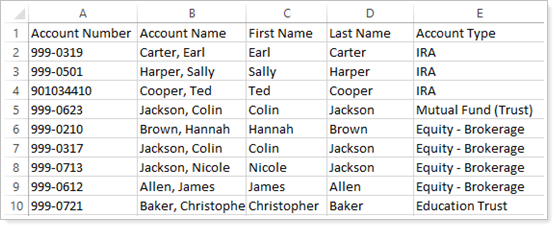
When you run your customized bulk report, you will see data from Tamarac Trading that uses your bulk report parameters. Bulk reports usually open in a spreadsheet program like Excel.
It's best to view bulk reports in Microsoft Excel or in a similar spreadsheet program. However, if you do not have Microsoft Excel or another spreadsheet program installed on your computer, you can view reports in Notepad.
Once the report appears on your screen, you can print it by pressing F12 on your keyboard.
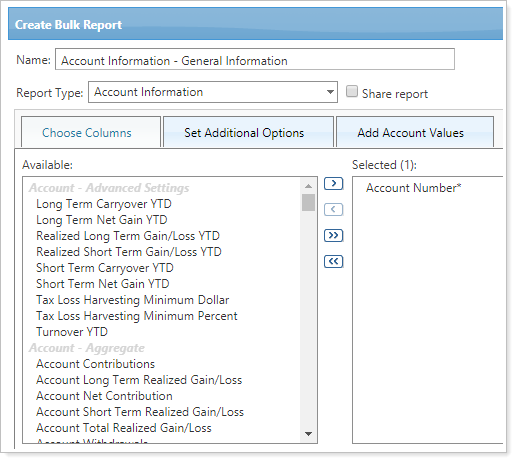
With Tamarac Trading, you can create bulk reports by selecting one of several bulk report types. Then, you can further customize the report by adding or removing columns to provide the data points you need to see.
The report type you choose will affect the columns available to add to your bulk report.
The columns available to add to your bulk report are broken into sections called section types. For example, Account - General contains columns related to general account settings, such as address, account type, description, tax status, and so on. Use these section types to identity columns you might want to add to your bulk reports.
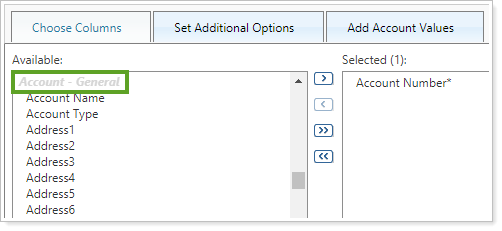
You can also click on these section types to add all of the columns in that section to your bulk report. To do this, click on the section type and click  .
.

For more information on all available bulk report types, see Bulk Report Descriptions.
To create and customize a new bulk report, follow these steps.
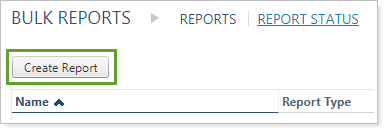
On the Reports menu, under Global Reports, click Bulk Reports.
Click Create Report.
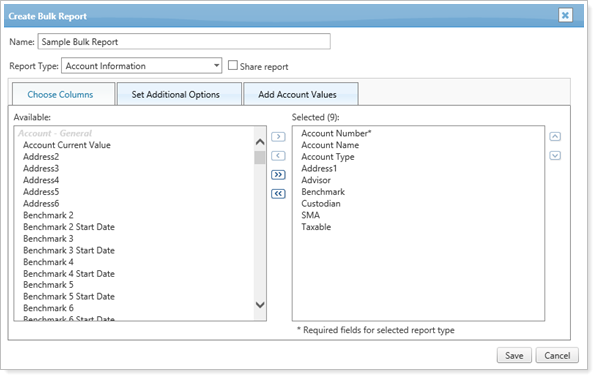
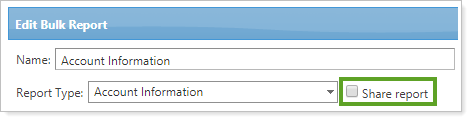
Type the name of the report in the Name box. Choose a descriptive name that will help you differentiate among different bulk reports, especially if you share this bulk report with colleagues.
Choose your report type in the Report Type list.
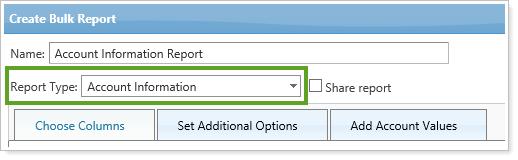
Select Share report only if you want this bulk report to be available to others. For more information, see Share a Bulk Report.
Add additional columns to the report as needed. Columns marked with an asterisk (*) are required and cannot be removed.
- To add a column to the list, in the Available box, click the column you want to add, and then click
- To remove a column from the list, in the Selected box, click the column you want to remove, and then click
.
- To add all available columns to the list, click
.
- To remove all columns from the list, click
.
- Use the
and
buttons change the order of the columns on the report.
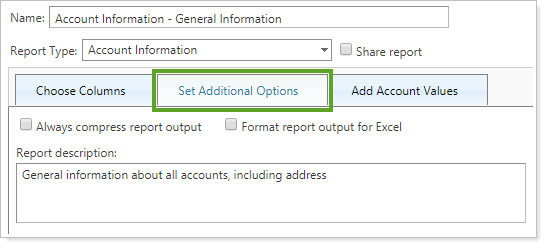
On the Set Additional Options tab, customize any relevant information. The following options appear for every bulk report. For more information on specific options for some bulk reports, see Bulk Report Descriptions.
On the Add Account Values tab, if available, customize any of the following:
| Setting | More Information |
|---|---|
| Include __ account value as of |
Choose what kind of account value you want to add: managed, unmanaged, or total. |
| Specific date |
Select this option if you want to include the account value for a specific date. You can type a date, select a date from the calendar, or click the Use current check box. |
| Past date |
Select this option and enter a value if you want to include the account value for a specified number of days, months, or years ago. |
| Previous |
Select this option if you want to include the account value for the previous day, month, quarter, or year end. |
Once you have entered a value with unique dates, click Add Account Value.
Click Save.
Once you save your bulk report, you can then run and download the bulk report.
You can edit and further customize a bulk report after it's been created. To edit an existing bulk report, follow these steps:
On the Reports menu, under Global Reports, click Bulk Reports.
Click Edit next to the report you want to edit.

Make the necessary changes to the report and then click Save. For more information on available bulk report options, see Create and Customize a Bulk Report.
Once you've built and customized your bulk reports, you can run your bulk reports at any time on the Bulk Reports page, found on the Reports menu. This will run the report on all applicable accounts.

You can run bulk reports on several other pages, such as the Accounts page. This method allows you to run bulk reports on selected accounts rather than all accounts. This can greatly reduce the amount of time needed to generate the report.
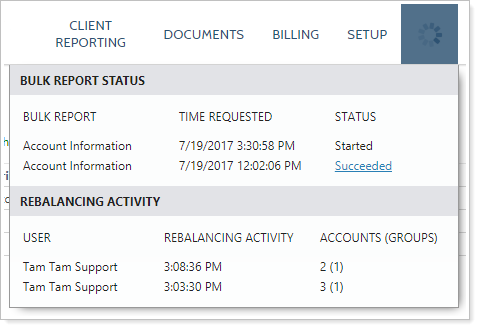
On the Bulk Report Status page, Succeeded will appear in the Status column when Tamarac Trading is finished generating the reports. If Tamarac Trading is not finished generating the report, Started will appear in the Status column.
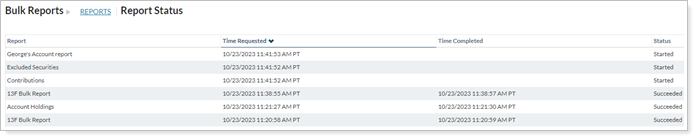
To update the status of the report, click the Refresh status link at the top of the page.
If you are generating a bulk report with a large amount of data, you can leave the Report Status page and the report will continue to run in the background.
Track report progress by clicking the  near the top of the page.
When you run a bulk report from the Bulk Reports page, you'll retrieve data for all applicable accounts, groups, clients, and/or Households.
To run and download a bulk report, follow these steps:
On the Reports menu, under Global Reports, click Bulk Reports.
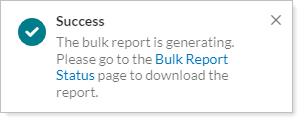
Click the Run Report link next to the report you want to run. Tamarac Trading will begin running the bulk report in the background. If the report you want doesn't appear, visit Create and Customize a Bulk Report for instructions on creating bulk reports.
Click the Bulk Report Status link to go to the Bulk Report Status page. This is where you'll view the status of the bulk report and then download it.

Once the bulk report is done running, click the Download Report link to download and view the report.

You can run bulk reports on several pages throughout Tamarac Trading. This method allows you to run bulk reports on selected accounts, groups, clients, and/or Households rather than all of the above. This can greatly reduce the amount of time needed to generate the report.
To run a bulk report from various pages throughout Tamarac Trading, follow these steps:
Visit one of the following pages:
- Accounts
- Clients/Client Portals
- Households
- Rebalance (both current and classic versions)
- Trade Review
- Trades on Hold
- Rebalance Review
- Trade List
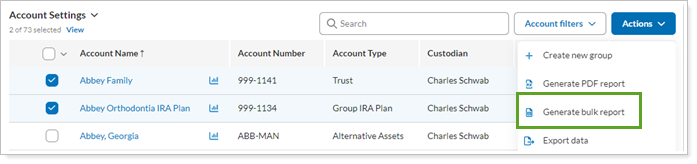
Select the account or accounts in which you want to run a bulk report.
Click Generate Bulk Report in the Actions list.
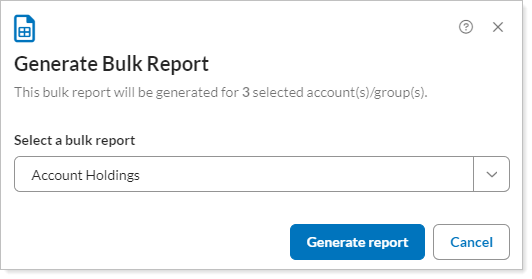
Select the report you want to run in the Generate Bulk Report dialog box, and then click Generate Report.
Click the Bulk Report Status link that appears to go to the Bulk Report Status page. This is where you'll view the status of the bulk report and then download it.
Once the bulk report is done running, click the Download Report link to download and view the report.
You may want to share bulk reports with others in your organization. For commonly used bulk reports, this can save time for colleagues who won't need to build the same bulk report for themselves.
If you create and then share a bulk report, you will be the only person who can edit that report. If you delete a shared bulk report, this will delete the report for everyone.
To share a bulk report with all users in your organization, follow these steps:
On the Reports menu, under Global Reports, click Bulk Reports.
Click Edit next to the report you want to share.
Select the Share report check box.
Click Save. The report will now appear on the Bulk Reports page for all users of your firm.
If you delete a shared bulk report, this will delete the report for everyone.
To delete a report, follow these steps:
On the Reports menu, under Global Reports, click Bulk Reports.
Click Delete next to the report you want to delete.

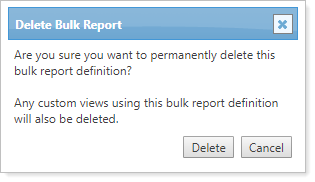
On the Delete Bulk Report dialog, click Delete.
One of the easiest ways to update large amounts to data is to use bulk reports. You can run a bulk report of existing data, then use this data to upload data changes. This is the workflow to change existing data:
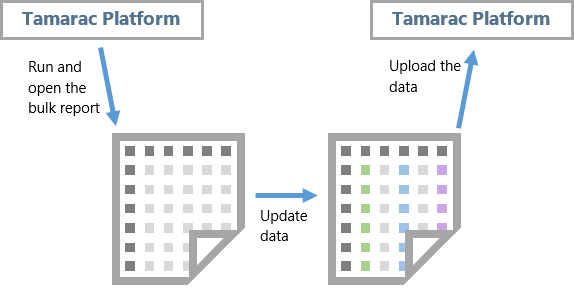
Bulk report.Generate and run a bulk report using the columns you choose in the upload format. Download the report and open it in your spreadsheet program.
Update data.In your spreadsheet program, update the fields that require update.
Upload.Upload the updated data from your spreadsheet back into Tamarac Trading on the Upload page. For more information on uploading data, see Uploading Data and Available Upload Data Sets.