
Contents
|
Step 4: Filter and Sort the Results Step 5: Export the Data to a Spreadsheet Update a Custom View with New Data Customize the Custom Views Page |
Introduction
Custom Views combine the filtering of saved searches and reporting of bulk reports to give you powerful data mining capabilities. They allow you to run bulk reports based on saved searches and then filter the bulk reports directly on your screen. Flexible grouping and aggregation options allow you to narrow the data further. Finally, you can export the data to a spreadsheet, if needed.
You can use saved searches to drill down to actionable details—for example, you could look at all accounts holding a security that is maturing in the next 30 days. You can then sort and group the results further, if needed.
With all these customization options, Custom Views allow you to easily find and access the data in the way that is most useful to you.
Build a Custom View
The simple process of creating a custom view is as follows:
The following sections will go through the process of creating a custom view.
Step 1: Create a Bulk Report
Bulk reports allow you to create reports based on the data parameters you set. First, you select the report type to determine what information you want to include in the report—for example, the Account Information bulk report displays account details—and then customize which columns of data you want to include in that bulk report.
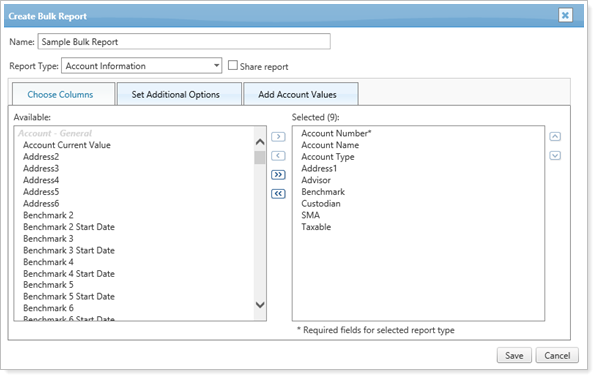
For more thorough information on creating a bulk report, see Create, Edit, and Delete Bulk Reports.
For details on the bulk report types you can create, see Bulk Report Descriptions.
Step 2: Create a Saved Search
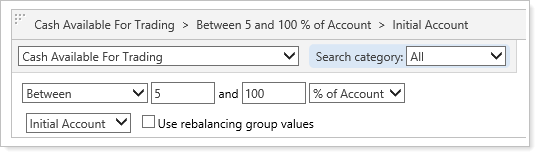
Saved searches allow you to add filters to your data. You can use data filters such as Tax Status and Account Type to narrow your results. You can also nest your saved search filters with filter sets to further narrow your results and make your results more precise. You'll be applying these filters to your bulk reports to narrow down the data in your custom view.
For more thorough information on creating a saved search, see Create, Edit, and Delete Saved Searches.
For details on the search filters you can use to create your saved searches, see Search Filters.
Step 3: Create a Custom View
After you've created a bulk report and saved search, create a custom view using these steps:
-
On the Reports menu, under Global Reports, click Custom Views.
-
Click Create New.
-
Type a name for the custom view in the Name box. Other employees in your firm will see this name, so it's recommended you use a name that's specific and easy to understand.

-
Select the bulk report you want to use in the Bulk report list. This choice determines the columns that will be visible on your screen. The bulk report you choose should be limited to 20 columns or fewer.
-
Select the saved search you want to use in the Saved search list. Only accounts or securities that meet the criteria of the saved search will appear on the custom view.
-
Optional: select any of these items that might apply:
-
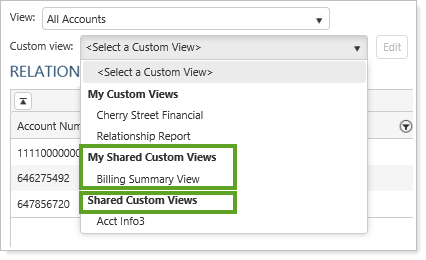
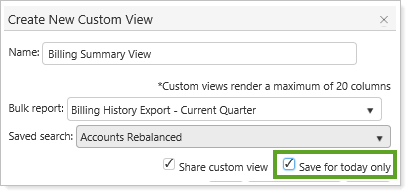
Share Custom View.This option shares the custom view with other users in your firm. If selected, this custom view will appear under Shared Custom Views for each user in your firm. You will see it under My Shared Custom Views.
-
Save for Today Only.This option automatically deletes the custom view at the end of the day. This check box avoids unnecessary clutter for custom views that you won't need in the future.
-
-
Click Save or Save & Generate. Save & Generate generates the data for you. This may take some time depending on the amount of data you've selected.
Step 4: Filter and Sort the Results
Once you've created a custom view, you can now filter and aggregate the data on your custom view to further drill down and find the data you need.
Steps to Filter and Sort Results
To filter and aggregate the data in your custom view, follow these steps:
-
Select the custom view you've created in the Custom view list.
-
In the View list, filter the results by the listed account sets, if needed. Use All Accounts to see all accounts.
-
Click
 . This opens the Configure Grouping and Aggregation dialog box where you'll see the columns found in your bulk report.
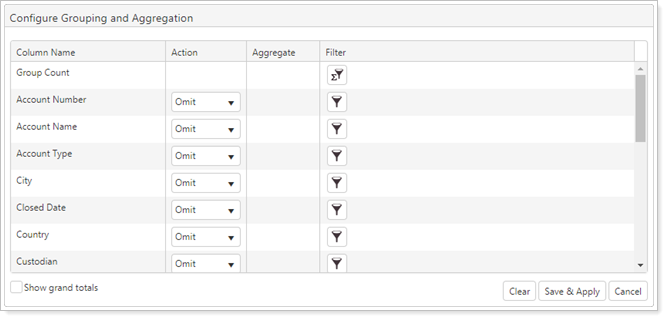
-
Select an option in the Action column to determine which columns will be shown and how they'll be shown. These are your options:
-
Omit.Removes this column from your view. You must leave at least one column visible; if all columns are omitted, the omit settings will be ignored and all columns will display.
-
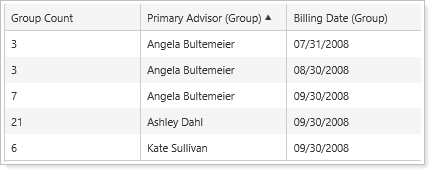
Group.When selected, the contents of this column will be combined. For example, you can combine all the accounts with the same primary advisor.
You can select multiple columns if you want groups to be broken out in more than one way. For example, you could group by both primary advisor and billing date, and each group would have a shared date and advisor.
-
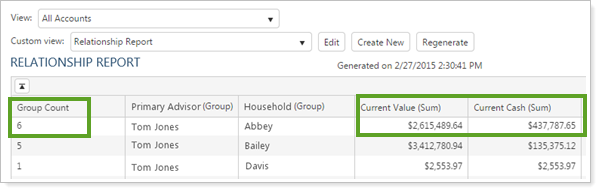
Aggregate.Calculate the Sum, Average, Min, or Max value of the combined groups. The options you choose depend on the data in the column chosen, and this list only shows if you select Aggregate in the Action column.
In this example, current value and current cash show the sum value for the accounts within each group.
-
-
Optional: set additional filter options in the Filter column. This lets you filter data by either pre-aggregated or post-aggregated values.
-
Click
 and select pre-aggregated filter settings. Even if a column is omitted from the report, the underlying data for that column can still be used in a pre-aggregate filter. Only those records that fulfill the specified criteria can be extracted.
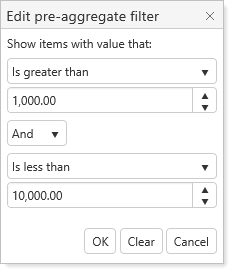
-
Click
 and select post-aggregate filter settings. This filter will only return data against aggregated values that meet the specified criteria.
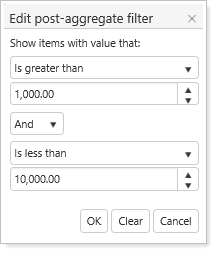
-
-
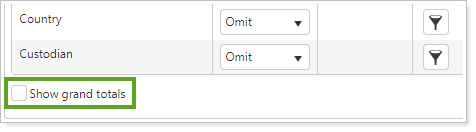
Optional: select or clear the Show grand totals check box. This determines whether totals will display for the values of all the groups.
-
Click Save & Apply.
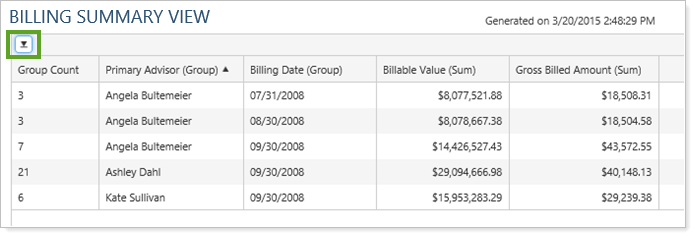
You'll see the columns you selected, grouped, and aggregated to provide a summary view.
Example
You want to view account values for accounts assigned to a particular advisor. To do this, you first create the Account Information bulk report so that it contains columns such as Rebalancing Account Value and Total Account Value. Then, you create a saved search to specify a particular advisor, and use these to create your custom view.
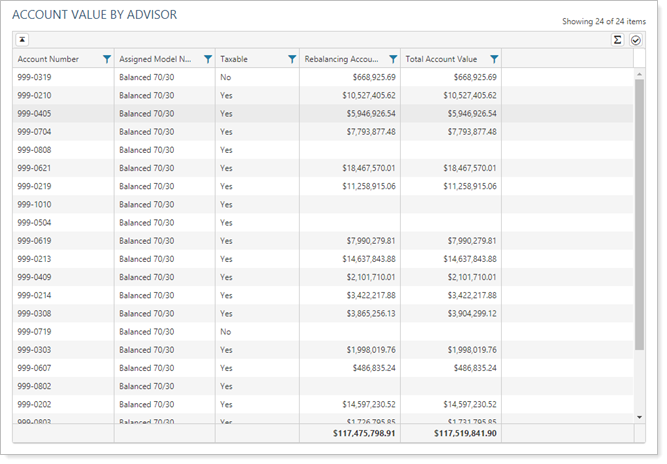
Once you've created this view, you can select the Show grand totals check box to see the totals for numeric columns, such as Total Account Value.
In addition, you can group by other columns included in your bulk report, such as the model assigned to each account, or the tax status of each account.
Step 5: Export the Data to a Spreadsheet
After you've created your custom view and customized the filtering and sorting, you can export the data to Excel or your spreadsheet program.
To export a custom view to Microsoft Excel, click Export Data at the top of the page.

Export Data filenames use the view name and include the date and time so you can easily identify your exported files.

Customize a Custom View
Once you've created your custom view, you can customize the view and the Custom View page in the following ways.
Update a Custom View with New Data
Once you've created your custom view, follow these steps to update the view with new accounts or securities that meet the saved search criteria.
-
On the Reports menu, click Custom Views.
-
Select the custom view you want to update in the Custom view list.
-
Click Regenerate.

Copy a Custom View
If an existing custom view is close to what you want to set up, you can clone it and create a variation of the original custom view.
To copy a custom view, follow these steps:
-
Click Custom Views on the Reports menu.
-
In the View list, select the accounts this view will use.
-
In the Custom view list, select the custom view you want to clone.

-
Click Edit.
-
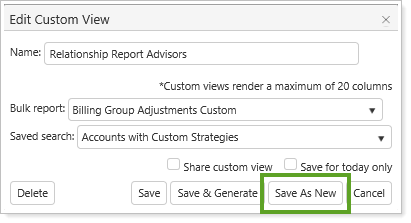
In the Name box, type the name of your new custom view.
-
In the Bulk report list, select the bulk report you want to use.
-
In the Saved search list, select the saved search you want to use.
-
Optional: If you want to share your custom view, click the Share custom view check box.
-
Optional: If you want to save this custom view temporarily, without having to remember to go back and delete it later, click the Save for today only check box.
-
Click Save as New.
Update Custom View Grouping
To edit grouping on the Custom Views page, follow these steps:
-
On the Reports menu, click Custom Views.
-
Select the custom view you want to update in the Custom view list.
-
Click
. This opens the Configure Grouping and Aggregation dialog box where you'll see the columns found in your bulk report.
-
Make the desired changes by omitting columns you don't want to see, and grouping or aggregating any columns you do want to see.
-
Click Save & Apply.
Delete a Custom View
To delete a custom view, follow these steps:
-
On the Reports menu, click Custom Views.
-
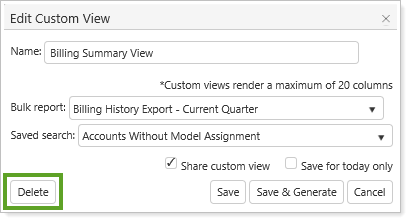
In the Custom view list, click the custom view that you want to delete, and then click Edit.

-
On the Edit Custom View dialog, click Delete.
Customize the Custom Views Page
As you work in a custom view, you can change to customize the way you see the data on the page in the following ways.
Maximize Your Work Area
If you have a large number of groups to view, you can expand your work area by clicking the  button under the name of the view.
When you're ready to work in the normal view again, click the  button.
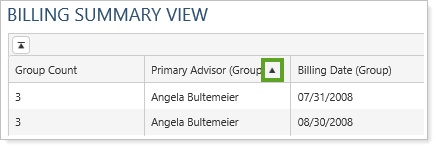
Sort a Column in a Custom View
To sort a column, click the column headings you want to sort. You will see an up or down arrow next to the heading showing that the field is sorted in ascending or descending order.
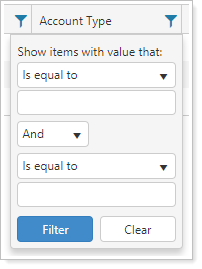
Clear a Column Filter
If you want to undo a column that you've filtered, follow these steps:
-
Click the filter button (
 ) that appears on the column heading.
 -
Click Clear.
Save Custom View Display Settings
You can save all of your display settings by clicking the  button on the Custom Views page so you won't have to set up the view each time. All settings, including custom column widths, filter options, and sorting will be saved. If it's a shared custom view, all other users will also have these settings applied the next time they use the report.
