
Contents
|
Customize a Service Request Form Types of Service Request Forms Open or Create a Service Request Form Create Custom Fields for the Service Request Form |
Introduction
When you set up a custom service request for your firm, you can add and adjust fields on the service request form. This will allow you to customize your firm’s unique fields for data collection.
This is step 1 in the Workflow: Set Up Custom Service Requests in Tamarac CRM.

Before You Start
To add fields to custom service request forms, you must have System Customizer permissions.
For more information, see Customize Service Requests in Tamarac CRM.
Customize a Service Request Form
To customize a service request form, you must:
-
Open or create a custom service request form.
-
Optionally create custom fields to add to the custom form.
-
Add and adjust existing fields on the service request form as needed.
Types of Service Request Forms
You can customize the following types of service request forms:
-
Custom service request forms
-
Managed service request forms
We recommend as a best practice to adjust custom service request forms instead of managed service request forms in Tamarac CRM. Managed service requests may receive automatic updates in the future that cause your unique changes to be lost.
Open or Create a Service Request Form
To open or create a custom service request form:
-
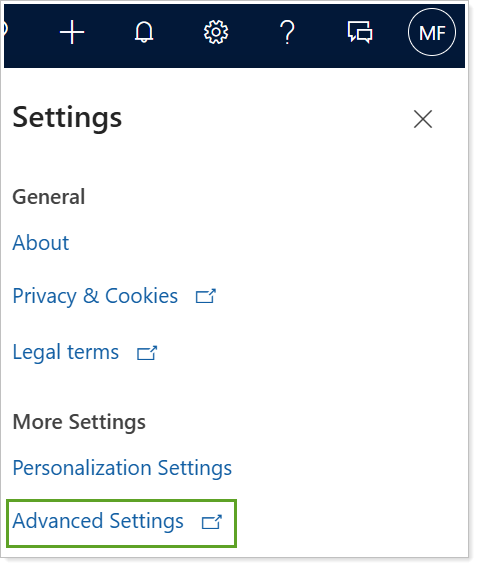
In Tamarac CRM, select Settings.

-
Select Advanced Settings.
-
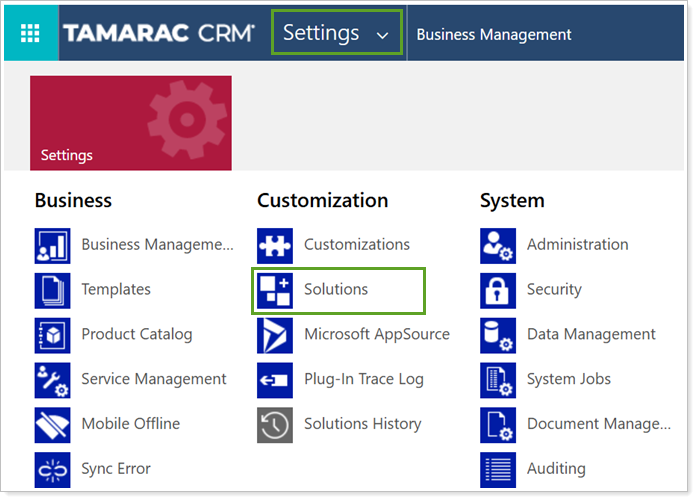
In the Settings menu, under Customization, select Solutions.
-
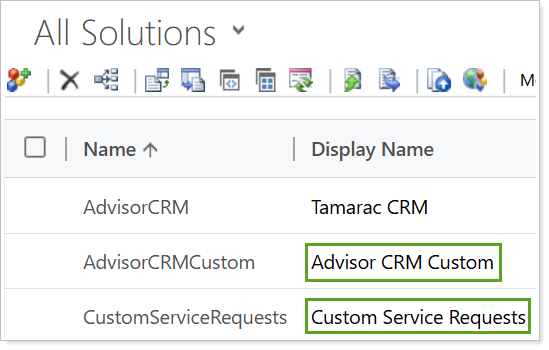
Under All Solutions, select Custom Service Requests. If you do not see this option, select Advisor CRM Custom.
-
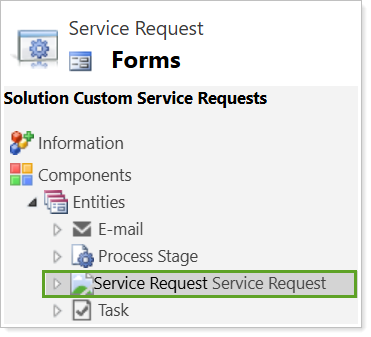
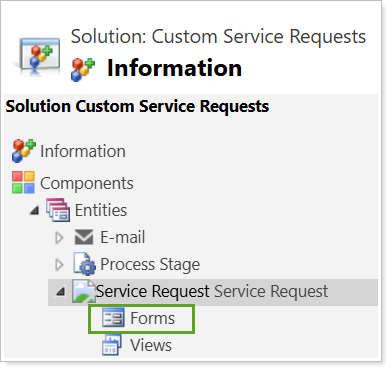
In PowerApps, under Components, select Entities.

-
Under Entities, select Service Request.
Note
If you do not see Service Request, please contact Support for assistance.
-
Under Service Request, select Forms.
-
Select the form labeled Custom and Unmanaged.
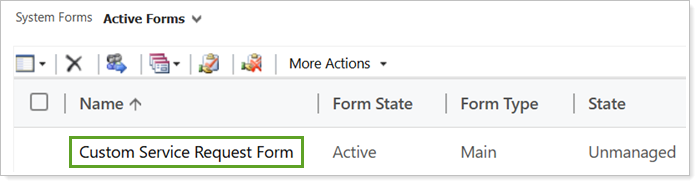
The custom service request form opens for editing. You can now add existing fields or create custom fields to add to the form.
Create Custom Fields for the Service Request Form
To create a custom field:
-
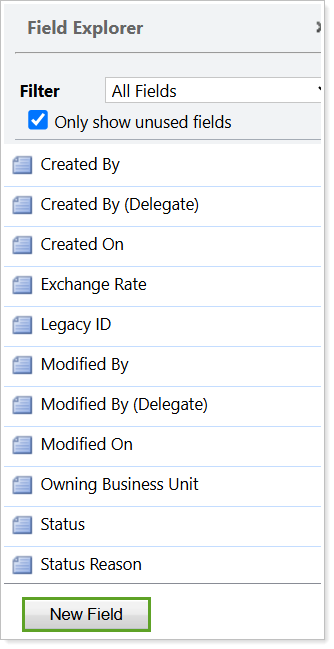
In the Field Explorer panel, select New Field.
-
Under Schema, enter the Display Name for the new field. This is the name that users see when they complete the service request form.

Note
The Display Name has a 50-character limit.
-
Choose your desired Data Type.
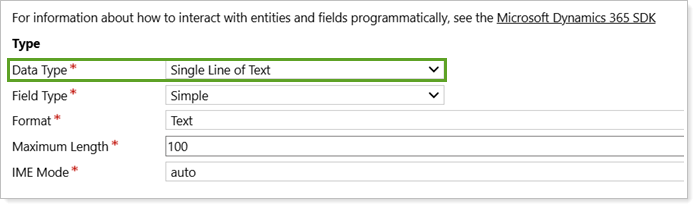
Important
When you select a Data Type, consider the following:
- You cannot select Multiselect Option as your Data Type in a service request workflow.
-
Once the field is created with a Data Type, it can’t be changed afterwards.
For more information on the Data Type options, see Types of columns (links to an external site).
-
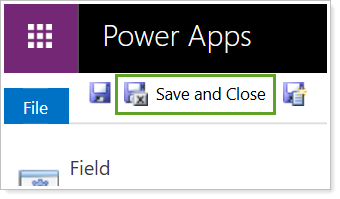
Select Save and Close.
To see the new field appear on the list, you must refresh the custom form window. Press F5 on your keyboard to refresh. Alternatively, select New Field and then close the window to return to the custom form.
Add Fields to the Service Request Form
Once you have your new custom field or existing fields selected, you must add them to a service request form.
To add a field to your custom service request form:
-
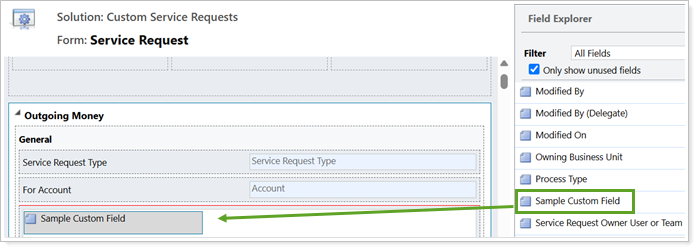
In your custom service request form, drag and drop the existing or custom field to the appropriate place on the form.
-
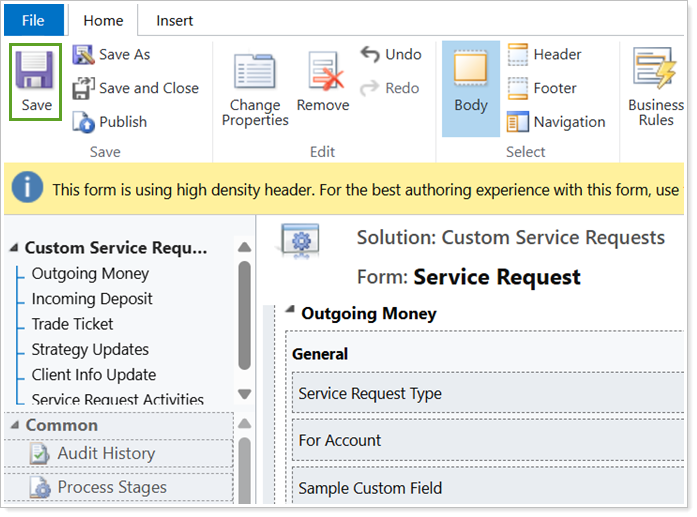
Select Save.
-
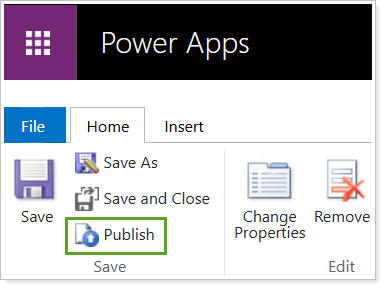
Once you add all fields and save the custom form, select Publish.
Next Steps
Once you have added fields to the service request form, you can optionally create business rules to control service request field requirements and visibility based on specific conditions. For steps, see Create Business Rules for Service Requests.
To continue to the third step in the workflow, see Create Modern Dialogs for Service Requests.