Back
Back Home > Tamarac Reporting > Clients and Client Portals > Client Portals > Setting Up Client Portals > Client Views > Client Views Pages > Add Dashboard Tabs and Report Pages on the Dashboard Page
|
Back |
Home > Tamarac Reporting > Clients and Client Portals > Client Portals > Setting Up Client Portals > Client Views > Client Views Pages > Add Dashboard Tabs and Report Pages on the Dashboard Page
|
Add Dashboard Tabs and Report Pages on the Dashboard Page
|
What Are Dashboard Tabs and Report Pages? |
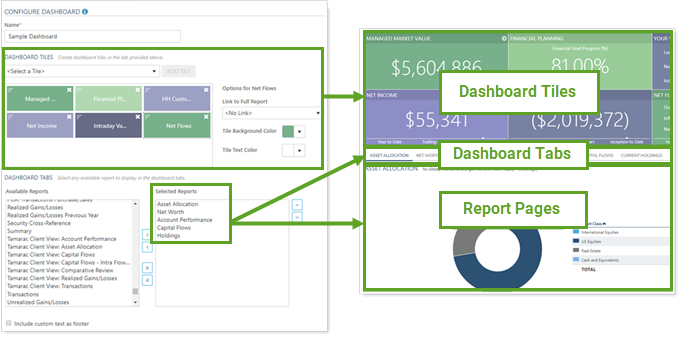
The dashboard is the landing page when your clients visit Tamarac Reporting. It shows the information that you share with your client and consists of the following elements:
Dashboard tiles. For more information about dashboard tiles, see Arrange and Format Dashboard Tiles on the Dashboard Page.
Dashboard Tabs and Report Pages. This topic provides more information about adding reports to the dashboard.
Disclosures. You can add custom text to the footer of your dashboard. You can use this space to add compliance statements, disclaimers, footnotes, and any other information you want your client to see when signing into the client portal. For more information, see Add Custom Footer to the Dashboard Page.
For more information on the client portal dashboard page, see Client Views - Dashboard Page.
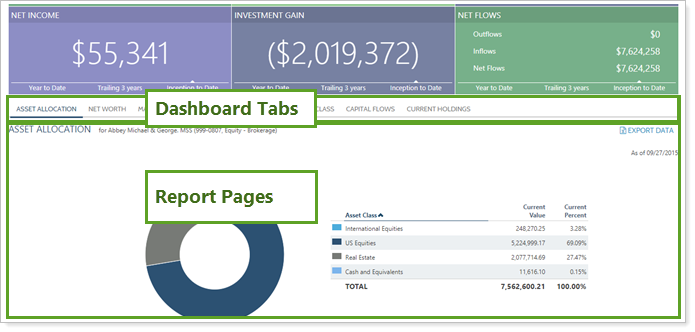
Add specific reports or pages to the dashboard to highlight them or bring them to clients' attention when they first arrive at the portal. Dashboard tabs appear beneath the dashboard tiles and link to reports that you add to the dashboard. When you add a report to the client portal dashboard, a dashboard tab is automatically created to provide direct access to each report on the dashboard.
You can add as many tabs as you want, change the name of the tab, and change the order that they appear. You can also control where the View Full Report link takes the user—for example, you can have a dashboard tab that shows only an Account Performance report with only month-to-date performance, but the View Full Report link shows month-to-date and yearly performance.
For more information on creating additional reports to add to your dashboard, visit Client Views - Reports Pages.
To add reports to the client portal dashboard:
On the Client Reporting menu, click Client Views.
Click the Report / Pages tab.
Choose an existing dashboard from the Select a Report or Page list, or in the Report and Page Types list, click Dashboard.
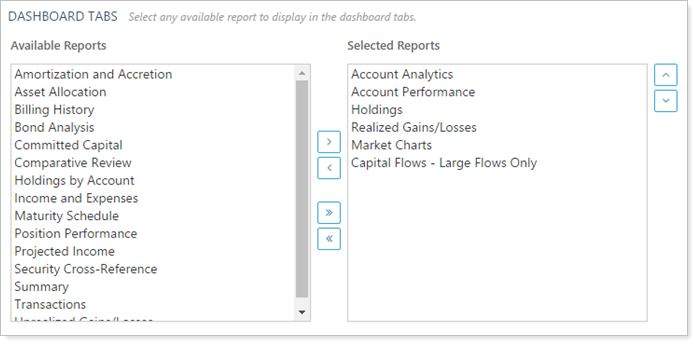
In the Dashboard Tabs section, move reports from Available Reports to Selected Reports to add them to the client portal. Dashboard tabs linking to the reports are added to the dashboard in the order they are listed. For more information on using this tool, see Available/Selected Columns.
Click Save.
For more information on creating additional reports to add to your dashboard, visit Client Views - Reports Pages.
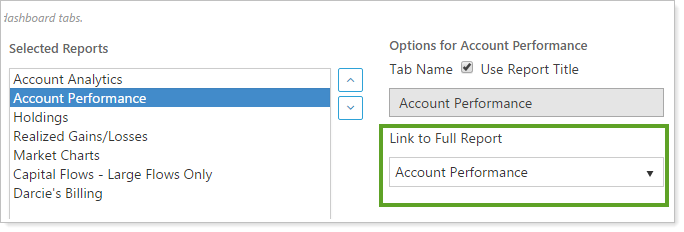
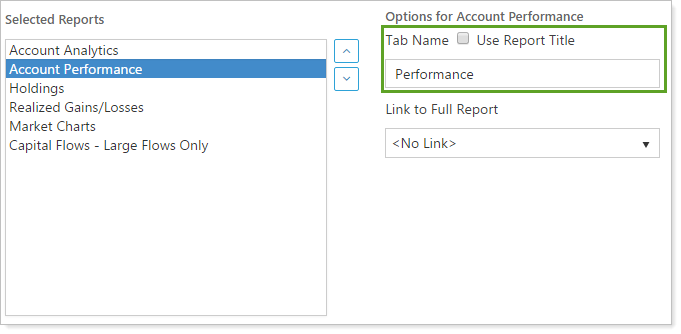
You can shorten report names if the default name is too long. For more information, see Tab Name.
For more information on creating additional reports to add to your dashboard, visit Client Views - Reports Pages.
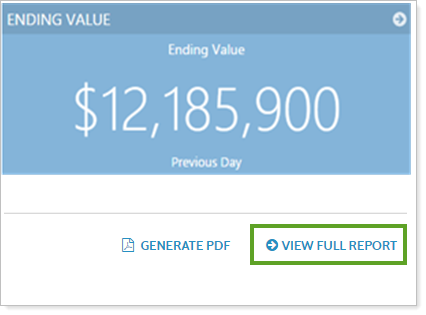
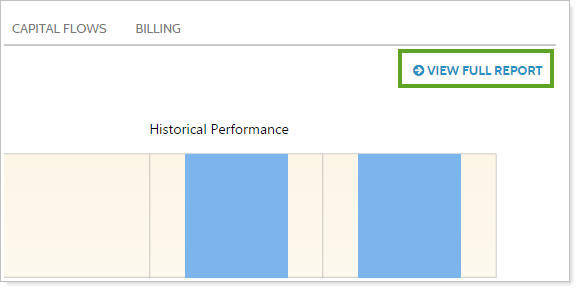
From the Dashboard tabs, you can link to full reports. The reports appear as View Full Report links, as shown in the picture below. When linking to a full report, we recommend linking to a report that contains more information than the report you're linking from.
Full reports are the same as the reports that appear on the dashboard tabs. The only difference is that dashboard tab reports are shown on the dashboard and full reports are shown on the Reports menu. The reason we've named the reports "full reports" is because some users prefer to use "shorter" reports on the dashboard and link to a "fuller" report that includes more information. In theory, there's no real difference between a full report and any other type of report—we've simply named it "full report" because most users use the feature to link from smaller reports to reports with more information.
For more information on creating reports, visit Client Views - Reports Pages.
Under Dashboard Tabs, click the report where you want to create the link to the full report. In the Link to Full Report list, click the full report where you want the link to take the client.