Contents
Easily Maintain Your Dates and Date Periods
In Advisor View, you can quickly view reports for any date or date range for which data exists. The Dates and Date Periods pages allow you to create multiple dates and date ranges that you can reuse later on other reports. Over the years, some of you have mentioned that dates and date ranges that are no longer needed have built up over time from everyday use. These obsolete dates and date periods make it difficult to find the date or date period you want to add to a report and clutter your drop-down lists.
With this release of Advisor View, we've introduced some changes to help you avoid the clutter associated with obsolete date periods:
-
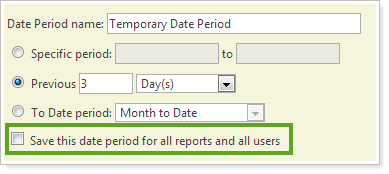
Specify Temporary Dates and Date Periods.In some cases, you may want to add a date or date range to a specific report - for example, let's say you just want to view performance for a specific date period to prepare for a client meeting. You probably wouldn't want to use this date period again. With this scenario in mind, we've introduced temporary dates and date periods. Temporary dates and date periods will be used on the report for which it was created, but will not appear in any other drop-down lists. Advisor View will automatically delete the temporary date or date period when it's no longer in use on the report. Dates and date periods will be identified as temporary by default, but you can continue to save dates and date periods to be available for all users at your firm by selecting the Save this date period for all reports and users check box. Learn More >>
-
Quickly identify reports that use a specific date or date period.When maintaining your dates and date periods, it's usually helpful to identify the reports that are using a specific date or date period. To make it easy to quickly see which reports are using a date or date period, you can now export the usage information to Microsoft Excel. To export this information, simply click the In Use link for the applicable date or date period on the Dates or Date Periods pages.

Modify Labels
Labels help you organize your documents into categories — performance reports, tax documents, important forms, and any category you want. Labels do all the work that folders do, but with an added bonus: you can add more than one to a document.
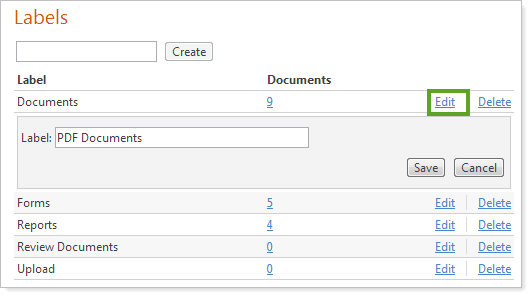
We've offered labels in Advisor View for years, and the response has been great. However, a few of you wanted the ability to make changes to existing labels - for example, you wanted the ability change the name of your Documents label to PDF Documents. Before this release, you'd have to remove the Documents label from all documents that use it, create the PDF Documents label, and then assign it to the applicable documents. With this release, you can simply click an Edit button, type a new label name and you're done.
Automated Email Customization
New client portal setup, password resets, new documents and more all require Advisor View to send an email to your clients. For example, when you reset a password, Advisor View will send an email to your client with instructions on how to reset the password.
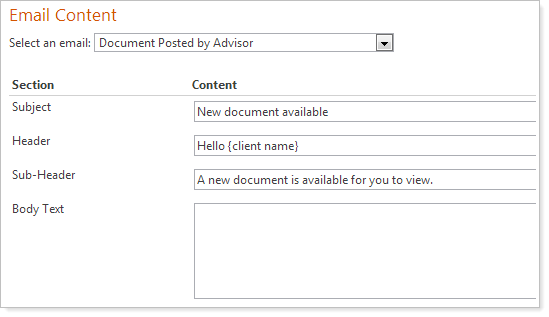
In this release, you can customize the automated email messages that Advisor View sends—even if you don't have any specialized knowledge of HTML. You simply type the email message in the email editor and insert fields from the database (much the same as a mail merge in Word or other programs), resulting in personalized emails.
For those of you that use single sign on (when your clients sign into your website, they will be authenticated in Advisor View as well), we're pleased to announce that you can now specify the website address of your portal. This change allows you to send clients to your website to sign into Advisor View.

Prevent Drill-Down for the Account Performance Report
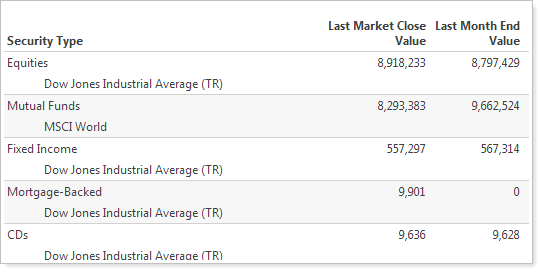
To analyze data on the dynamic Account Performance report, many of you click the  to drill-down into the securities or holdings for the group. However, some of you have asked to disable the drill-down functionality of the report. We've listened to your feedback and Advisor View now contains this option.
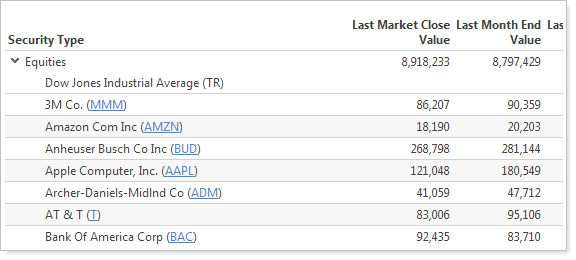
To disable the drill-down feature on the Account Performance report, in the report settings, click Do not expand for When expanding a group, show.

After enabling this option, the Account Performance report will look similar to the picture below.
Build Composites Using Saved Searches
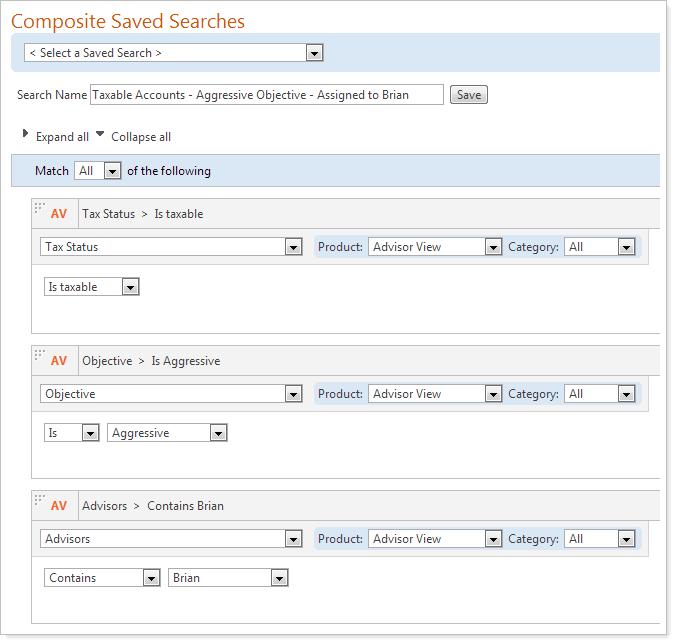
In the March release of Advisor View, we delivered composite reporting, which gives you the power to create composites that follow GIPS standards. In this release we've made composite reporting even more powerful by making it easier to build precise composites.
Now you can identify accounts to add to a composite by using saved searches. Using saved searches, you can look for accounts that meet specific criteria - for example, you can use saved searches to locate discretionary, fee-paying accounts that have the same objective (such as aggressive accounts). By using saved searches, you can organize workflows to identify accounts that meet your predefined criteria.
Improved Usability for Setting Up and Maintaining Client Portals
In the last release of Advisor View, we overhauled the Portal Account Setup page and gave it a new look. Based on your feedback, we've made a few changes to make it even easier to set up and configure client portals.
These changes include:
-
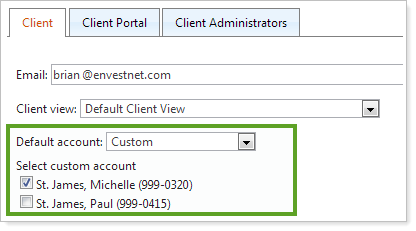
Set a Default Account.When you set up a client portal, you can now specify the default account your client will see when signing into the client portal. You can choose All Accounts or you can select Custom to specify the default account.
-
More robust searches.When you search for portals on the Client Portal Setup page, Advisor View will now return results when your search term matches the client name, client portal name, and email address when you filter by client.
-
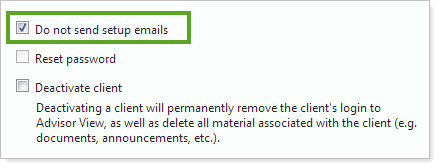
Opt Out of Setup Email Messages.If you're using single sign on (when your clients sign into your website, they will be authenticated in Advisor View as well), you can now tell Advisor View not to send setup email messages to your clients. To do this, simply select the Do not send setup emails check box when setting up the client portal.
-
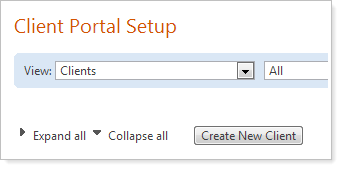
New Default View.When you visit the Client Portal Setup page, Advisor View will now default to the client view instead of the client portal view. We made this change because most users find it convenient to create the clients before building the client portals.
Asset Allocation Over Time Report
Many of you have asked to view the asset allocation report based on new grouping options or over time because a client's asset allocation might change based on changes in his or her financial situation, age, progress toward financial goals, rebalances, etc. Advisor View now gives you and your clients the option to view this information on the Asset Allocation report.
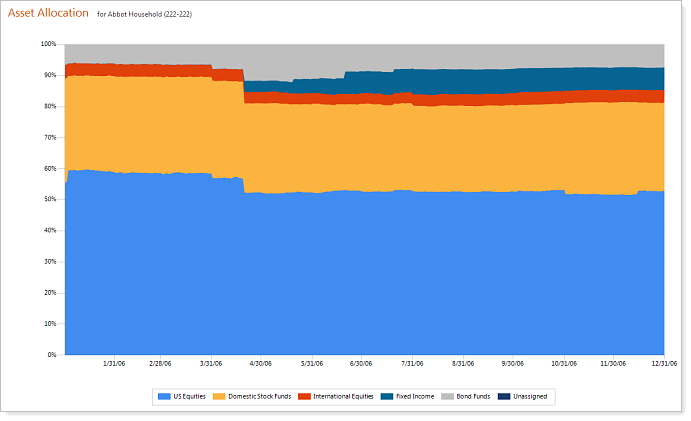
To check out this chart, in the report settings, click Allocation over time.
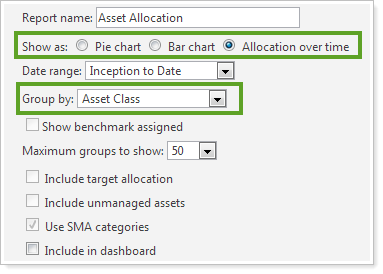
In addition, you can now group the report by account, account type, objective, or tax status.
For more information on adding this chart to your dynamic and PDF reports, visit Asset Allocation Report.
New Search Filters for Saved Searches
We've added the following new search filters that will make it easier to find the information you want:
-
Asset Allocation Within or Outside Tolerance.Find accounts that have drifted outside the target asset allocation you specified in Advisor View.
-
Billing Group.Now you can find accounts that are not assigned to any group or are assigned to any group, instead of specifying a specific billing group.
-
Closing Value.Finds accounts with a closing value you specify.
-
Custodian.Find accounts assigned to a particular custodian in Advisor View.
-
Initial Value.Find accounts with an initial value you specify.
-
Securities Excluded from Billing.Find accounts that are assigned securities that have been excluded from billing calculations.
-
Securities Excluded from Performance.Find accounts that are assigned securities that have been excluded from performance calculations.
-
Target Allocation.Find accounts assigned to a particular asset allocation.
-
Tax Status.Find taxable or non-taxable accounts.
-
Variance.Find accounts that have drifted from the target asset allocation. You specify the variance as a dollar amount or as a percentage.
View Net Income in the Summary Section of Your PDF Reports
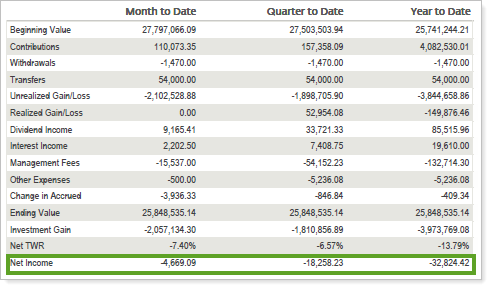
You now have the option to add a Net Income row to the Summary section of your PDF reports. Net Income is calculated as income (dividends + interest) without management fees and other expenses.
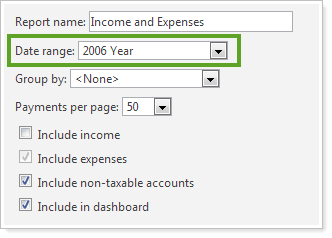
Specify a Date Range on the Dynamic Income and Expenses Report
When working with the dynamic Income and Expenses report, you may want to look at a specific time period - for example, calendar year 2006. With this in mind, you can now specify a date range on the dynamic Income and Expenses report.
To check out this new feature, in the report settings for the dynamic report, click the date range you want in the Date range list.
Permissions Update for Securities Page
On the Securities page, you can assign benchmarks and specify the treatment of securities as cash (This is useful for extremely liquid funds that a firm wants to report as cash and treat as cash). These permissions are independent of each - in other words, you can allow a user to assign benchmarks but prevent him or her from specifying the treatment of securities as cash. In this release, we've combined those permissions in to a single permission. This means that if a user has rights to assign benchmarks, he or she will also have rights to specify that a security should be treated as cash.

