 Back
Back Home > Tamarac Reporting > Integrations > CRM Integrations > Salesforce Integration > Install and Configure Tamarac App > Workflow: Install the Tamarac App
|
Back |
Home > Tamarac Reporting > Integrations > CRM Integrations > Salesforce Integration > Install and Configure Tamarac App > Workflow: Install the Tamarac App
|
Workflow: Install the Tamarac App
The Salesforce integration puts detailed account information at your fingertips, as well as streamlining your workflows around client onboarding and data maintenance by seamlessly syncing between Tamarac Reporting and Salesforce.
This page provides links to the steps for the Step 1 in the overall onboarding workflow for firms that the following Salesforce installations:
Classic Sales Cloud
Sales Cloud with Lightning Experience
Sales Cloud with Custom Financial Account Object
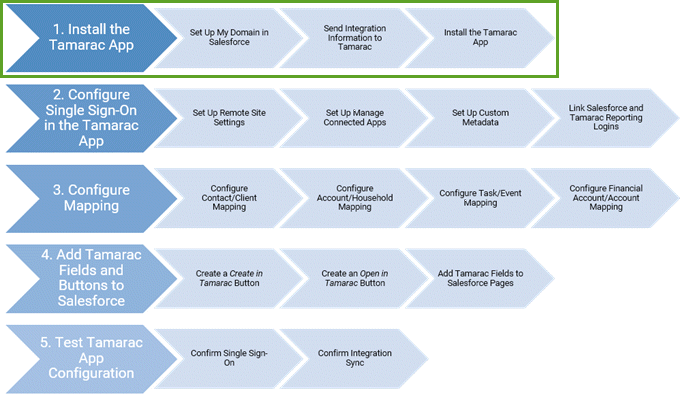
This workflow covers the following installation steps:
Before you can start installing and configuring the Tamarac app in Salesforce:
Contact Tamarac Account Management to complete the paperwork to add the Salesforce integration to your Tamarac account. They will help you confirm that the Salesforce integration will meet your firm's needs. For more information, see Before You Start: Salesforce Considerations.
Once the paperwork is complete, your dedicated Support team will contact you to provide the installation file and details on how to install the Tamarac app.
|
|
1. |
Configure My Domain in Salesforce to obtain your domain URL. |
|
|
2. |
Send Integration Information to Tamarac > Send your domain URL and Salesforce Organization ID and certificate to Tamarac. |
|
|
3. |
Receive and install the Tamarac app. |
The next step in the onboarding workflow for Salesforce users who do not use Financial Services Cloud is Workflow: Configure Single Sign-On in the Tamarac App.
For more information about Salesforce integration features, see About the Salesforce Integration.
For information about how to use the Salesforce integration, see Learn More About Using the Tamarac App.