Contents
|
Create a Billing Group Manually |
Introduction
These are the steps for how to create, edit, or delete a billing group. A billing group is a collection of financial accounts you want aggregated together to determine the billable value and the billed amount. By treating these accounts as a group, you can avoid managing the billing preferences of accounts on an individual basis. Instead, you can attach the billing information such as billing definitions, payment distribution, adjustments, and statement display options to all the billing group member accounts at once.

Smart Help Video: Building Billing Groups
In this short video, you'll learn about how to create billing groups in Tamarac.
For more information on when to use billing groups, see Understanding Billing Groups and Understanding the Difference Between Billing Groups and Reporting Groups.
This is one step in the Workflow: Set Up Billing.

Create a Billing Group
You can create billing groups one at a time manually, using the onscreen interface, or you can create multiple billing groups at once using bulk reports. The following are steps for each method.
Create a Billing Group Manually
To create a billing group manually:
-
On the Billing menu, click Billing Groups.
-
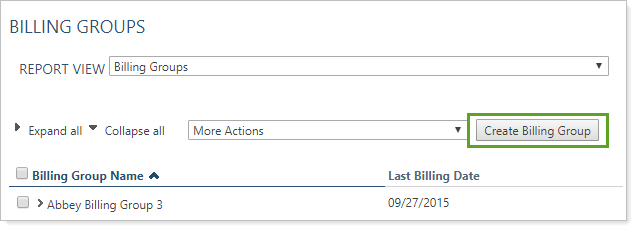
Click Create Billing Group.

-
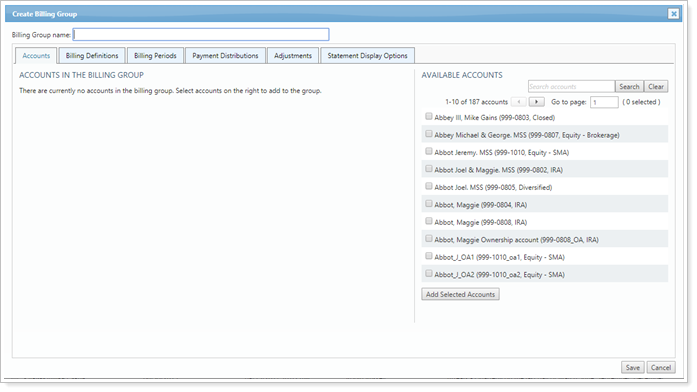
In Billing Group Name, type a name for the billing group.

-
Configure the billing group tabs. For more information on configuration options for each tab, see Billing Groups Settings.

-
Click Save.
Create a Billing Group via Upload
To create a billing group using an upload, generate a standard bulk upload that includes the following data sets:
-
Billing Group Information data set. This set must include at least the following columns:
-
New Billing Group Name: This is the name of the new group you are creating.
-
Billing Definition: The billing definition must be included or the upload will fail. Other billing group settings can be added but are not required.
-
-
Billing Group Accounts upload data set. This set must include at least the following columns:
-
Billing Group Name: This name should match the New Billing Group Name you set in the Billing Group Information data set.
-
Account Number or Upload ID: The account number of all the accounts you want to add to the group.
-
Edit a Billing Group
To edit a billing group:
-
On the Billing menu, click Billing Groups.

-
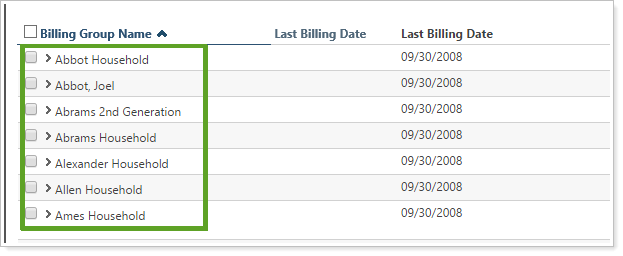
In the list of billing groups, click the group you want to edit.
-
Make the necessary changes to the billing group and then click Save.
Delete a Billing Group
To delete a billing group:
-
On the Billing menu, click Billing Groups.
-
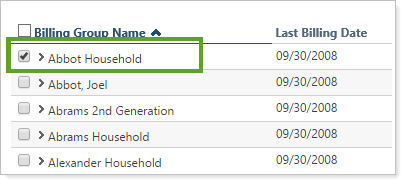
In the list of billing groups, select the check box to the left of the group you want to delete.

-
In the More Actions list, select Delete.

- Select Delete in the warning pop-up.

