
Contents
Introduction
If you've prepared data to upload, you can quickly and easily upload that data by copying it from a spreadsheet or file and pasting it directly onto the Upload page. This is the easiest way to edit large amounts of data in Tamarac Reporting.
This page provides steps for how to upload bulk data into Tamarac. For information about how uploads work and details about using uploads, see Understanding Bulk Data Uploads.
Keep the following in mind when uploading:
-
You can upload multiple upload data sets at one time by selecting each additional upload data set in the Add an upload data set list and clicking Add.
-
If your upload includes Reporting Group Direct Members, Billing Group Accounts, or Households Members upload data sets, see Upload Settings: Replace Existing Billing Group Accounts, Reporting Group and Household Direct Members.
For more information on available upload data sets, see Available Upload Data Sets.
Upload Data Using Copy & Paste
To upload data by copying and pasting it, follow these steps:
-
Open the file that contains the formatted data you want to upload. Often, this is done in a spreadsheet program like Excel.
-
Select and copy the data.
In Windows, use Ctrl+A to select all data and Ctrl+C to copy the data.
-
In Tamarac Reporting, click Upload on the Setup menu, found under Data Management.
-
Select the data set you want to upload in the Add an upload data set list and click Add.

For more information on available upload data sets, see Available Upload Data Sets.
-
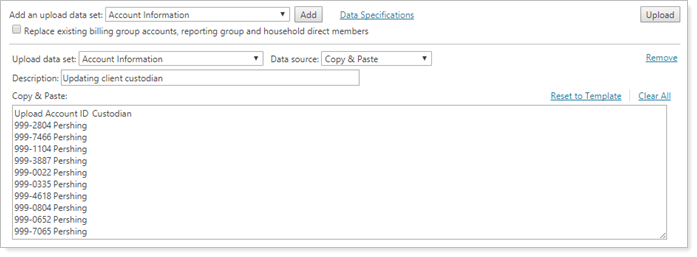
In the Data source list, choose Copy & Paste.

-
Add an optional description of the upload in the Description box.
-
Paste the data into the Copy & Paste box. Use Reset to Template to add a list of all the available data points automatically.
In Windows, use Ctrl+V to paste.
-
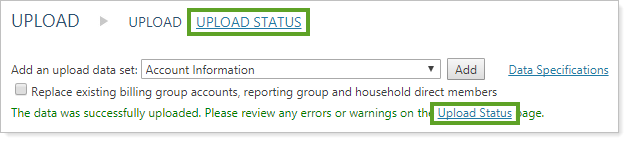
Click Upload.
-
Click the Upload Status link to go to the Upload Status page. This page allows you to verify if upload was completed successfully and to check for possible errors or warnings.
Upload Data From a File
To upload data from a file, follow these steps:
-
Click Upload on the Setup menu, found under Data Management.
-
Select the data set you want to upload in the Add an upload data set list and click Add.
For more information on available upload data sets, see Available Upload Data Sets.
-
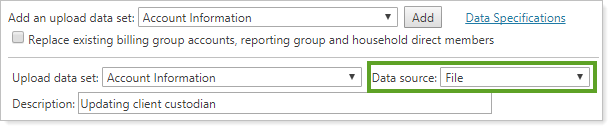
In the Data source list, choose File.
-
Add an optional description of the upload in the Description box.
-
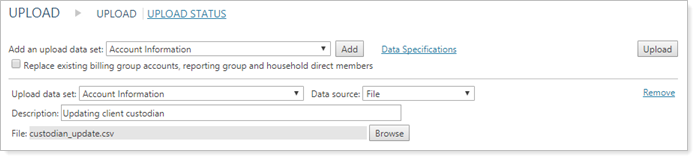
Click Browse, locate the file where you've saved your data to upload, and click Open.
-
Click Upload.
-
Click the Upload Status link to go to the Upload Status page. This page allows you to verify if upload was completed successfully and to check for possible errors or warnings.