 Back
Back|
Back |
|
Create, Edit, or Delete a Page View
Page views allow you to customize the columns displayed on the Accounts, Households, Clients, and Securities pages. This topic provides steps for how to create, edit, delete, or copy page views.
For more information on page views, see Using Page Views.
To create a view, follow these steps:
Open the grid page you want to view.
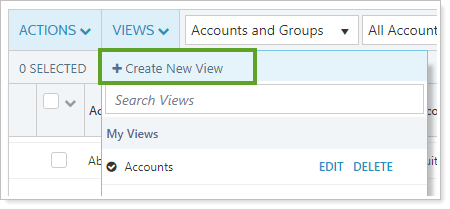
On the Views menu, click Create New View. This opens the Create View dialog box.
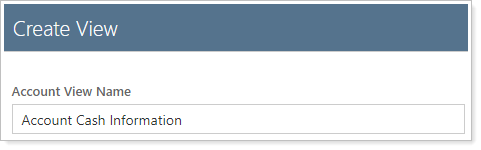
Type the name for your new view in the View Name box. Be descriptive so you can identify your view later.
Complete the following settings:

| Setting | Applicable Pages | More Information |
|---|---|---|
| View Name |
|
Type a name for the account view. This name appears in the Views list once you create the view. For more information, see Account View Name, Household View Name, and View Name. |
| Available columns / Selected columns |
|
Select the column(s) you want to add to the view.
You can also rename some of these columns. For details, see Customize a Column Name for Reports and Pages. For more information, see Available/Selected Columns. |
| Mark as publicly accessible |
|
Share your view with other firm users. For more information, see Mark as Publicly Accessible. |
| Include unmanaged assets in variance |
Accounts |
Include unmanaged assets in the calculation for percent variance from target allocation. For more information, see Include Unmanaged Assets in Variance. |
| Use SMA categories in variance |
Accounts |
Use SMA categories in the calculation for percent variance from target allocation. For more information, see Use SMA Categories in Variance. |
| Show closed accounts |
Accounts |
Choose how the view displays closed accounts. For more information, see Show Closed Accounts. |
| Filter categories |
Securities |
Narrow down the securities displayed by various categories. For more information, see Filter Categories. |
| Columns with applied filters |
Rebalance |
See a list of all columns with preset column filters applied. |
Click Create.
To edit an account view, follow these steps:
Visit one of the following pages:
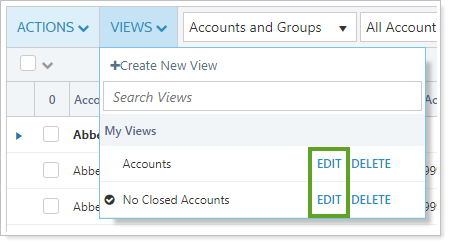
On the Views menu, click Edit next to the view you want to edit.
If a column name displays in gray, it can't be edited.
Make the necessary changes.
| Setting | Applicable Pages | More Information |
|---|---|---|
| View Name |
|
Type a name for the account view. This name appears in the Views list once you create the view. For more information, see Account View Name, Household View Name, and View Name. |
| Available columns / Selected columns |
|
Select the column(s) you want to add to the view.
You can also rename some of these columns. For details, see Customize a Column Name for Reports and Pages. For more information, see Available/Selected Columns. |
| Mark as publicly accessible |
|
Share your view with other firm users. For more information, see Mark as Publicly Accessible. |
| Include unmanaged assets in variance |
Accounts |
Include unmanaged assets in the calculation for percent variance from target allocation. For more information, see Include Unmanaged Assets in Variance. |
| Use SMA categories in variance |
Accounts |
Use SMA categories in the calculation for percent variance from target allocation. For more information, see Use SMA Categories in Variance. |
| Show closed accounts |
Accounts |
Choose how the view displays closed accounts. For more information, see Show Closed Accounts. |
| Filter categories |
Securities |
Narrow down the securities displayed by various categories. For more information, see Filter Categories. |
| Columns with applied filters |
Rebalance |
See a list of all columns with preset column filters applied. |
Click Save.
You can only delete views you create or have permission to delete.
To delete an account view, follow these steps:
Visit one of the following pages:
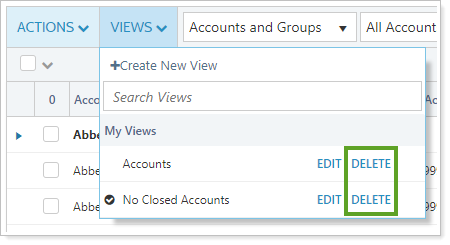
On the Views menu, click Delete next to the view you want to delete.
Confirm the deletion.
To duplicate a view, follow these steps:
Visit one of the following pages:
On the Views menu, click Edit next to the view you want to copy. This opens the Edit View dialog box.
In the View Name box, type a unique name for the new view you want to create.
Make the necessary changes.
| Setting | Applicable Pages | More Information |
|---|---|---|
| View Name |
|
Type a name for the account view. This name appears in the Views list once you create the view. For more information, see Account View Name, Household View Name, and View Name. |
| Available columns / Selected columns |
|
Select the column(s) you want to add to the view.
You can also rename some of these columns. For details, see Customize a Column Name for Reports and Pages. For more information, see Available/Selected Columns. |
| Mark as publicly accessible |
|
Share your view with other firm users. For more information, see Mark as Publicly Accessible. |
| Include unmanaged assets in variance |
Accounts |
Include unmanaged assets in the calculation for percent variance from target allocation. For more information, see Include Unmanaged Assets in Variance. |
| Use SMA categories in variance |
Accounts |
Use SMA categories in the calculation for percent variance from target allocation. For more information, see Use SMA Categories in Variance. |
| Show closed accounts |
Accounts |
Choose how the view displays closed accounts. For more information, see Show Closed Accounts. |
| Filter categories |
Securities |
Narrow down the securities displayed by various categories. For more information, see Filter Categories. |
| Columns with applied filters |
Rebalance |
See a list of all columns with preset column filters applied. |
Click Save as New.
You can share your views for others to see. Users will see any views they have created for the Accounts page, plus any that have been made publicly available (and which an administrator has given them permission to view, using the User Management page) under the Shared Views heading.

To share an account view, follow these steps:
Visit one of the following pages:
On the View menu, click Edit next to the view you want to share.
Select Mark as publicly accessible.

By default, marking a view as publicly accessible doesn't automatically share it with all users since a large number of shared views would clutter the Accounts page. Instead, shared views must be approved by an administrator before they are shared with others. If you're signed in as an administrator, a Manage View Access link will appear. Click this link to share it with other users.
Click Save.
 to add a column to the Selected list.
  .
.  .
.