Contents
How do I set up billing in advance?
To set up billing in advance, follow these steps:
-
On the Billing menu, click Billing Definitions.
-
In the Select a billing definition list, choose an existing billing definition. If you haven't created a billing definition, see Create, Edit, or Delete a Billing Definition.
-
Under Bill in, click Advance.
-
Click Save.
How do I set up billing in arrears?
To set up billing in arrears, follow these steps:
-
On the Billing menu, click Billing Definitions.
-
In the Select a billing definition list, choose an existing billing definition. If you haven't created a billing definition, see Create, Edit, or Delete a Billing Definition.
-
Under Bill in, click Arrears.
-
Click Save.
I have a father who wants to pay a portion of his child's bill. How do I set this up?
To do this, follow these steps:
-
On the Billing menu, click Billing Groups.
-
Click Edit next to the billing group where the child is assigned.
-
Add the father's account to the billing group. To do this, select his account in the Available Accounts column and then click Add Selected Accounts.
If the only reason you added the account to the billing group was to use it as a payment account, select Exclude ALL Securities from Billing on the account's Excluded Securities Panel.
-
On the Payment Distributions tab, click Add account under the child's account.
-
In the list that appears, click the father's account.
-
Specify the applicable payment distributions and then click Save. In the example below, the father (Michael) will pay half of his daughter's (Georgia) bill.

Does the average daily balance include weekend days?
Yes, average daily balance billing includes weekend days and holidays.
How is average daily balance calculated?
We take the summation of the daily ending value of billed securities for the days on which the account is to be billed (adjusted for custom/start end dates and billing inception/close dates) and divide by the number of days in the billing period.
How do I give a client discount?
Do one of the following:
| Discount Type | Actions to Take |
|---|---|
| Specific account discount |
|
| Billing group discount |
|
| Discount to all accounts assigned to a billing definition |
To give a discount of a set amount at the billing definition level, follow these steps:
To give a discount as a rate at the billing definition level, follow these steps:
|
How do I create an adjustment and apply a credit to a billing group or billing account?
To apply a credit to a billing group/billing account, see Create, Edit, or Delete a Billing Group Adjustment.
How do adjustments affect minimum fees?
Adjustments are deducted or added after the minimum fee is calculated.
Let's say you have the following billing situation:
-
The minimum fee amount in your billing definition is $250.00.
-
Tamarac Reporting calculates a fee of $270 for a client.
-
There is a $60 credit on the client's account.
Tamarac Reporting will not apply the minimum fee amount of $250 because the calculated amount of the bill is more than the minimum fee amount. Tamarac Reporting will then apply the credit amount of $60. The total calculated bill will be $210.
Can I turn off the proration of capital flows?
Yes, you can turn off prorations at the billing definition level.
To turn off proration of cash flows, follow these steps:
-
On the Billing menu, click Billing Definitions.
-
In the Select a billing definition list, click the billing definition where you want to turn off the proration of cash flows.
-
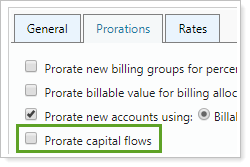
On the Prorations tab, clear the Prorate capital flows check box.
-
Click Save.
How do I set up billing periods?
To set up your billing periods, follow these steps:
-
On the Billing menu, click Billing Groups.
-
Click Edit next to the billing group where you want to specify the billing period. If you haven't created a billing group, visit Billing Groups.
-
Click the Billing Periods tab and complete the following:
Field More information Use billing inception date
Select this option if you want to set the billing start date as the date that the account was created. The billing inception date is determined by the billing inception date specified in PortfolioCenter.
Use custom billing period
Select this option if you want to specify a custom billing date. If you select this option, choose a start date for the account by clicking in the Billing inception box and then clicking the billing start date on the calendar. If you do not complete this entry, Tamarac Reporting will set the start date as the inception date.
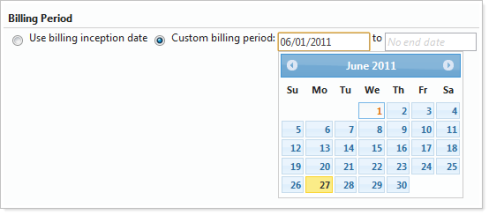
You can also specify an end date for the account in the end date box. However, this an end date is not a required entry.
-
Click Save.
How can I exclude small cash flows from billing?
To exclude small capital flows from billing, follow these steps:
-
On the Billing menu, click Billing Definitions.
-
In the Select a billing definition list, choose the billing definition where you want to exclude cash flows. If you haven't created a billing definition, see Create, Edit, or Delete a Billing Definition.
-
On the Prorations tab, specify the maximum amount you want to exclude in the Exclude flows under box.

-
Click Save.
How do I bill at a single rate?
To bill at a single rate, follow these steps:
-
On the Billing menu, click Billing Definitions.
-
In the Select a billing definition list, choose a billing definition. If you haven't created a billing definition, see Create, Edit, or Delete a Billing Definition.
-
Click the Rates tab and select the Bill at single rate check box. When you select this option, Tamarac Reporting assigns one billing rate to the entire account.
For example, you set up the following rate tiers:

With single rate billing, a portfolio with the value of $1.5 million would be billed at a rate of .20 percent and a portfolio with the value of $5.5 million would be billed at a rate of .10 percent.
If you do not use single rate billing, a portfolio with the value of $1.5 million would be billed like this: the first $1 million would be billed at a rate of 0.25 percent, and the remaining $500,000 would be billed at a rate of 0.20 percent.
-
Click Save.
How do I export my management fees?
To export the data from the dynamic Billing History report:
-
On the Billing menu, click Billing History.
-
In the Find Data For list, start typing the number or name of the account for which you want to run the report. Click the desired record. The report appears on your screen.
-
In the Report View list, choose a report view. If you haven't created a report view, visit Create a Billing History report view. The report appears on your screen.
-
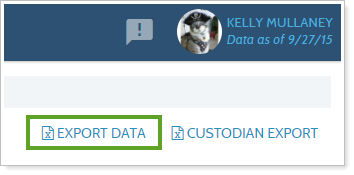
Click Export Data.
-
In the File Download dialog, click Open. You can open the CSV file in Microsoft Excel or any program that is capable of opening comma-delimited files.
How can I see a report of my billing history?
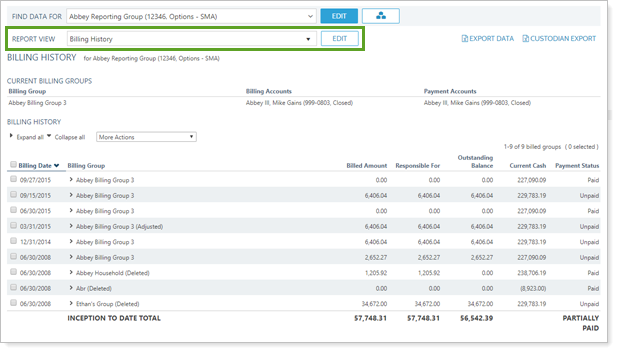
The Billing History report shows the time periods, adjustments, paid amounts, and billing amounts for each portfolio. On this page you can start an auto-reconciliation, export your management fees, perform a custodian export of your billing information.
To run the dynamic billing history report, follow these steps:
-
On the Billing menu, click Billing History.
-
In the Find Data For list, start typing the number or name of the account for which you want to run the report. Click the desired record. The report appears on your screen.
-
In the Report View list, choose a report view.
-
Do any of the following:
-
Custodian Export of Billing Information.To perform a custodian export of your billing information, click Custodian Export.
-
Export Management Fees.To export your management fees, click Export Data at the top of the page.
-
Auto-Reconciliation.To perform an auto-reconciliation, in the More Actions list, click Auto-Reconciliation. For more information on auto-reconciliation, visit Billing Reconciliation.
-
Delete Billing History.To delete an item from billing history, select the check box next to the item you want to delete, and then click Delete History in the More Actions list.
How can I compare the previous billed amount with the current billed amount?
To compare the previous billed amount with the current billed amount, you can use an Account Billing History bulk report.
-
Create an Account Billing History bulk report.
-
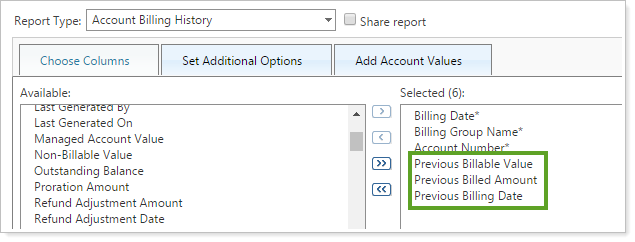
In addition to the required columns, add:
-
Billable Value
-
Billed Amount
-
Previous Billable Value
-
Previous Billed Amount
-
Previous Billing Date
-
-
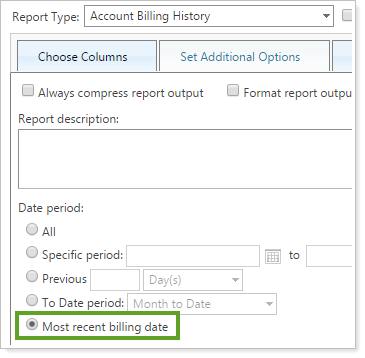
In the Set Additional Options tab, under Date period, select Most recent billing date. Most recent billing date returns the last billing history for every combination of account and billing group. This means that if an account belonged to one billing group and was subsequently moved to a different group, you will see results for both groups.
-
Click Save.
-
On the Accounts page, select the check box next to the account or group you want to compare.
-
Under Actions, click Generate Bulk Report. Choose the comparison bulk report you just created and click Generate Report.
In the output generated, you will see both the current billed amount and the previous billed amount, as well as date of previous bill.

What bifurcation dates do you use for average cost accounting?
Tamarac Reporting supports average cost accounting with the following bifurcation dates as established by IRS guidelines:
| Security Type | Bifurcation Date |
|---|---|
|
Equities |
January 1, 2011 |
|
Mutual Funds |
January 1, 2011 |
|
All other security types |
January 1, 2012 |


