 Back
Back Home > Tamarac Reporting > Clients and Client Portals > Client Portals > New Client Portal > Elements of the New Client Portal
|
Back |
Home > Tamarac Reporting > Clients and Client Portals > Client Portals > New Client Portal > Elements of the New Client Portal
|
Elements of the New Client Portal
The new client portal is made up of a variety of different parts, which you set up in the configuration tool and combine together to create the client portal experience.
This page provides an overview of the different elements of the client portal and how you configure them.
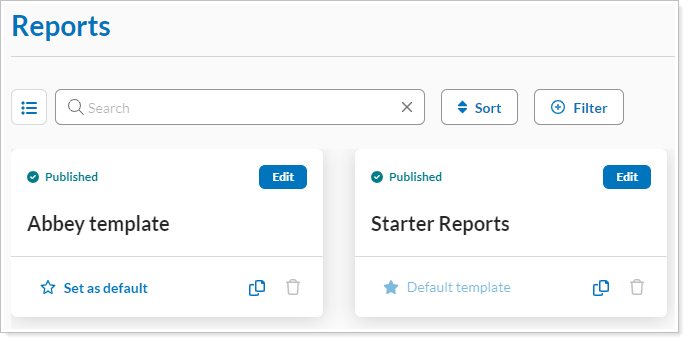
Templates control everything from the colors and logo clients see to what features appear on a portal. There are two types of templates: Branding and Reports.
When you first start with a new client portal, you get one default Starter Branding template and one default Starter Reports template. You can use these templates without any changes to quickly get the new client portal up and running. However, to provide clients with a more customized experience, you can edit the Starter templates or create entirely new, fully custom templates from scratch.
Once created, you assign clients one of each template to create the client portal experience.
Branding templates determine the look and feel of the portal. With Branding templates, you can:
Add the logo that clients see on the portal.
Choose the colors for light and dark mode.
Designate the default color mode.
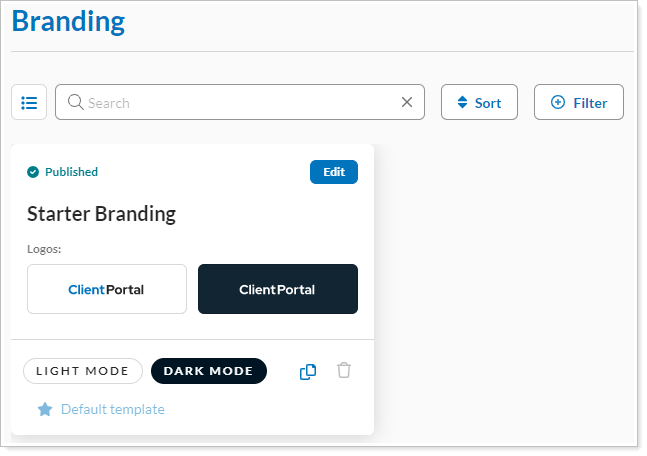
For more information, see Customize the Branding Template.
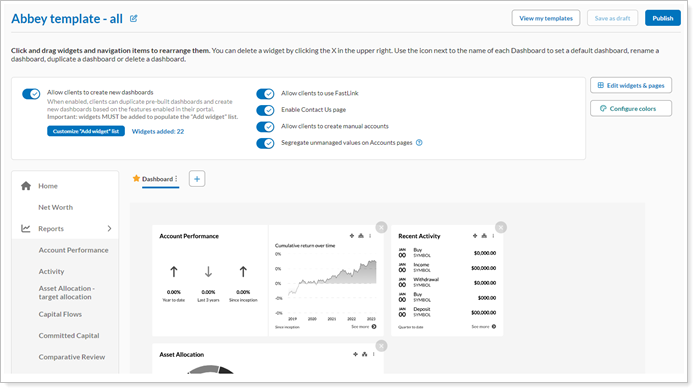
Reports templates determine the features available to clients when they visit their portal. With Reports templates, you can:
Choose widgets and pages from the library for client see in their portal.
Create dashboards and set a default dashboard.
Set the order that pages appear in the left navigation menu.
Allow clients to link add accounts.
Control the colors for certain pages and widgets.
For more information, see Customize a Reports Template.
In the new client portal configuration tool, a pages library and a widgets library contain all the pages and widgets available to your firm. Each library starts with a selection of out-of-the-box pages and widgets created with default settings. You can customize the defaults or create your own pages and widgets from scratch, depending on your needs.

Before creating the Reports template, you must build the inventory of pages and widgets that will be available to draw from as you create different Reports templates. When you build a Reports template, you add pages or widgets from the library to create the desired client experience.
For more information, see Customize the New Client Portal Pages and Reports and Customize the New Client Portal Widgets.
The new client portal gives you access to all your Tamarac dates and date periods. You can choose from the complete list of your dates and date periods which ones you want clients to be able to use on the portal.

The date and date period selections apply to all the Reports templates. This means that all clients will get the dates or date periods you choose, regardless of template assignment.
For more information, see Customize New Client Portal Dates and Date Periods.
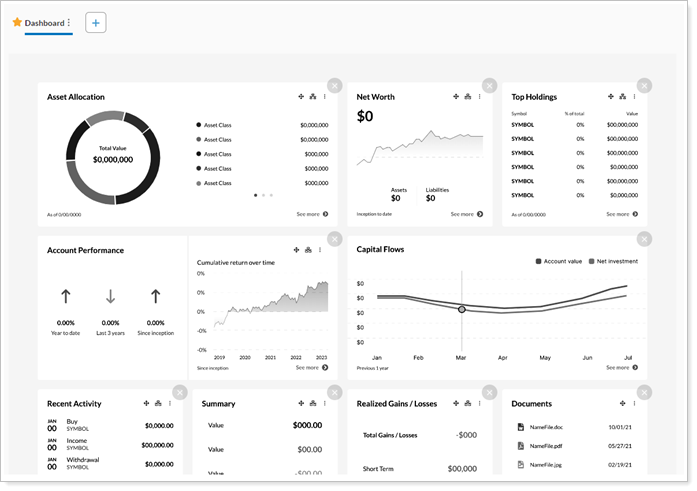
Dashboards are made of widgets from the widget library and are unique to each Reports template. In a Reports template, you set up one or more dashboards, which clients see when they first open the portal.
You must set up the widgets library before you can create dashboards. For more information about dashboards, see Build a New Client Portal Dashboard.
The new client portal offers the following interactive tools that to further customize and benefit the client:
Allow clients to create new dashboards. Turn on this option to give clients the ability to create their own custom dashboards. If you turn this on, you also designate which widgets clients can choose.
Allow clients to use FastLink. Turn on this option to allow clients to link held-away assets and liabilities. These linked accounts appear on the Aggregated Accounts page as Reporting-Only accounts.
Enable Contact Us page. Turn on this option to let clients see a contact page, accessible through their user menu. The Contact Us page displays the name, address, email, and phone number for the service team members assigned to the Household in Tamarac.
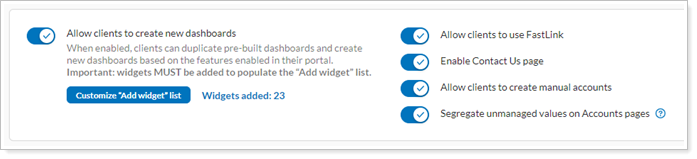
You turn on or off these options for each Reports template. That means that, for example, you can allow some clients to link external accounts, while preventing others from doing so.
When you add pages to a Reports template, you choose what order they appear in the left navigation. Before you start, you must create the page library.
For more information, see Organize Pages in the Left Navigation Menu.
