 Back
Back Home > Tamarac Reporting > Clients and Client Portals > Client Portals > New Client Portal > Customize a Reports Template
|
Back |
Home > Tamarac Reporting > Clients and Client Portals > Client Portals > New Client Portal > Customize a Reports Template
|
Customize a Reports Template
Reports templates define the features available in the client portal experience: the pages, widgets, and tools clients can see and use when they visit their portal. Each Reports template is made up of a collection of pages that you previously set up.
This topic provides steps for how to create a Reports template. To save time, you can copy the Starter Reports template or use an existing Reports template as the basis for a new template.
It may take up to 5 minutes to see changes in the client portal.
Your new client portal Configuration Tool comes with a set of pre-configured dates, pages, and widgets that are used in the Starter Template. If you want to control what your clients see, complete the following:
To customize a Reports template:
On the Client Reporting menu, select Configuration Tool (New).
Select Reports.
Select Create new template.

Optionally, to add a descriptive name to help your colleagues identify it, edit the name in Configuration name.
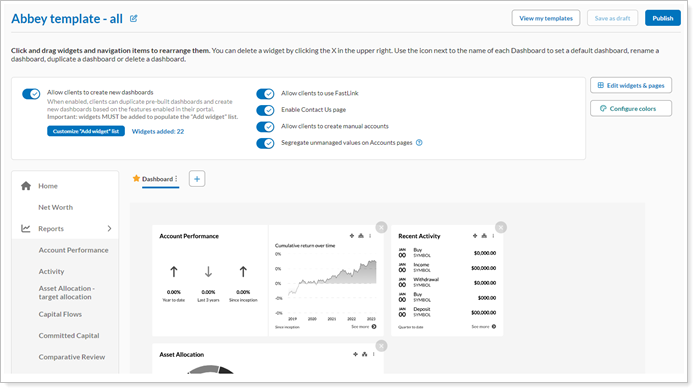
Choose what actions you want clients to be able to do:
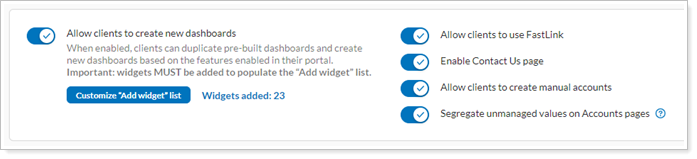
Turn on Allow clients to create new dashboards to give clients the ability to create their own custom dashboards. If you turn this on, you also designate which widgets clients can choose.
Turn on Allow clients to use FastLink to allow clients to link held-away assets and liabilities. These linked accounts appear on the Aggregated Accounts page as Reporting-Only accounts. This option requires the Yodlee integration. For more information, see Allow Clients to Link Accounts in the New Client Portal.
Turn on Enable Contact Us page to let clients see a contact page, accessible through their user menu. The Contact Us page displays the name, address, email, and phone number for the Service Team members assigned to the Household in Tamarac. For more information, see Control Whether Clients See the Contact Us Page in the New Client Portal.
Turn on Allow clients to create manual accounts to let clients add, edit, and delete assets and liabilities in the client portal. For more information, see Turn on Manual Assets or Liabilities for the New Client Portal.
Turn on Segregate unmanaged values on Accounts pages to show totals for managed and unmanaged assets separately on the Accounts page and when clients view account details. For more information, see Allow Clients to See Unmanaged Assets in the New Client Portal.
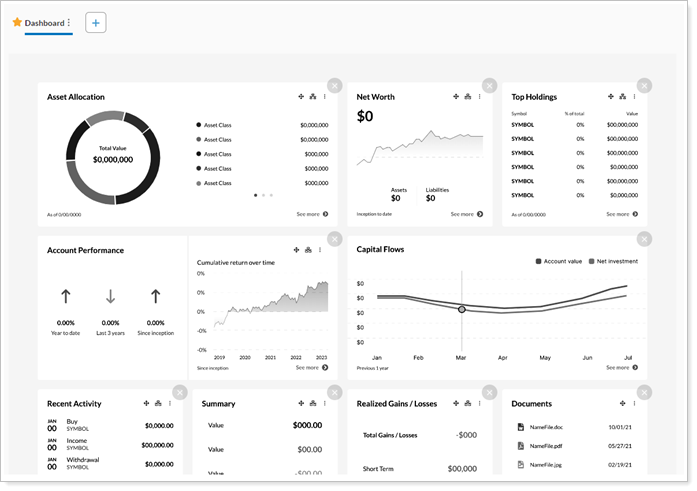
Add and arrange the widgets for one or more dashboards. For more information, see Build a New Client Portal Dashboard.
Add pages to the template. For more information, see Add and Remove Pages from a Reports Template.

Optionally, arrange the pages and page sections in the left navigation menu. For more information, see Organize Pages in the Left Navigation Menu.
Optionally, set the colors for Income vs. Spending and MoneyGuide widgets and pages. For more information, see Customize Some Page and Widget Colors on Reports Templates.
To keep working on the template later, select Save as draft. Firm users can see and edit draft templates, but can't assign them to clients. To make the template available to assign to clients, select Publish.