Contents
|
Text and Graphics in Headers and Footers Create, Edit, or Delete a Header and Footer |
Introduction
A header or footer is text or graphics that Tamarac Reporting prints at the top or bottom of every page in your PDF report. A header is printed in the top margin, and a footer is printed in the bottom margin.
Headers and footers can be as simple as the document title and a page number or as complex as a firm logo image, client information merge text, and custom disclaimers. You can use different headers and footers in each report section. For example, you might want the header for each section to reflect the title of that section.
To learn more about the settings available for configuring headers and footers, see Header and Footer Settings.
Types of Headers and Footers
You can create two types of headers and footers: standard and custom.
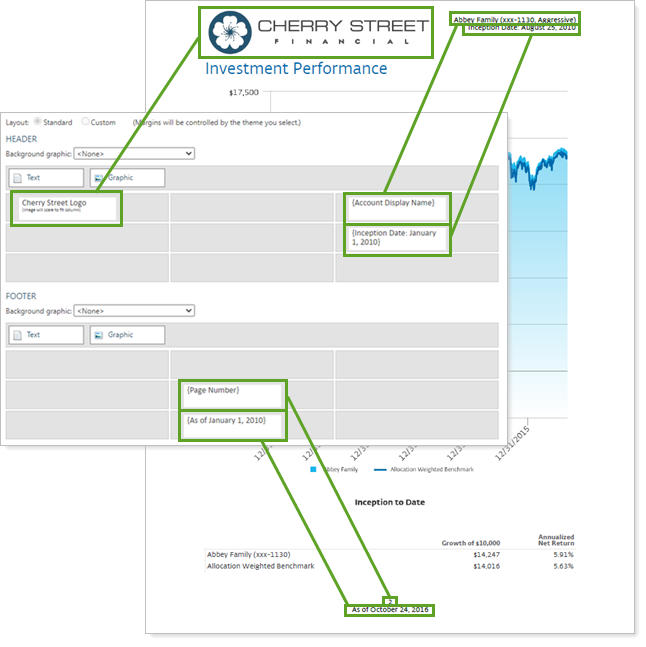
Standard Headers and Footers
Standard header and footer areas are split up into three columns: left, middle, and right. The columns are distributed evenly across the page—for example, let's say your PDF template does not have any margins and is printing in landscape orientation. When you print the report, the left column will span the first 3.66 inches, the middle column will span the next 3.66 inches, and the right column will span the remaining 3.66 inches.
Each column can contain up to three lines of text. For example, you can have the date on one line, account information (account name, account number, etc.) on the next line, and the page number on the last line.
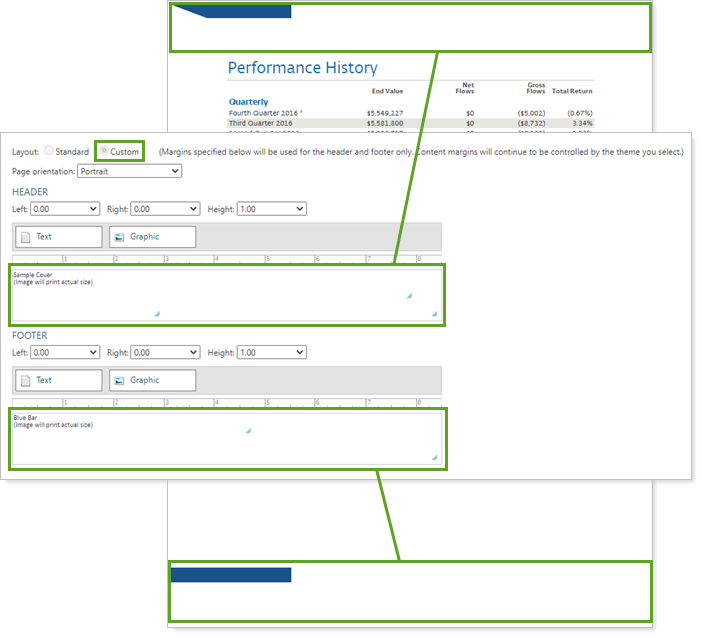
Custom Headers and Footers
Unlike standard headers and footers, custom sections do not limit the amount of information you can include and give you complete control over the appearance of your headers and footers. With custom headers and footers, you can create headers and footers that include freeform text, merge fields, graphics, horizontal lines, and Tamarac Reporting information like account name or client name.
Custom headers and footers allow you to:
-
Control margins.You can control the margins of the header and footer independently of the PDF theme. For example, you can have a 0.5-inch margin for the headers and footers and a 1-inch margin for the display of the content. This will allow you to have a header graphic that spans the entire width of the page, while keeping your report content buffered.
-
Set the height.You can set the height of the header and footer - for example, you might want to create a 1-inch header.
-
Add Text or images.Insert custom graphics for firm branding or merge fields like account name, account number, full name, or freeform text.
Text and Graphics in Headers and Footers
In both standard and custom headers and footers, you can drag and drop custom text and graphic objects in the desired location to display the branding and information you want for your templates.
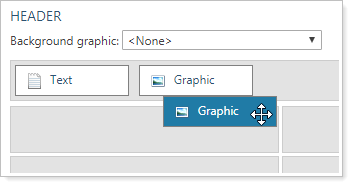
You can add two types of objects:
-
Text.One way to customize text is using merge fields and freeform text in headers and footers. Examples of merge fields you can insert include account information, dates, page numbers, mailing labels, custom fields, etc.
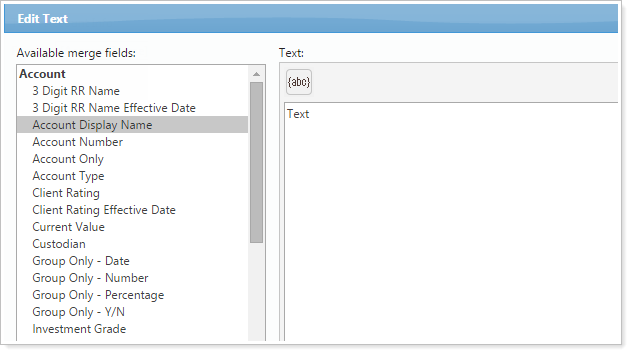
For more information about using the text object, see:
-
Graphic. Add images to headers and footers to create the branding you want for your PDF templates.
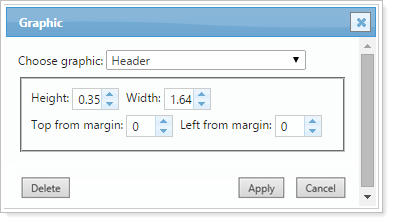
For more information about using the graphics object, see:
For information about how to add, edit, delete, or customize text in headers and footers, see Add Freeform and Merge Text to Headers & Footers
Use Header and Footers
The following are actions to create, customize, and use headers and footers.
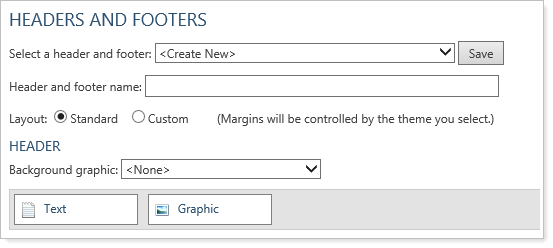
Create, Edit, or Delete a Header and Footer
For information about how to create, edit, or delete standard or custom headers and footers, see Create, Edit, and Delete Headers and Footers.
Copy a Header and Footer
To make a copy of a header and footer, see Copy a Header and Footer.
Assign a Header and Footer to a PDF Template
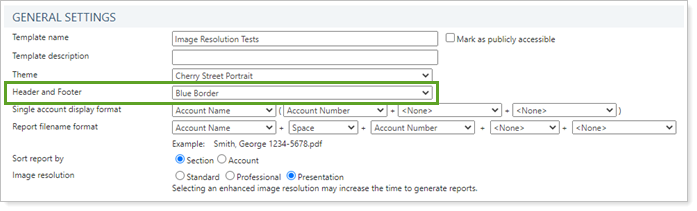
Once you've created a header and footer, you can assign it to a PDF template or a PDF section. For information about how to add a header and footer to a PDF template or section, see Add a Header and Footer to a PDF Template.
Use a Header and Footer as a Mailing Label
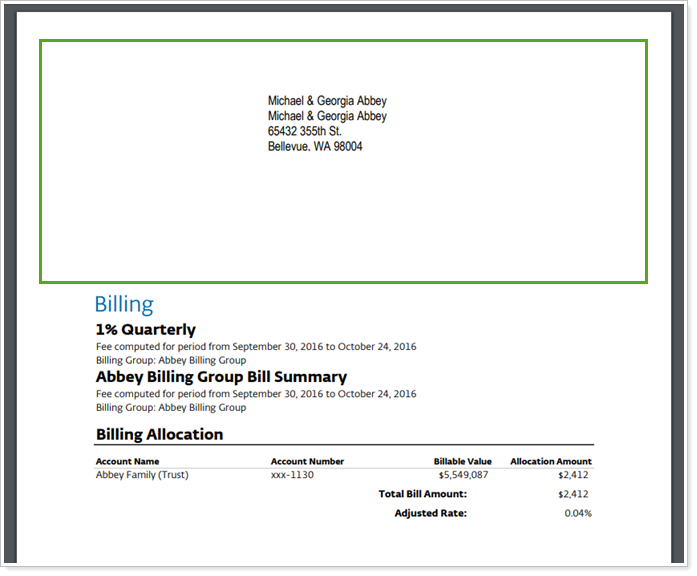
For those of you who send one-page invoices to clients, you likely print a separate page that contains the mailing address to use as the mailing label. Instead of printing a separate sheet with just the address on it, you can print a one-page invoice with the top 1/3 of the page displaying a mailing label in the header.
For more information, see Use a Header as a Mailing Label.