Contents
Introduction
This workflow provides the steps for creating new groups and adding accounts to groups in bulk in Tamarac Reporting.

Workflow Video: Skills: Uploading Groups
In this comprehensive video, you'll learn how to create groups and add accounts to groups using uploads.
Workflow Steps: Create Groups With Uploads
|
|
1. |
Review Data Sets and Create Upload Files To prepare the data for upload, create a blank spreadsheet for each of the following upload data sets:
|
|||||||||
|
|
2. |
To export existing data:
For information about account settings, see Maintaining Accounts. For information about group settings, see Creating and Modifying Groups. For more information about running bulk reports, see Understanding Bulk Data Exports. |
|||||||||
|
|
3. |
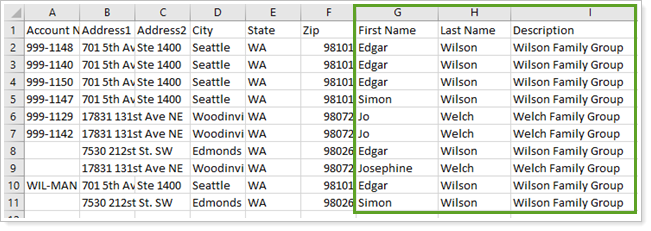
Use the Existing Data to Populate the Upload Files
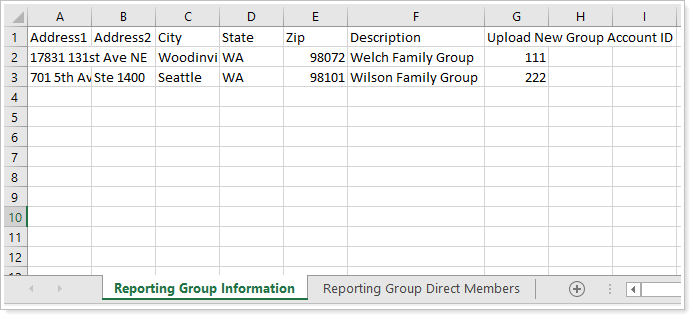
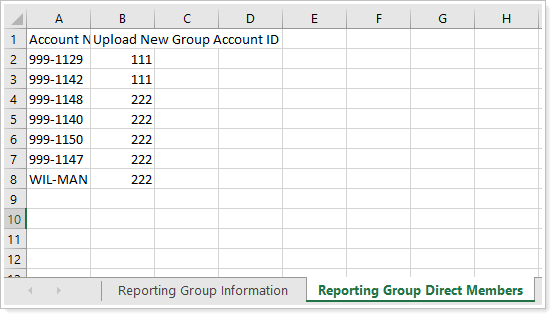
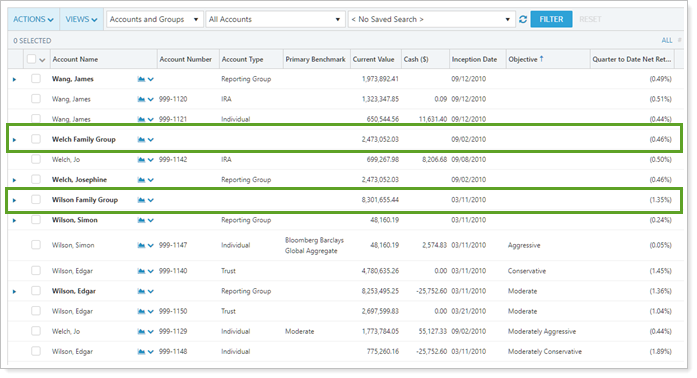
We recommend that you review the Upload New Group Account IDs assigned to each account and confirm they belong to the correct group before doing the upload. See Upload IDs in ActionIn the Reporting Group Information upload data set, the Welch Family Group is assigned an Upload New Group Account ID of 111. The Wilson Family Group is assigned an Upload New Group Account ID of 222. In the Reporting Group Direct Members upload data set, all Welch accounts are assigned an Upload New Group Account ID of 111. All Wilson accounts are assigned an Upload New Group Account ID of 222. This ensures all Welch accounts are matched with the Welch group and all the Wilson accounts are matched with the Wilson group. |
|||||||||
|
|
4. |
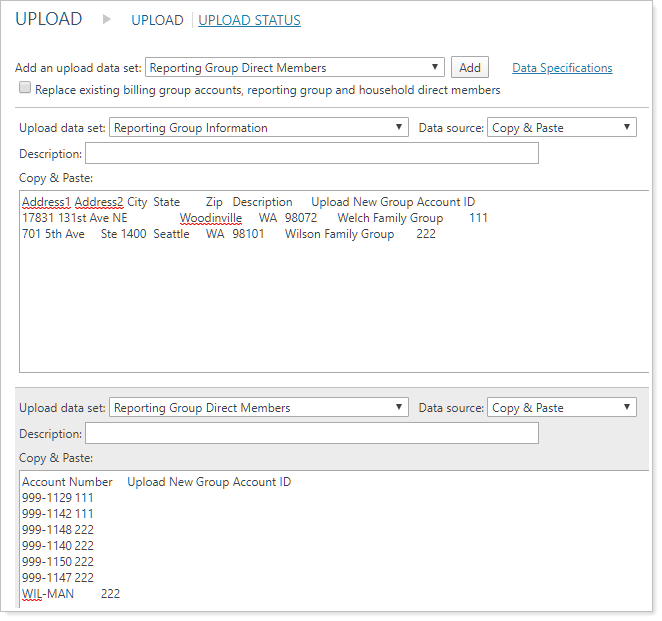
In Tamarac, on the Uploads page, create two new upload data sets in this order:
We recommend that you uploading one group’s worth of data first to confirm the spreadsheets are set up correctly. For more information on creating an upload, see Upload Bulk Data. |
|||||||||
|
|
5. |
Confirm the Upload and Review Errors Confirm the upload and troubleshoot any errors on the Upload Status page. For more information on resolving upload errors, see Upload Status and Troubleshooting.
|
After Creating Groups
Once you've added accounts to groups, you can add the groups to Households, display them in the client portal, and start running reports based on groups. For more information, see:
Additional Resources
Learn more about:
-
Accounts: Maintaining Accounts
-
Groups: Creating and Modifying Groups
-
Bulk reports: Understanding Bulk Data Exports
-
Uploads: Understanding Bulk Data Uploads


