Contents
Introduction
Groups are collections of individual accounts and other groups that allow you to perform some reporting and rebalancing functions. Groups can range from single individual accounts to large numbers of underlying accounts and subgroups. You can add an unlimited number of accounts and groups to a group.
Types of Groups
The following are the ways you can use groups within Tamarac Reporting.
Groups for Reporting
A group can be used for reporting where the collection of accounts facilitates group-level reporting and group-level performance calculations. A group is a separate entity, apart from the accounts it contains. You can put as many accounts into a group for reporting as you wish.

In the example above, you would want to use a group for reporting in the following instances:
| For the Abbey IRA Accounts group | You want to print a Holdings report that includes positions from both accounts. |
| For the Abbey Taxable Accounts group | You want to calculate and present performance reports for the taxable accounts only, rather than presenting them for the entire group. |
Groups for Rebalancing
A group can be used for rebalancing where the collection of accounts are all managed to work together for trading and rebalancing purposes, allowing you to better control tax management. Each account in a group enabled for rebalancing works together for a common goal. A good rule of thumb as to which accounts should be included in group-level rebalancing is to consider who benefits from each account.
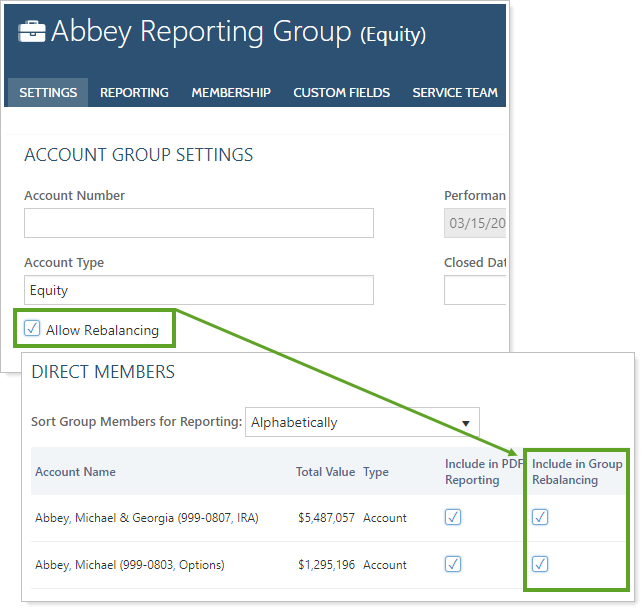
For example, Mr. and Mrs. Abbey each benefit from several individual and joint accounts they hold. Accounts with a common beneficiary—such as Mr. and Mrs. Abbey—can be grouped together for group-level rebalancing.
See Include in Group Rebalancing in Action
John and Georgia Abbey are a married couple, each of whom have individual as well as joint accounts. John also has a old 401(k) managed outside of your firm, and Georgia has two closed accounts in her name.
In order to rebalance these accounts together as a group, you add each of John and Georgia's accounts to the Abbey Group. Then, you enable that group for rebalancing and choose Include in Group Rebalancing for all the accounts except the 401(k) and Georgia's closed accounts. This way, you won't be rebalancing the outside 401(k) or the closed accounts, but you can still include them in group-level reporting.
Enable a Group for Rebalancing
Once you create a group, you must enable it for rebalancing by selecting the Allow Rebalancing check box on the Account Group Settings panel for the group, and select the accounts within the group that will be rebalanced together by selecting the Include in Group Rebalancing check box on the Direct Members panel.
You may place an account in multiple groups, but you can only enable that account for rebalancing in one group.
For a high-level look at how accounts, groups, clients, and Households work together, see Introduction to Accounts, Groups, Households, and Clients.
Billing Groups
A billing group is a collection of financial accounts you want aggregated together to determine the billable value and the billed amount. By treating these accounts as a group, you can avoid managing the billing preferences of accounts on an individual basis. Instead, you can attach the billing information such as billing definitions, payment distribution, adjustments, and statement display options to all the billing group member accounts at once.
Creating billing groups is not covered in this topic. For more information on billing groups, see Billing Groups.
Create a Group
You can create multiple groups and assign accounts to them in bulk using bulk reports and uploads. For more information, see Workflow: Create Groups With Uploads.
To create a group manually, follow these steps:
-
On the Accounts menu, click Accounts.
-
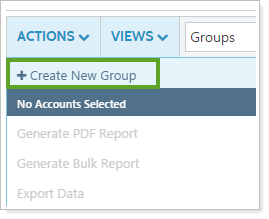
In the Actions list, click Create New Group.
-
Complete the following panels. Click the name of the panel for details on the available settings:
Tab Panel More Information Settings Account Group Settings This panel allows you to configure the basic settings for the group, such as the account type, closed date, target allocation, objective, and inception dates.
Name/Address This panel allows you to configure the basic settings for the group, such as name and address. It also lets you designate whether you'd like to use the Primary Household address.
Reporting Settings/Templates This panel allows you to determine reporting options such as fiscal year end dates, default templates, and sync start dates.
Benchmarks/Targets This panel allows you to assign benchmarks and target allocations for the group.
Membership Direct Members This panel contains a list of accounts and groups that are direct members of the selected group. Here, you can specify which direct members will be included in PDF reporting. This is also where you specify which accounts will be part of a group.
All Members This read-only panel lists all accounts included in the group—both accounts that are direct members of the selected group and indirect members (direct members of subgroups assigned to the group). You can use this panel to get a complete picture of all accounts assigned to the group.
Households/Groups This panel allows you to see the Households and groups that the selected group is a member of.
Clients This read-only panel shows you the clients that can view the account information.
Custom Fields N/A This panel allows you to assign values to any custom fields you've already created for groups.
For more information on custom fields, including creating the fields, visit Custom Fields for Accounts, Groups, Households, and Securities.
Service Team N/A This panel allows you to see the Service Team or teams that are assigned to the group.
Advanced Manual Performance This panel allows you to edit how your manual performance will be shown if you uploaded manual performance and have editing permissions.
Rebalancing N/A This panel lets you establish rebalancing settings for a group for rebalancing, such as the assigned model and allocation preference.
To enable a group for rebalancing, select the Allow Rebalancing option and individually including direct members into the group for rebalancing.

-
When finished, click Save.
Delete a Group
To delete a group, follow these steps:
-
On the Accounts menu, click Accounts.
-
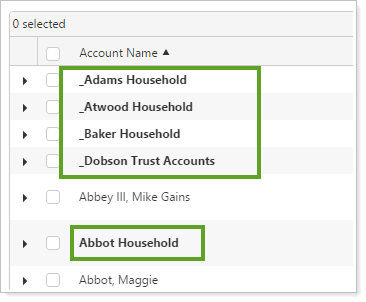
Click the name of the group you want to delete. Groups appear in a bold font.
-
Click Delete in the upper-right corner.
Add an Account to a Group
You can add accounts to a reporting group in two places:
-
From the group's Direct Members panel.

-
From the account's Households/Groups panel.

Modify or Delete Multiple Groups At Once
To edit more than one group at the same time, follow these steps:
-
On the Accounts menu, click Accounts.
-
Select the check box next to the groups you want to edit or delete.
-
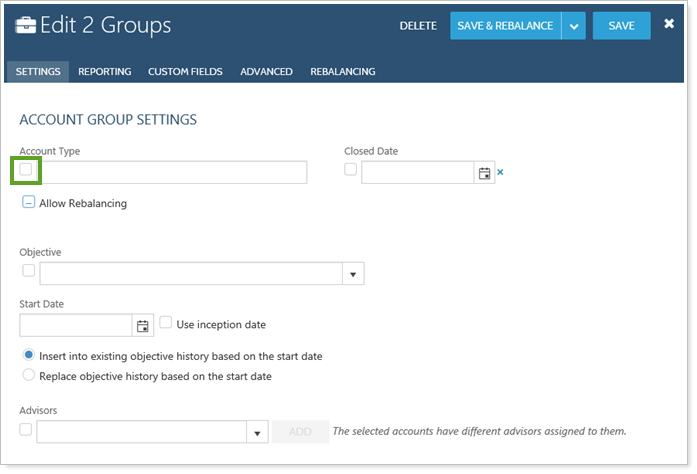
In the Actions list, click Edit. Tamarac Reporting will show you the fields that you can edit via multi-edit. If a field does not appear, you'll need to make the changes one at a time for each group.
-
Select the check box next to the information you want to edit for all selected groups. If you don't select a check box next to a setting, Tamarac Reporting will not change the values for that setting. To learn about all the settings that will appear, click a link below.
Tab Panel More Information Settings Account Group Settings This panel allows you to configure the basic settings for the group, such as the account type, closed date, target allocation, objective, and inception dates.
Name/Address This panel allows you to configure the basic settings for the group, such as name and address. It also lets you designate whether you'd like to use the Primary Household address.
Reporting Settings/Templates This panel allows you to determine reporting options such as fiscal year end dates, default templates, and sync start dates.
Benchmarks/Targets This panel allows you to assign benchmarks and target allocations for the group.
Membership Direct Members This panel contains a list of accounts and groups that are direct members of the selected group. Here, you can specify which direct members will be included in PDF reporting. This is also where you specify which accounts will be part of a group.
All Members This read-only panel lists all accounts included in the group—both accounts that are direct members of the selected group and indirect members (direct members of subgroups assigned to the group). You can use this panel to get a complete picture of all accounts assigned to the group.
Households/Groups This panel allows you to see the Households and groups that the selected group is a member of.
Clients This read-only panel shows you the clients that can view the account information.
Custom Fields N/A This panel allows you to assign values to any custom fields you've already created for groups.
For more information on custom fields, including creating the fields, visit Custom Fields for Accounts, Groups, Households, and Securities.
Service Team N/A This panel allows you to see the Service Team or teams that are assigned to the group.
Advanced Manual Performance This panel allows you to edit how your manual performance will be shown if you uploaded manual performance and have editing permissions.
Rebalancing N/A This panel lets you establish rebalancing settings for a group for rebalancing, such as the assigned model and allocation preference.
To delete the groups in bulk, click Delete. Then, in the Delete Group dialog, click Delete to confirm.
-
Click Save.
Modify a Single Group
-
On the Accounts menu, click Accounts.
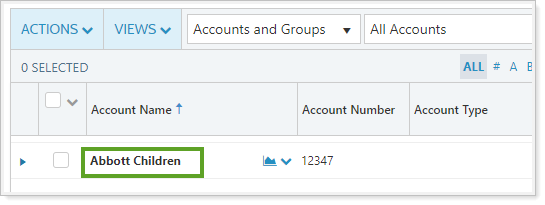
-
Click the name of the group that you want to edit.
-
Complete the following information on the panel that appears (click the name of the page for details on the page and settings):
Tab Panel More Information Settings Account Group Settings This panel allows you to configure the basic settings for the group, such as the account type, closed date, target allocation, objective, and inception dates.
Name/Address This panel allows you to configure the basic settings for the group, such as name and address. It also lets you designate whether you'd like to use the Primary Household address.
Reporting Settings/Templates This panel allows you to determine reporting options such as fiscal year end dates, default templates, and sync start dates.
Benchmarks/Targets This panel allows you to assign benchmarks and target allocations for the group.
Membership Direct Members This panel contains a list of accounts and groups that are direct members of the selected group. Here, you can specify which direct members will be included in PDF reporting. This is also where you specify which accounts will be part of a group.
All Members This read-only panel lists all accounts included in the group—both accounts that are direct members of the selected group and indirect members (direct members of subgroups assigned to the group). You can use this panel to get a complete picture of all accounts assigned to the group.
Households/Groups This panel allows you to see the Households and groups that the selected group is a member of.
Clients This read-only panel shows you the clients that can view the account information.
Custom Fields N/A This panel allows you to assign values to any custom fields you've already created for groups.
For more information on custom fields, including creating the fields, visit Custom Fields for Accounts, Groups, Households, and Securities.
Service Team N/A This panel allows you to see the Service Team or teams that are assigned to the group.
Advanced Manual Performance This panel allows you to edit how your manual performance will be shown if you uploaded manual performance and have editing permissions.
Rebalancing N/A This panel lets you establish rebalancing settings for a group for rebalancing, such as the assigned model and allocation preference.
-
Click Save.
See Group Notes
Notes in Tamarac Reporting allow you to add documentation to accounts that can be widely seen by other users who have permission to view those accounts. Client wishes, account changes, alerting to special circumstances and other issues, including compliance issues, can be documented in accounts using notes.
To learn more about account notes, see Learn More About Notes.
