 Back
Back Home > Tamarac Reporting > Clients and Client Portals > Client Portals > Setting Up Client Portals > Client Views > Client Views Pages > Client Views - Service Team Page
|
Back |
Home > Tamarac Reporting > Clients and Client Portals > Client Portals > Setting Up Client Portals > Client Views > Client Views Pages > Client Views - Service Team Page
|
Client Views - Service Team Page
|
Assign a Service Team Page to a Client View Change the Order in Which Roles Display |
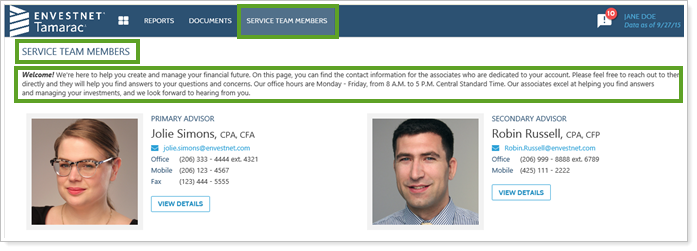
The Service Team page helps you manage the Service Team contact information that clients will see on their client portal if you assign it to them.
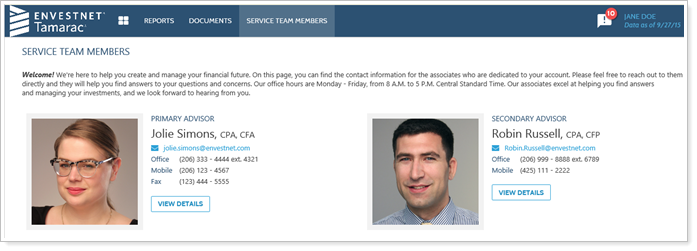
You can enter introductory text, choose types of contact info they'll see for each service role, and set whether they'll be able to see additional details about each member.
All of the Service Team member information is set up and edited on the My Profile page. For details about what profile information appears where on the Service Teams page, see Where User Profile Information Appears.
You can choose which information appears on the page. You can hide photos if you want to just include the names, roles, and contact information, or you could even choose to show only a welcome message with a general number clients should call when they have questions.

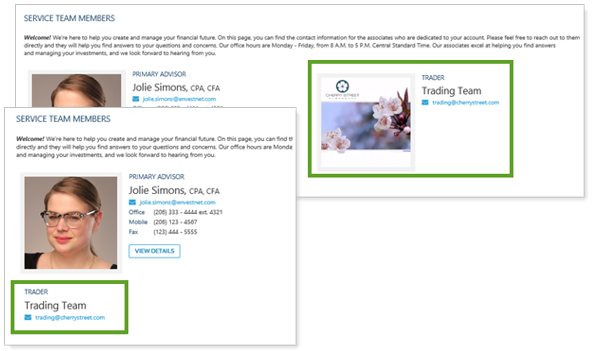
If you include a generic user on your page and you choose to show a photo for that role, your administrator will need to add the photo for that generic user on the My Profile page. Otherwise, you can hide the photo and show only the contact information.
To create a Service Team page, follow these steps:
On the Client Reporting menu, under Client Portal Settings, click Client Views.
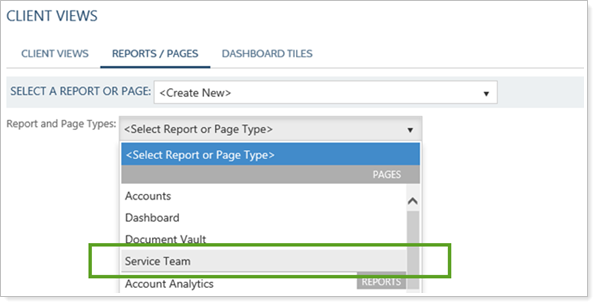
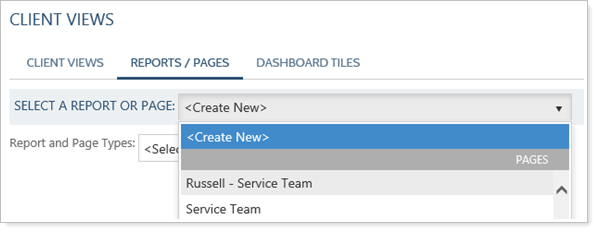
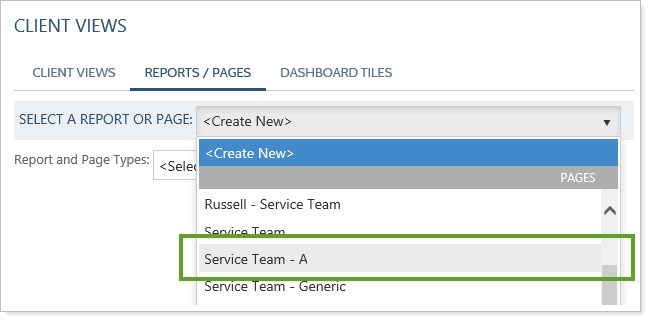
Click the Reports/Pages tab, and leave the Select a Report or Page list set to <Create New>.
In the Report and Page Types list, select Service Team.
In the Name box, type a name that will identify this view in the Select a Report or Page list. This name must be unique and can be specific since it is only visible internally.
In the Title box, type the page title and tab name that you want to display on the client's page—you can enter up to 20 characters. This tab will only display if both this view and a service team are assigned to the client view's household.
To include introductory text at the beginning of the page, click the Include custom header check box, then type and format your text, as desired.

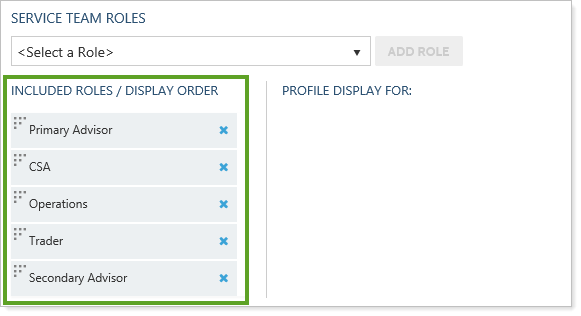
In the Service Team Roles list, select a role that you want displayed on your clients' Service Team page, then click Add Role. Repeat until all the roles you want to include have been added—you can add as many roles as you need. You can Change the Order in Which Roles Display, if needed. Note that roles will only display if they are assigned to the client view's household.
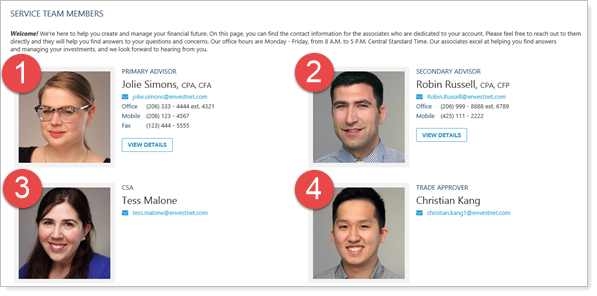
The client will see each available role that you've selected.

Click the name of a role under the Included Roles / Display Order section.
Click Edit on the Page Title tab and make the desired changes. For more information, see
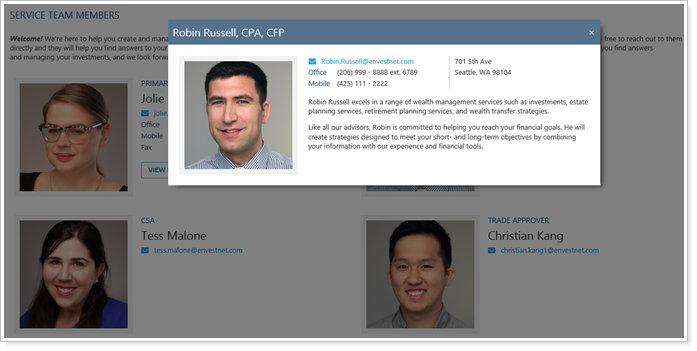
If you enable the View Details button on the Page Title tab for a particular role, use the Details Pop-Up to customize the details displayed.
Repeat the previous step for each role, unless you clicked the Update to all Roles or Apply to all Roles buttons.
Click Save.
Once you have created a Service Team page, you will need to assign it to one or more client views in order for clients to see it. Each household can be assigned one client view, so they will see just one service team. However, that client view may be used for many households.
Once you've assigned the page, you can view a client portal exactly as your client sees it.
To assign a Service Team page to a client view, follow these steps:
On the Client Reporting menu, under Client Portal Settings, click Client Views.
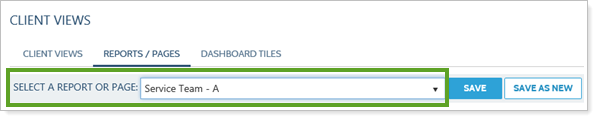
Click the Client Views tab, then select the Service Team page from the Service Team list.
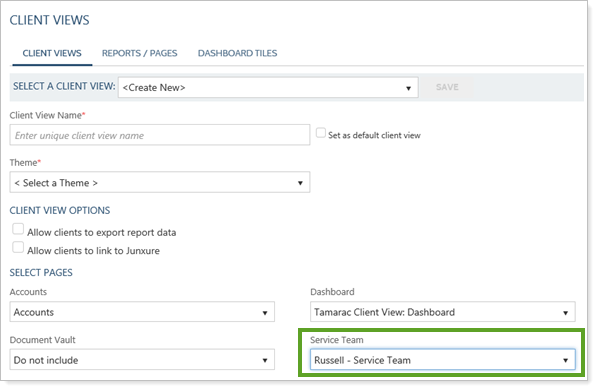
Click Save.
You can edit the text of the page title and the tab title, as well as the introductory text on the client's Service Team page.
You can also choose which roles are shown on the page, and which details are shown or hidden for each role. The text for the role is edited by each employee on the My Profile page, and you can include as much or as little of that text as you want.
You can customize the name of the Service Team page. This is the name you will see in the Select a Report or Page list. It must be unique and can be specific since it is only visible internally.
To edit the name of a client's Service Team page, follow these steps:
On the Client Reporting menu, under Client Portal Settings, click Client Views.
Click the Reports/Pages tab.
In the Select a Report or Page list, select the Service Team page that you want to edit. This list is where the name will be updated once you've made your edits.
In the Name box, type a new unique name to identify this view. The name will be visible internally only.
Click Save.
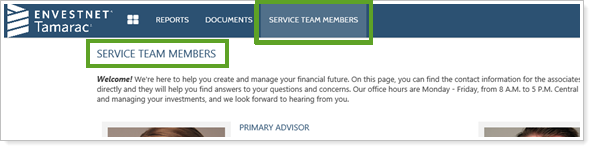
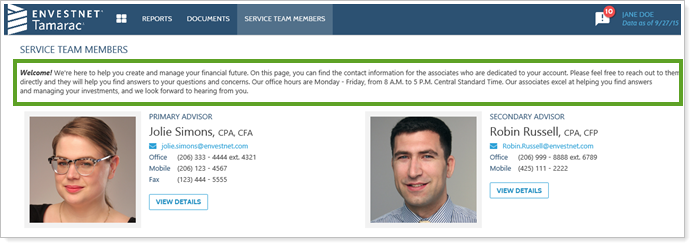
You can customize the name your clients will see for the Service Team page. The name you set will be visible in the menu bar and at the top of the page.
Note that this tab will only display if there is a service team assigned to the client view's household.
To edit the title in the menu bar and at the top of a client's Service Team page, follow these steps:
On the Client Reporting menu, under Client Portal Settings, click Client Views.
Click the Reports/Pages tab.
In the Select a Report or Page list, select the Service Team page that you want to edit.
In the Title box, make the desired changes to the title that displays on the client's page. The title must be no more than 20 characters.
Click Save.
To edit the introductory text on a client's Service Team page, follow these steps:
On the Client Reporting menu, under Client Portal Settings, click Client Views.
Click the Reports/Pages tab.
In the Select a Report or Page list, select the Service Team page that you want to edit.
Click Include custom header, then update your text, as desired.
Click Save.
You can manage the roles on your Service Team page at any time, adding as many roles as you need over time, or deleting roles that have been discontinued.
The information that displays is influenced by the assignments you've set for roles:
If multiple people are assigned to the same role, both people will be displayed. For example, if you had another secondary advisor named Kevin Wilson, the display order could be:
| Jolie Simons - Primary Advisor | Kevin Wilson - Secondary Advisor |
| Robin Russell - Secondary Advisor | Tess Malone - CSA |
| Christian Kang - Trade Approver |
Roles will only display if they are assigned to the client view's household, so in the example above, if Tess Malone was not assigned to the household, the order would then be displayed as:
| Jolie Simons - Primary Advisor | Kevin Wilson - Secondary Advisor |
| Robin Russell - Secondary Advisor | Christian Kang - Trade Approver |
If one person is assigned multiple roles, you will see that person displayed on the page once, with all their roles listed, and the details will be shown for the highest ranking role. For example, if Christian Kang had both the roles of Trader and Trade Approver, you would see his Trade Approver details.
|
Jolie Simons - Primary Advisor Details for the Primary Advisor role will display. |
Kevin Wilson - Secondary Advisor Details for the Secondary Advisor role will display. |
|
Robin Russell - Secondary Advisor Details for the Secondary Advisor role will display. |
Christian Kang - Trader, Trade Approver Details for the Trade Approver role will display. |
To add or remove roles on a client's Service Team page, follow these steps:
On the Client Reporting menu, under Client Portal Settings, click Client Views.
Click the Reports/Pages tab.
In the Select a Report or Page list, select the Service Team page that you want to edit.
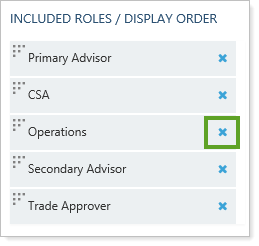
In the Included Roles/Display Order section, remove any unwanted roles by clicking the  button for those roles.
In the Service Team Roles list, select any new role that you want displayed on your clients' Service Team page, then click Add Role. Repeat until all the roles you want to include have been added. You can also Change the Order in Which Roles Display.
The order in which the selected roles are listed determines the order in which they display. For example, if you deleted Operations in the example above, your client would see the page displayed as shown below.
Note that roles will only display if they are assigned to the client view's household, and only the available details will display—if you set a fax number to be included, but that field is blank on the advisor's My Profile page, the client will not see a row for fax number.
Click Save.
To adjust the order of roles on the Service Team page, follow these steps:
On the Client Reporting menu, under Client Portal Settings, click Client Views.
Click the Reports/Pages tab.
In the Select a Report or Page list, select the Service Team page that you want to edit.
In the Included Roles/Display Order list, drag and drop roles to adjust the order.
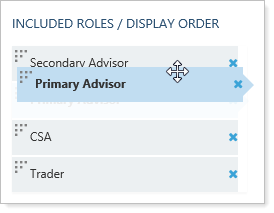
Roles assigned to the household will display sequentially according to the order you set, going from left to right and then moving to the next row.
Click Save.
To edit which information shows for roles on a client's Service Team page, follow these steps:
On the Client Reporting menu, under Client Portal Settings, click Client Views.
Click the Reports/Pages tab.
In the Select a Report or Page list, select the Service Team page that you want to edit.
Click the name of a role under the Included Roles / Display Order section.
Click Edit.
Click on each item you want to change visibility for. You can show as many or as few items as you'd like. When you hover over an item, buttons indicate whether each section will be hidden ( ) or shown (
 ) if you click that section. Any items with a blue background will be shown to the client—all items will be shown in the example below.
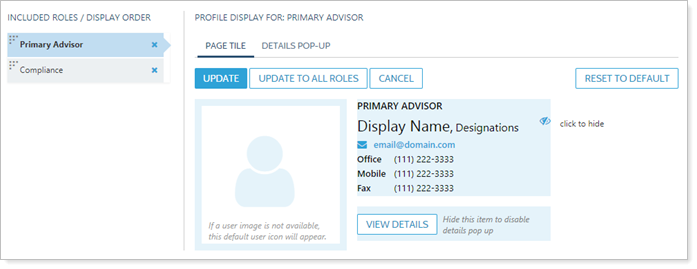
Click Update to apply the settings to only this role, or click Update to all Roles if you want to apply the settings to all your selected roles.
Click the Details Pop-up tab if you chose to enable the View Details button. Otherwise this tab is disabled. The View Details button will link to the custom link a user has set on their My Profile page.
Click Edit.
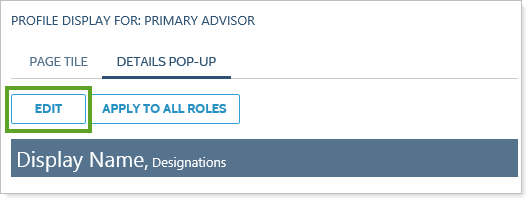
Click on each item with a button to hide the content from the client. If you change your mind, you can then click items with a button to show the content to the client. You can show as many or as few items as you'd like. Address information is shown as a unit.
Note that roles will only display if they are assigned to the client view's household, and only the available details will display—if you set a fax number to be included, but that field is blank on the advisor's My Profile page, the client will not see a row for fax number.
Click Update to apply the settings to only this role, or click Update to all Roles if you want to apply the settings to all your selected roles.
Repeat the previous step for each role, unless you clicked the Update to all Roles or Apply to all Roles buttons.
Click Save.
To delete a Service Team page, follow these steps:
On the Client Reporting menu, under Client Portal Settings, click Client Views.
Click the Reports / Pages tab.
In the Select a Report or Page list, choose the Service Team page that you want to delete.
To make a copy of an existing Service Team page, follow these steps:
On the Client Reporting menu, under Client Portal Settings, click Client Views.
Click the Reports / Pages tab.
In the Select a Report or Page list, choose the Service Team page you want to copy.
In the Name box, type a unique name for the new page and then click Save As New.