 Back
Back Home > Tamarac Trading > Accounts and Groups > Groups > Create, Edit, and Delete Groups for Rebalancing
|
Back |
Home > Tamarac Trading > Accounts and Groups > Groups > Create, Edit, and Delete Groups for Rebalancing
|
Create, Edit, and Delete Groups for Rebalancing
|
Create a New Group for Group Rebalancing Add Accounts to an Existing Group When Viewing the Account You Want to Add Delete an Account From a Group |
You can configure groups in such a way so that all the accounts in the group are managed together and work toward a common goal, including for trading and rebalancing activities. When rebalance accounts as a group, you can rebalance all accounts together, configure how the assets are placed in individual accounts, and keep an eye on tax management for each of the accounts.
When determining which accounts to include in a group enabled for rebalancing, a good rule of thumb is to consider who the beneficiary of each account is. Accounts with a common beneficiary can be rebalanced together. Consider this example:
Lisa and Robert Burke have two children: Kelsey and Christopher. Lisa and Robert each have a retirement account and a shared taxable account. They also have education savings accounts for both Kelsey and Christopher who are nearing college age.
Each of the accounts for the Burke family, including the education savings accounts for the children, are related, so each of these accounts can be included in the same group, the Burke Family Group. However, each account does not have a common beneficiary. Lisa and Robert's retirement accounts, as well as their shared taxable account, contribute to a common goal for Lisa and Robert.
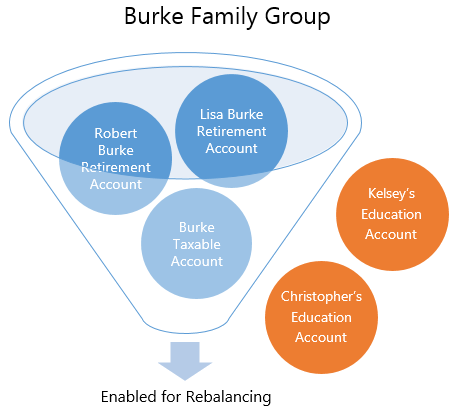
Because you want to rebalance Lisa and Robert's accounts as a group, you enable Burke Family Group for rebalancing.
You then include only these three accounts in group rebalancing, allowing you to assign these accounts a common model, common rebalance settings, and a common asset allocation strategy for which assets which be placed in which accounts.
The two education savings accounts for the Burke family children don't contribute to the same common goals, nor do they have the same beneficiary. Because of this, these accounts are not enabled for rebalancing, even though they are in the same group.
Below, you'll find information on how to create, edit, and delete the groups you maintain for rebalancing. First, you'll create your group and enable that group for rebalancing. Then, you can decide which members of the group you want to include in group rebalancing.
For more information on the various rebalancing settings you can apply to your groups, see Rebalancing Group Settings.
Creating a group for group rebalancing is a two-part process: First, you'll create a group and enable that group for rebalancing. Next, you'll choose which accounts within that group should be rebalanced together.
To create a group for group rebalancing, following these steps:
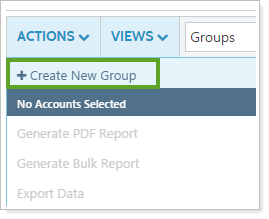
On the Accounts menu, click Accounts.
In the Actions list, click Create New Group.
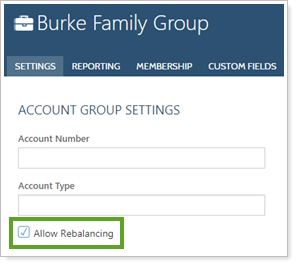
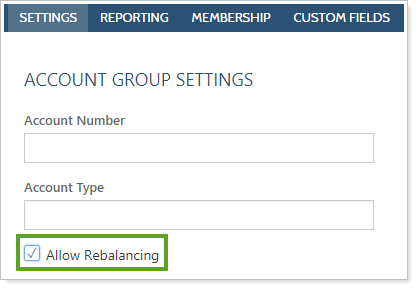
On the Settings tab, choose Account Group.
On the Account Group Settings panel, select Allow Rebalancing to enable this group for rebalancing and trading activity.
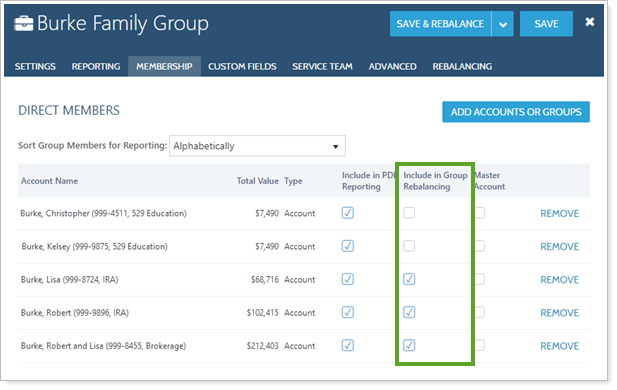
On the Membership tab, click Direct Members. This is where you'll add members to your group.
Click Add Accounts or Groups.
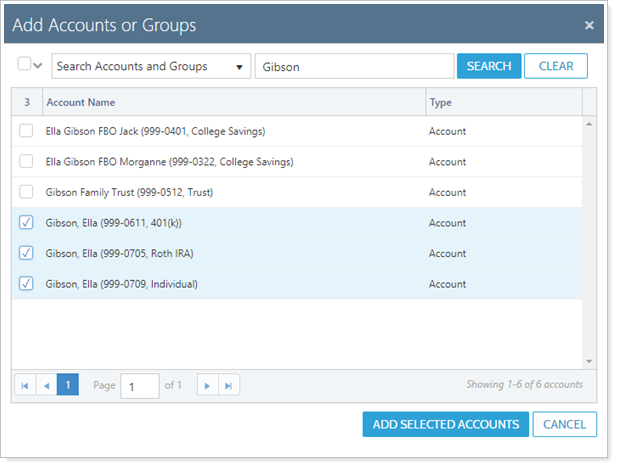
On the Add Accounts or Groups dialog box, search for the account or accounts you want to add to the group. When you find them, select the account and click Add Selected Account. Repeat until you've added all applicable accounts.
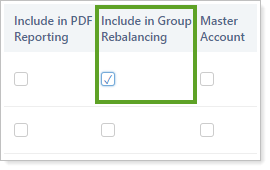
On the Direct Members panel, select the accounts that you want to enable for rebalancing by selecting Include in Group Rebalancing.

Complete any other applicable tabs you want to apply to the group. The following table gives a summary of the available group settings:
Tab Panel More Information Settings Account Group Settings This panel allows you to configure the basic settings for the group, such as the account type, closed date, target allocation, objective, and inception dates.
Name/Address This panel allows you to configure the basic settings for the group, such as name and address. It also lets you designate whether you'd like to use the Primary Household address.
Reporting Settings/Templates This panel allows you to determine reporting options such as fiscal year end dates, default templates, and sync start dates.
Benchmarks/Targets This panel allows you to assign benchmarks and target allocations for the group.
Membership Direct Members This panel contains a list of accounts and groups that are direct members of the selected group. Here, you can specify which direct members will be included in PDF reporting. This is also where you specify which accounts will be part of a group.
All Members This read-only panel lists all accounts included in the group—both accounts that are direct members of the selected group and indirect members (direct members of subgroups assigned to the group). You can use this panel to get a complete picture of all accounts assigned to the group.
Households/Groups This panel allows you to see the Households and groups that the selected group is a member of.
Clients This read-only panel shows you the clients that can view the account information.
Custom Fields N/A This panel allows you to assign values to any custom fields you've already created for groups.
For more information on custom fields, including creating the fields, visit Custom Fields for Accounts, Groups, Households, and Securities.
Service Team N/A This panel allows you to see the Service Team or teams that are assigned to the group.
Advanced Manual Performance This panel allows you to edit how your manual performance will be shown if you uploaded manual performance and have editing permissions.
Rebalancing N/A This panel lets you establish rebalancing settings for a group for rebalancing, such as the assigned model and allocation preference.
For more information on rebalancing-specific settings, see Rebalancing Group Settings.
When finished, click Save.
There are two simple ways to add accounts to existing groups, as shown below.
To add an account to a group, follow these steps:
On the Accounts menu, click Accounts.
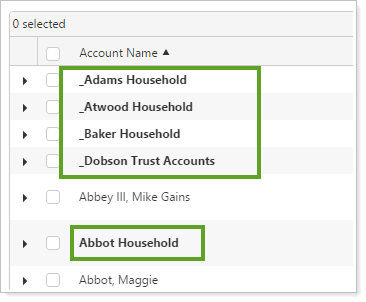
Click the name of the group where you want to add a member. Groups appear in a bold font.
On the Settings tab, choose Account Group to open the Account Group Settings panel. There, select Allow Rebalancing if it's not already selected. This enables the group for rebalancing and trading activity.
Choose Direct Members in the Membership tab.
Click Add Accounts or Groups.
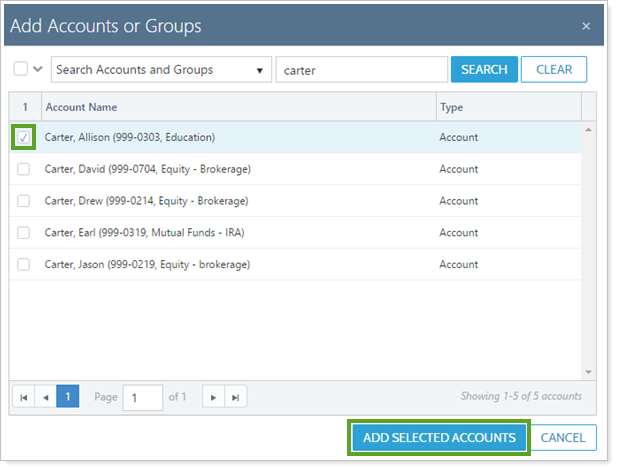
Type the name of the account you want to add in Search Accounts and Groups to Add and click Search.
Select the accounts you want to add and click Add Selected Accounts.
Select Include in Group Rebalancing for the selected account.
Click Save.
To add an account to a group when viewing the account, follow these steps:
On the Accounts menu, click Accounts.
Select the account that you want to add to a group.
Click Households/Groups in the Membership tab.
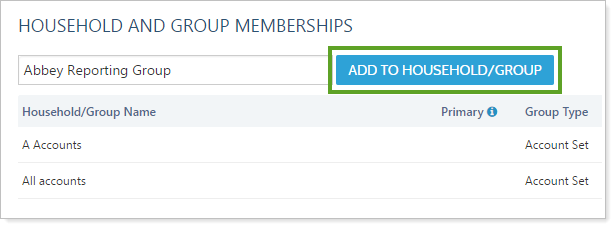
Type the name of the group you want to add the account to in Search Households and groups.
Click Add to Household/Group.
Click Save.
To delete an account from a group, follow these steps:
On the Accounts menu, click Accounts.
Click the name of the group where you want to delete a member. Groups appear in a bold font.
Choose Direct Members in the Membership tab.
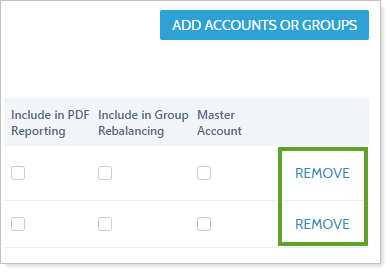
Click Remove next to the account you want to remove.
Click Save.
To modify the rebalancing settings for a group, follow these steps:
On the Accounts menu, click Accounts.
Click the name of the group where you want to modify rebalancing settings. Groups appear in a bold font.
Select the Rebalancing tab to open the Rebalancing Group Settings panel.
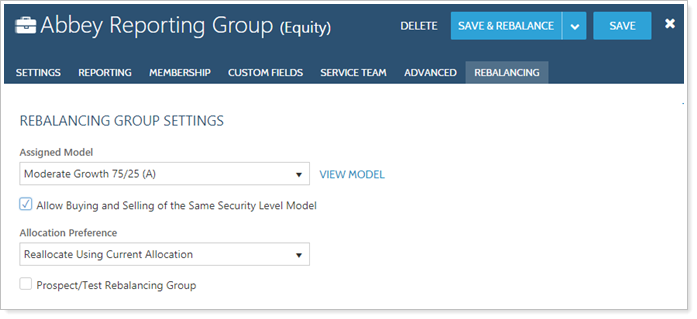
Make any necessary changes to the settings. For more information on each of the available settings, see Rebalancing Group Settings.
Click Save.
To remove members of a group from rebalancing, clear the Include in Group Rebalancing check box. This check box is found on the Direct Members panel, under the Membership tab. This removes that account from group rebalancing, but the account will remain in the group.
For more information on deleting a group, see Creating and Modifying Groups.