Back
Back|
Back |
|
Workflow: Post From FTP
Posting many files to clients' document vaults automatically based on file name involves the following steps:

This page discusses the workflow steps to use the Post From FTP feature.
For more information about Post From FTP overall, see Post From FTP (Auto-Post) to Client Portals.
|
|
1. |
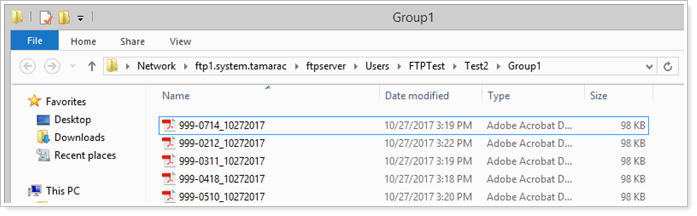
When you have the FTP folder set up, copy the desired files into the FTP folder. To learn more about the FTP site, see Using and Connecting to the Tamarac FTP Site.
Once you've set up the files in the folder, In Tamarac Reporting, under Documents, click Post from FTP. |
|
|
2. |
In Step 1: Define Post Method, click the desired matching method, and follow the steps for the method you select. Click Search for files to post.
Auto MatchAuto Match allows you to define or select the file name format to automatically match documents to accounts. You might use this option if you had many custodian files where each file consistently included the account number the same way in each file name. To learn more about Auto Match, see Auto Match. Upload ManifestUpload Manifest allows you to create and upload an Excel file that directly matches documents to accounts. You might use this option if you have files that don't include the account number in the file name, or if you want to specifically designate which clients receive which files. To learn more about Upload Manifest, see Upload Manifest. Standard MatchStandard match allows you to match documents to accounts using the same naming format that has been required in the past. You might use this if your files already adhere to the standard file name formatting. To learn more about Standard Match, see Standard Match. Post files to clients with access to ____ associated with the groupThis setting narrows or broadens which clients receive the files. To learn more about this setting, see Post Files to Clients With Access to All Accounts/At Least One Account Associated With the Group. |
|
|
3. |
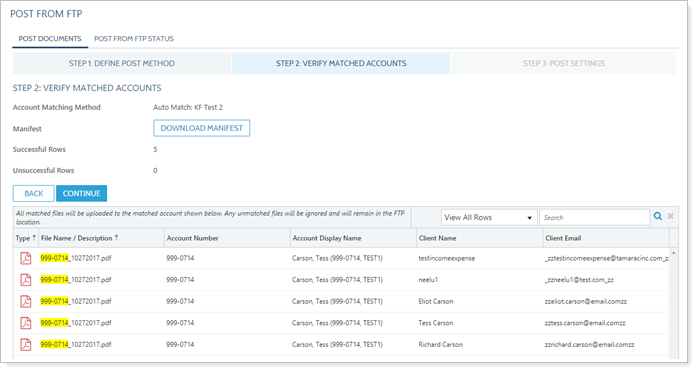
In Step 2: Verify Matched Accounts, review the files and which clients are receiving each.
|
|
|
4. |
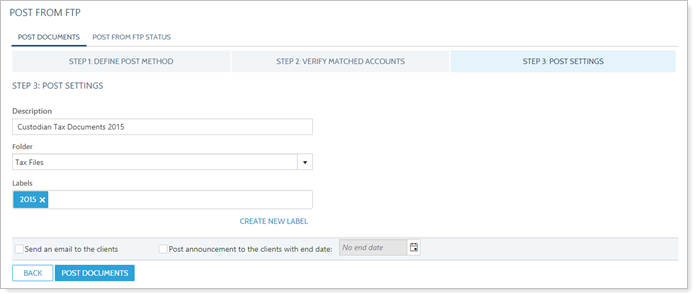
In Step 3: Post Settings, configure the document's description, folder, and labels and the client notification options as desired. When using automatic file post to upload files to the document vault, you can add folders and labels per batch. This means that folders or labels added to the batch will be applied to all the files in the batch. If you want to add family-specific labels in an upload, you would use one upload batch per family. Alternatively, you can apply folders and labels in bulk post-upload.
|
|
|
5. |
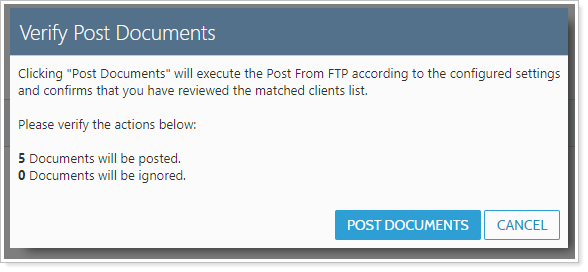
Review Post Status and Finish Posting
|
Learn more about Post From FTP: Post From FTP (Auto-Post).