 Back
Back Home > Tamarac Reporting > Clients and Client Portals > Client Portals > Setting Up Client Portals > Client Views > Client Views Pages > Create, Edit, or Delete a Dashboard Tile
|
Back |
Home > Tamarac Reporting > Clients and Client Portals > Client Portals > Setting Up Client Portals > Client Views > Client Views Pages > Create, Edit, or Delete a Dashboard Tile
|
Create, Edit, or Delete a Dashboard Tile
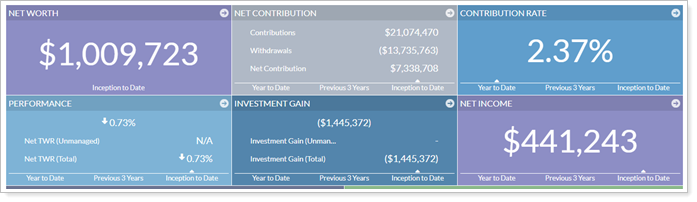
Client portal dashboards are highly configurable. You can decide how many dashboard tiles you want to use, how they should be displayed, and what kind of data they should show. Each dashboard tile is created separately and then added to a client view.
This topic provides steps for how to create, edit, or delete a dashboard tile. For more information about dashboard tiles, see Client Views - Dashboard Tiles.
To create a dashboard tile, follow these steps:
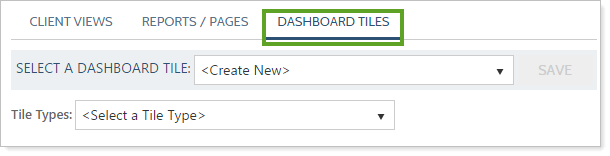
On the Client Reporting menu, click Client Views.
Click Dashboard Tiles.
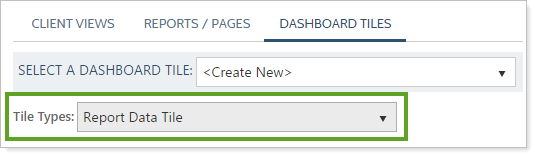
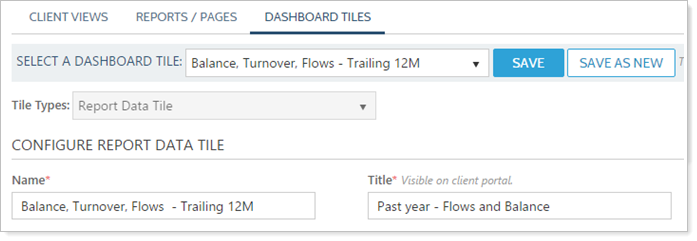
In Tile Types, choose your desired type.

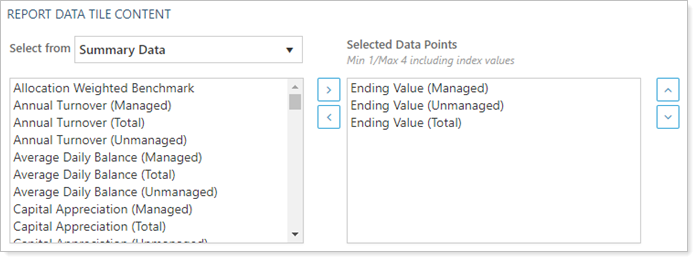
In the Tile Content section, choose the data points for the dashboard tile. Data points always run vertically, and you can have up to four data points on a tile. If you choose less than four data points, Tamarac Reporting will automatically use a larger font on the tile. For more information on adding and customizing data points, see Client Views - Dashboard Tiles.
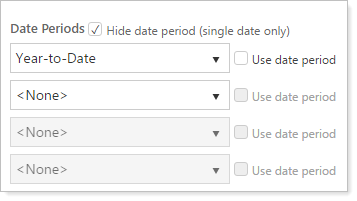
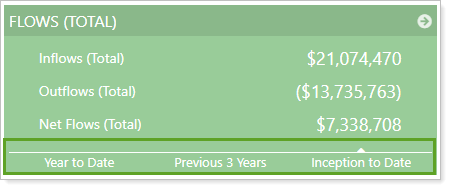
In the Date Periods section, add up to four date periods to the tile. Date periods run horizontally. You can use any date period you have in Tamarac Reporting. Complete the following settings:
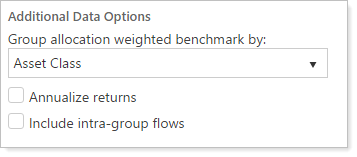
In the Additional Data Options section, complete the settings:
Click Save.
To edit a dashboard tile, follow these steps:
On the Client Reporting menu, click Client Views.
Click Dashboard Tiles.
In the Select a Dashboard Tile list, choose the dashboard tile you want to edit.
Edit the dashboard tile settings:
Click Save.
To delete a dashboard tile, follow these steps:
On the Client Reporting menu, click Client Views.
Click Dashboard Tiles.
In the Select a Dashboard Tile list, choose the tile you want to delete.
Click Delete.
To make a copy of a dashboard tile, follow these steps:
On the Client Reporting menu, click Client Views.
Click Dashboard Tiles.
In the Select a Dashboard Tile list, choose the tile you want to copy.
In the Name box, type a unique name for the new dashboard tile.
Click Save As New.