
Contents
Reporting
Introducing PDF Scheduler
PDF reports are fully configurable static reports designed to be printed or shared as a PDF file. They allow you to create professional, branded financial statements to distribute to your clients by mail or through the client portal.
We know that consistent communication is critical to building trust with your clients. When it's time to send your monthly or quarterly statements, we know you want to generate and share them with clients consistently. Plus, you're doing the same work every month, setting up and sending PDF statements to every client. That's why you'll love the new PDF Scheduler we're introducing this release.
This new scheduler simplifies sending regular reports to your clients by allowing you to set up automatic PDF generation and sharing. Schedule reports with just a few clicks and let your clients receive regular updates on their projects.
For more details about PDF Scheduler, see Schedule Automatic PDF Reports.
Group by Account on the Position Performance Report
The Position Performance report shows a granular breakdown of reporting data by category and position. Now, you have the option to group by account in addition to grouping by category on this report.
To organize Position Performance by account, select the new Account option when you set Group by for the report.
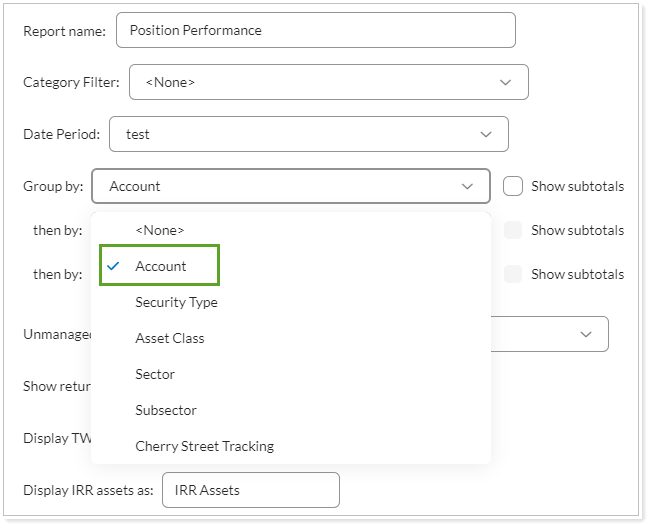
You'll see this option in the following Position Performance report types:
-
Dynamic
-
Dynamic CSV export
-
PDF full
-
Client views and client portals
Upload Allocation Weighted Benchmark History
Data is a critical element to how you serve your clients. It is the driving force behind the decisions you make and how you provide the most effective strategy. To enhance your data quality, with this release, you can now more efficiently maintain your allocation weighted benchmarks by uploading historical data.
With this latest enhancement, you can now integrate historical allocation weighted benchmark information into the Tamarac platform, enabling you to gain insights, identify long-term trends, and make data-driven decisions with greater accuracy and confidence. To upload this data, you will need to use the Allocation Weighted Benchmark dataset.
For more details, see Upload Bulk Data.
Add Qualified Status Setting for Income Paying Securities
We are thrilled to announce a new feature that will elevate your investment management. With this release, you can now assign qualified status to securities that pay income. This enhancement will allow you to identify and categorize securities, which will allow you to provide even more insight as you develop investment strategies for your clients.
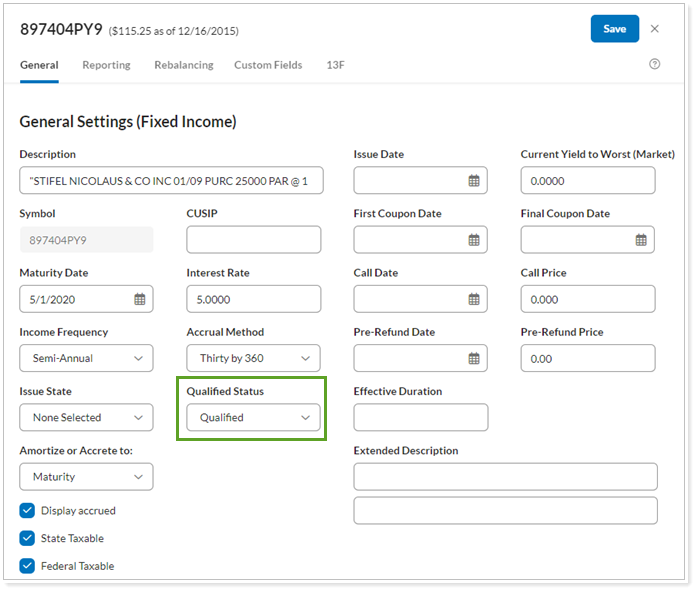
In the past, you could only assign qualified status to securities that paid dividends. Now, all interest paid to qualified Fixed Income, CDs, and Mortgage-Backed securities will be considered qualified as long as it meets the holding requirements. You now have even more detail, allowing you to make well-informed tax decisions, optimize your client’s portfolios and realize the full potential of income-generating assets.
Note
Interest income can only be considered qualified for Fixed Income, CDs, and Mortgage-Backed securities
The following reports are impacted by this feature:
-
Income and Expenses
-
Comparative Review (Tax Planning PDF Version)
-
Client Portal Income and Expenses
Include T-Bill Interest Income on the Income and Expenses Report
We are excited to bring you a new feature that will further enhance your ability to provide accurate and complete tax information to your clients. With this release, you can now include T-Bill interest income in the Income and Expense report.
Note
If the T-Bill is sold prior to the maturity date, the interest income will reflect on the report as $0.00.
For more information, see Income and Expenses Report.
Bulk Reports
New Columns in the Committed Capital Bulk Report
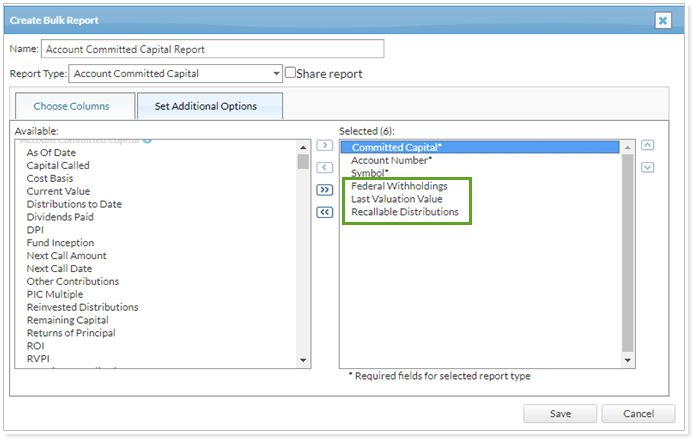
The Account Committed Capital bulk report presents committed capital data, including the amount, account number, and symbols. You use bulk reports to extract and analyze data so you can make the most informed decisions for your clients. That's why we've added the following additional data points to the Account Committed Capital bulk report:
-
Federal Withholding
-
Last Valuation Value
-
Recallable Distributions
For more information, on how to run this report, see Create, Edit, or Delete a Bulk Report.
Add Columns and Datasets to the Performance Data Extract Bulk Report
The Performance Data Extract bulk report gives you access to comprehensive account, category, and interval performance data combined in uniquely useful ways. With this release, new datasets and columns will allow you to extract even more performance data for effective auditing and performance data validation.
Datasets
-
Account – General
-
Account – General Reporting
-
Account – Single Reporting
-
Account – Custom Fields
Columns
-
Intra-Group Flows In
-
Intra-Group Flows Out
-
Net Flows
For more information, see Performance Data Extract Bulk Report.
Clients
Assign and Track Client Portal Templates for Multiple Clients
To define the new client portal experience, you assign Branding and Reports templates to each client. In the past, you could only assign these one at a time. With this release, you can assign the client portal type and new client portal templates to many clients at once with multi-edit.
Firms with a large client base significantly benefit from the efficiency of assigning templates to many clients at one time. This enhancement allows you to efficiently assign clients to the new client portal and then assign templates—allowing you to more efficiently provide many clients at once with access to the benefits of the new client portal experience.
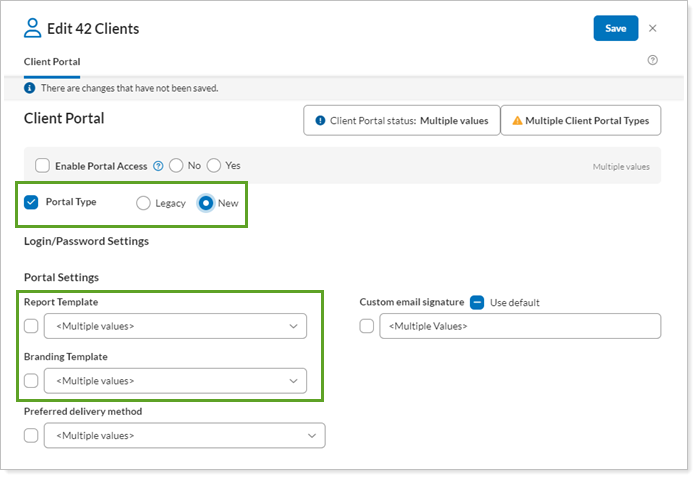
When multi-editing, the following defaults apply:
-
Portal Type is selected and set to Legacy when you choose a mix of clients using legacy and new portals.
-
Report Template is cleared and set to <Multiple values>
-
Branding Template is cleared and set to <Multiple values>
To track template assignment, the new Portal Type, Reports Template and Branding Template columns on the Clients page show the Reports and Branding templates assignment for clients who are using the new client portal. This lets you scan across the Clients page to identify at a glance which templates are assigned to which clients. These columns only appear when your enterprise is enabled for the new client portal.
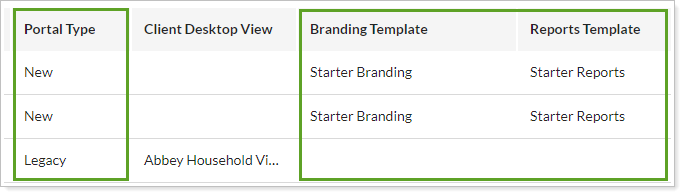
For details, see Assign New Client Portal Templates to a Client.
New Client Portal
Clients Can Manage Manual Assets and Liabilities
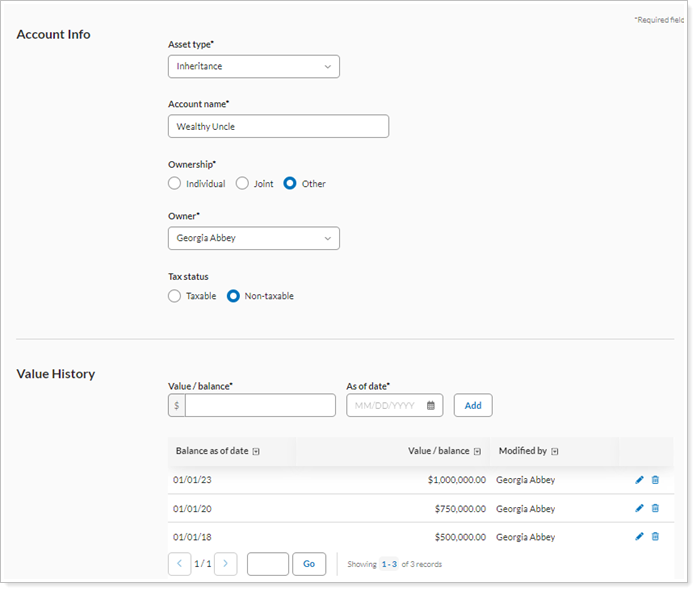
Manual assets and liabilities are crucial in the client portal. You and your clients use them to track personal belongings and debts, such as vehicles, art, jewelry, and personal loans—information that is vital for creating a full financial overview.
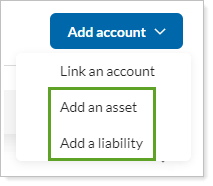
When we first introduced the new client portal, it only showed assets or liabilities that you added through Tamarac Reporting. With this release, we’ve significantly expanded manual assets and liabilities in the new client portal so that clients can manually add, edit, and delete assets and liabilities themselves.
By allowing clients to handle their manual assets and liabilities in the new portal, they can see their entire financial situation. Taking charge of their finances this way helps them make smarter decisions for a better financial life.
Additionally, this enhancement matches the behavior of the legacy Tamarac client portal, allowing you to introduce more clients to the new client portal’s enhanced user experience.
For more details, see Turn on Manual Assets or Liabilities for the New Client Portal.
Identify Closed Accounts More Clearly
The client portal has always included closed accounts, but it wasn’t always obvious when you were looking at one. Closed accounts may still show up on reports and the Accounts page because historical data is valuable for analysis and decision-making. This release, we’ve made the following enhancements to make it easier to identify closed accounts on the Accounts page and on pages and widgets.
Accounts page
The Accounts page features a new Closed accounts section, which collects and displays all closed accounts in one place. This keeps the main Accounts page decluttered and focused on active accounts.
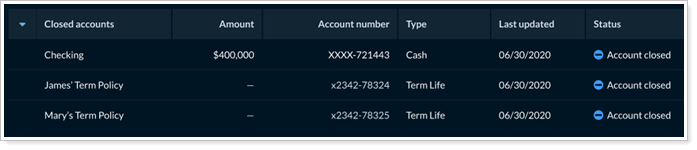
The closed account status icon has also changed from blue, to avoid the connotation of error that the previous red coloring implied.
![]()
Clients may notice that there are no actions available for closed accounts. This is intentional—we don’t expect them to have any actions to take on closed accounts.
Reports pages and widgets
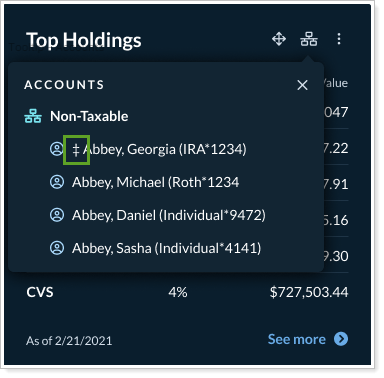
On reports pages and widgets, closed accounts sport the double dagger (‡) indicator in the Show data for list. This tells clients up front when they’re viewing data for a closed account.

An informational message defines the indicator.
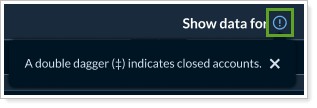
Widgets use the same double dagger indicator, and a message defines it.
As part of this enhancement, we’ve made all the main Accounts page sections in the new client portal able to expand or collapse. By default, Closed accounts is shown collapsed, saving space on the page and encouraging clients to focus on their open accounts.
More Intuitive Resolution for Linked Account Issues
Linked accounts are a cornerstone of the client portal, bringing together investment accounts, bank accounts, credit card accounts, real estate, and more. With this release, we’ve polished the client experience when they manage linked accounts. This clearer messaging leads to happier clients who feel empowered and are more likely to link additional accounts and use the client portal frequently.
Now, clients can:
-
Refresh the data for all the accounts held at a particular institution or custodian.
-
Better understand the impact of unlinking an account with clearer unlinking alert text.
-
Take informed, direct action to resolve link errors with a revamped Review account errors messaging.
Refresh Accounts
Use the new Refresh institution option for linked accounts to update the account values and transactions for all the accounts held at that institution. You can only refresh one institution at a time.

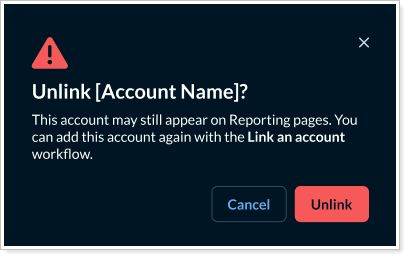
Understand the impact of unlinking
Unlinking an account doesn’t always delete the account. Historical account data will still appear in some places, such as on the Net Worth page. Clients should understand the impact of their choices when unlinking an account. We’ve updated the wording in the alert when unlinking to make it clearer that some account data may still show up, even for unlinked accounts.
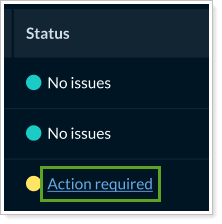
Resolve linked account issues
More intuitive link issue resolution guidance helps clients manage their own accounts. With this release, we've updated the messaging for when clients can and can't resolve a link issue themselves.
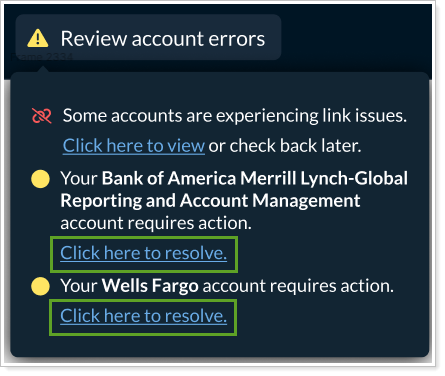
When clients can fix an issue, the Status column on the Accounts page shows an Action required link, which allows clients to resolve the issue.
For more information, see Allow Clients to Link Accounts in the New Client Portal.
Show Benchmarks on the Account Performance Page
Benchmarks provide a standardized yardstick to evaluate portfolio performance relative to a relevant market index, giving clients insight into how their portfolio is performing compared to the broader market. With this release, you can show clients that valuable comparison in the new client portal with benchmarks on the Account Performance page.
Account Performance Line chart
Benchmarks appear on the line chart as additional lines. The colors assigned by default and are not customizable.
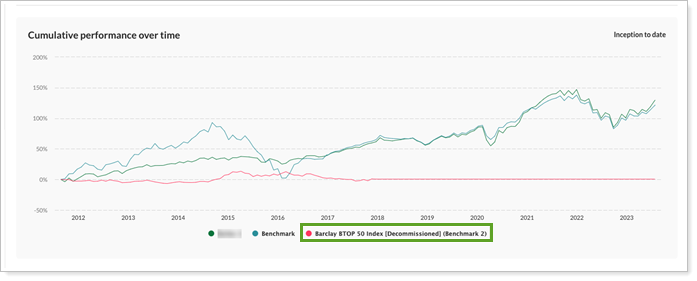
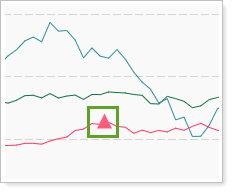
If you choose, the chart can add an indicator to mark when a benchmark changed.
Account Performance table
Account- and group-level benchmarks appear in the table as an indented row below its account.

To see benchmarks on the Account Performance page, use the Show account benchmark(s) option. Then you can add any of the benchmarks assigned to the account.
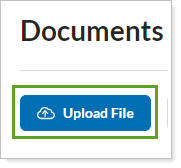
Clients Can Upload and Delete Files in the New Client Portal
The new client portal Documents page is a safe and secure way for you and your clients to share sensitive files. This release, your clients can take charge of their own files in the client portal. Now they can upload to share files with you.
With this enhancement, we've also expanded the file size allowed when uploading so that clients aren't limited in what they share with you. The maximum upload file size is 100 MB. This matches the existing legacy document vault limit.
Additionally, if they accidentally upload the wrong file or need to update a document, clients can now delete it themselves.
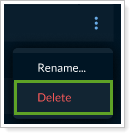
Clients still can’t move files or manage folders.
For steps to allow clients to upload and delete files, see Allow Clients to Upload Files in the New Client Portal.
Show Separately Managed Accounts as a Single Row on Reports Pages
Separately managed accounts (SMAs) are accounts that are managed by external investment managers. It's important to include them in reports to give clients a complete picture, but because they’re not under your direct management, you may want to minimize the amount of space dedicated to those holdings. This release, you can collapse holdings in accounts into a single line to simplify the client’s experience.
This is available for the following Reports pages:
-
Holdings
-
Position Performance
-
Projected Income
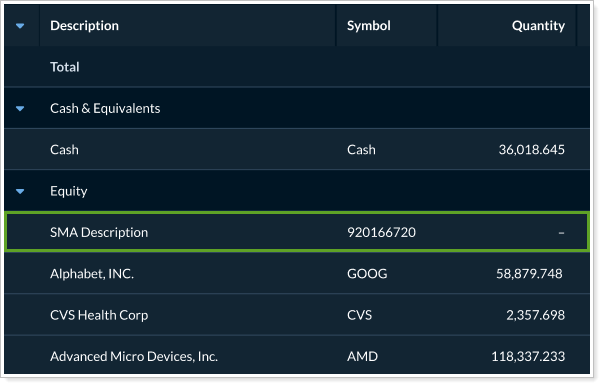
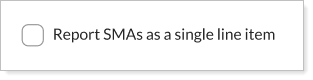
In the configuration tool for the page where you want to condense separately managed account holdings into one row per account, select Report SMAs as a single line item.
Clients with templates that use the page will see this change next time they sign in.
This option in the new client portal uses the SMA settings you configure in the account. For details, see Maintaining Accounts: The Separately Managed Account (SMA) Panel.
Include Unmanaged Assets in the New Client Portal
In the past, the new client portal showed only managed assets for financial accounts. With this release, you can now include unmanaged assets on the client portal, showing clients an accurate reflection of all their assets in one place. When you include unmanaged assets, clients will see them in the following locations:
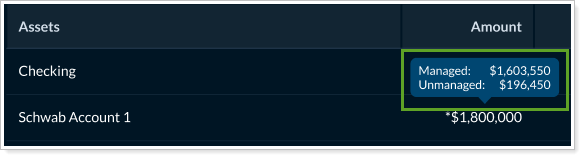
Accounts
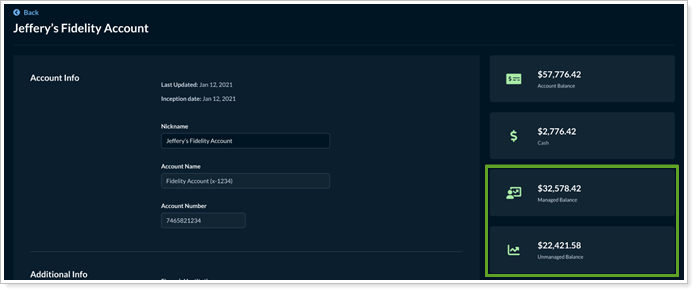
On the Accounts page, the client can hover their mouse over the value in the Amount column to see the managed and unmanaged totals for accounts with unmanaged assets. This information only appears if the account includes unmanaged assets.
When a client views the account details, new tiles reflect the managed and unmanaged amounts.
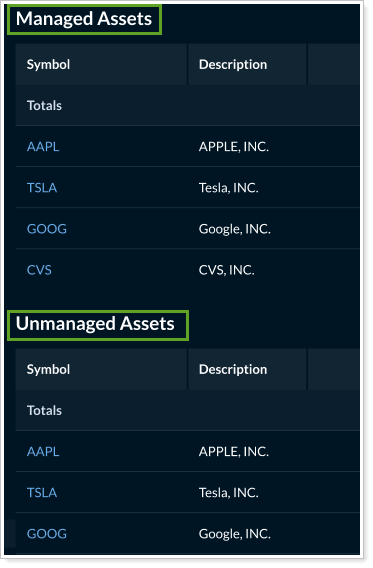
Reports
When you choose to segregate managed and unmanaged assets, grid pages are divided into Managed Assets and Unmanaged Assets sections.
Other pages report on managed and unmanaged separately in other ways:

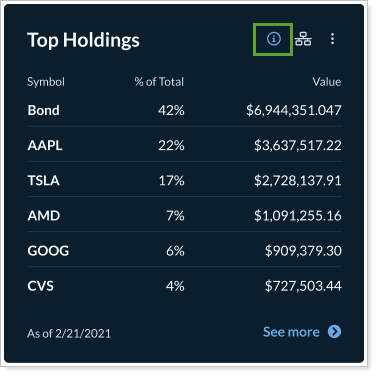
Widgets
You can choose to show either all unmanaged assets or all managed assets on a widget. If you want to show both managed and unmanaged together on one dashboard, you can add two widgets, one for managed, one for unmanaged.
When a widget is showing only unmanaged assets, the ⓘ icon appears. Clients can hover to see an explanatory message.
Availability and Enablement
You can add unmanaged assets to the following new client portal report pages and widgets:
-
Accounts (page only)
-
Account Performance
-
Asset Allocation
-
Capital Flows
-
Comparative Review
-
Holdings
-
Position Performance
-
Projected Income
On each page or widget, you can set the Unmanaged asset treatment option as desired. All pages and widgets are set to Omit by default.
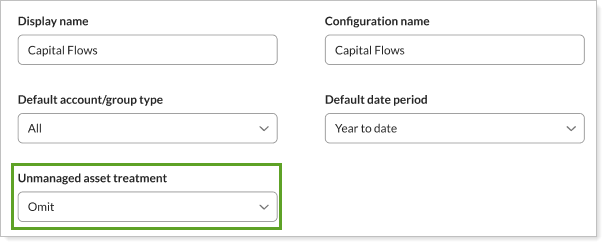
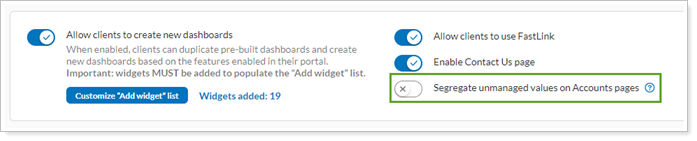
To enable unmanaged asset display when viewing individual account details, turn on the Segregate unmanaged values on Accounts pages toggle.
For steps, see Allow Clients to See Unmanaged Assets in the New Client Portal.
To learn more about unmanaged assets in general, see How Reports Handle Unmanaged Assets.
Learn More - Watch the Release Video